Your team's plan has no member seats
is on a plan without team members, so your access is paused. Nothing was deleted. Ask the team owner to move the team to Business and your access comes back at once.
Signed in as
Credential setup guide
How to get every credential for signing passes with your own Apple certificate and Google issuer. Each credential set on the Certificates page holds one Apple certificate, its push key, and one Google issuer; create a set first, then follow the steps below inside it. Your Apple private key is generated here and never leaves our servers. You only fetch and hand back public credentials, so there is no Keychain and no openssl at any point.
Apple Wallet
A Pass Type ID certificate and an APNs push key.
Register a Pass Type ID
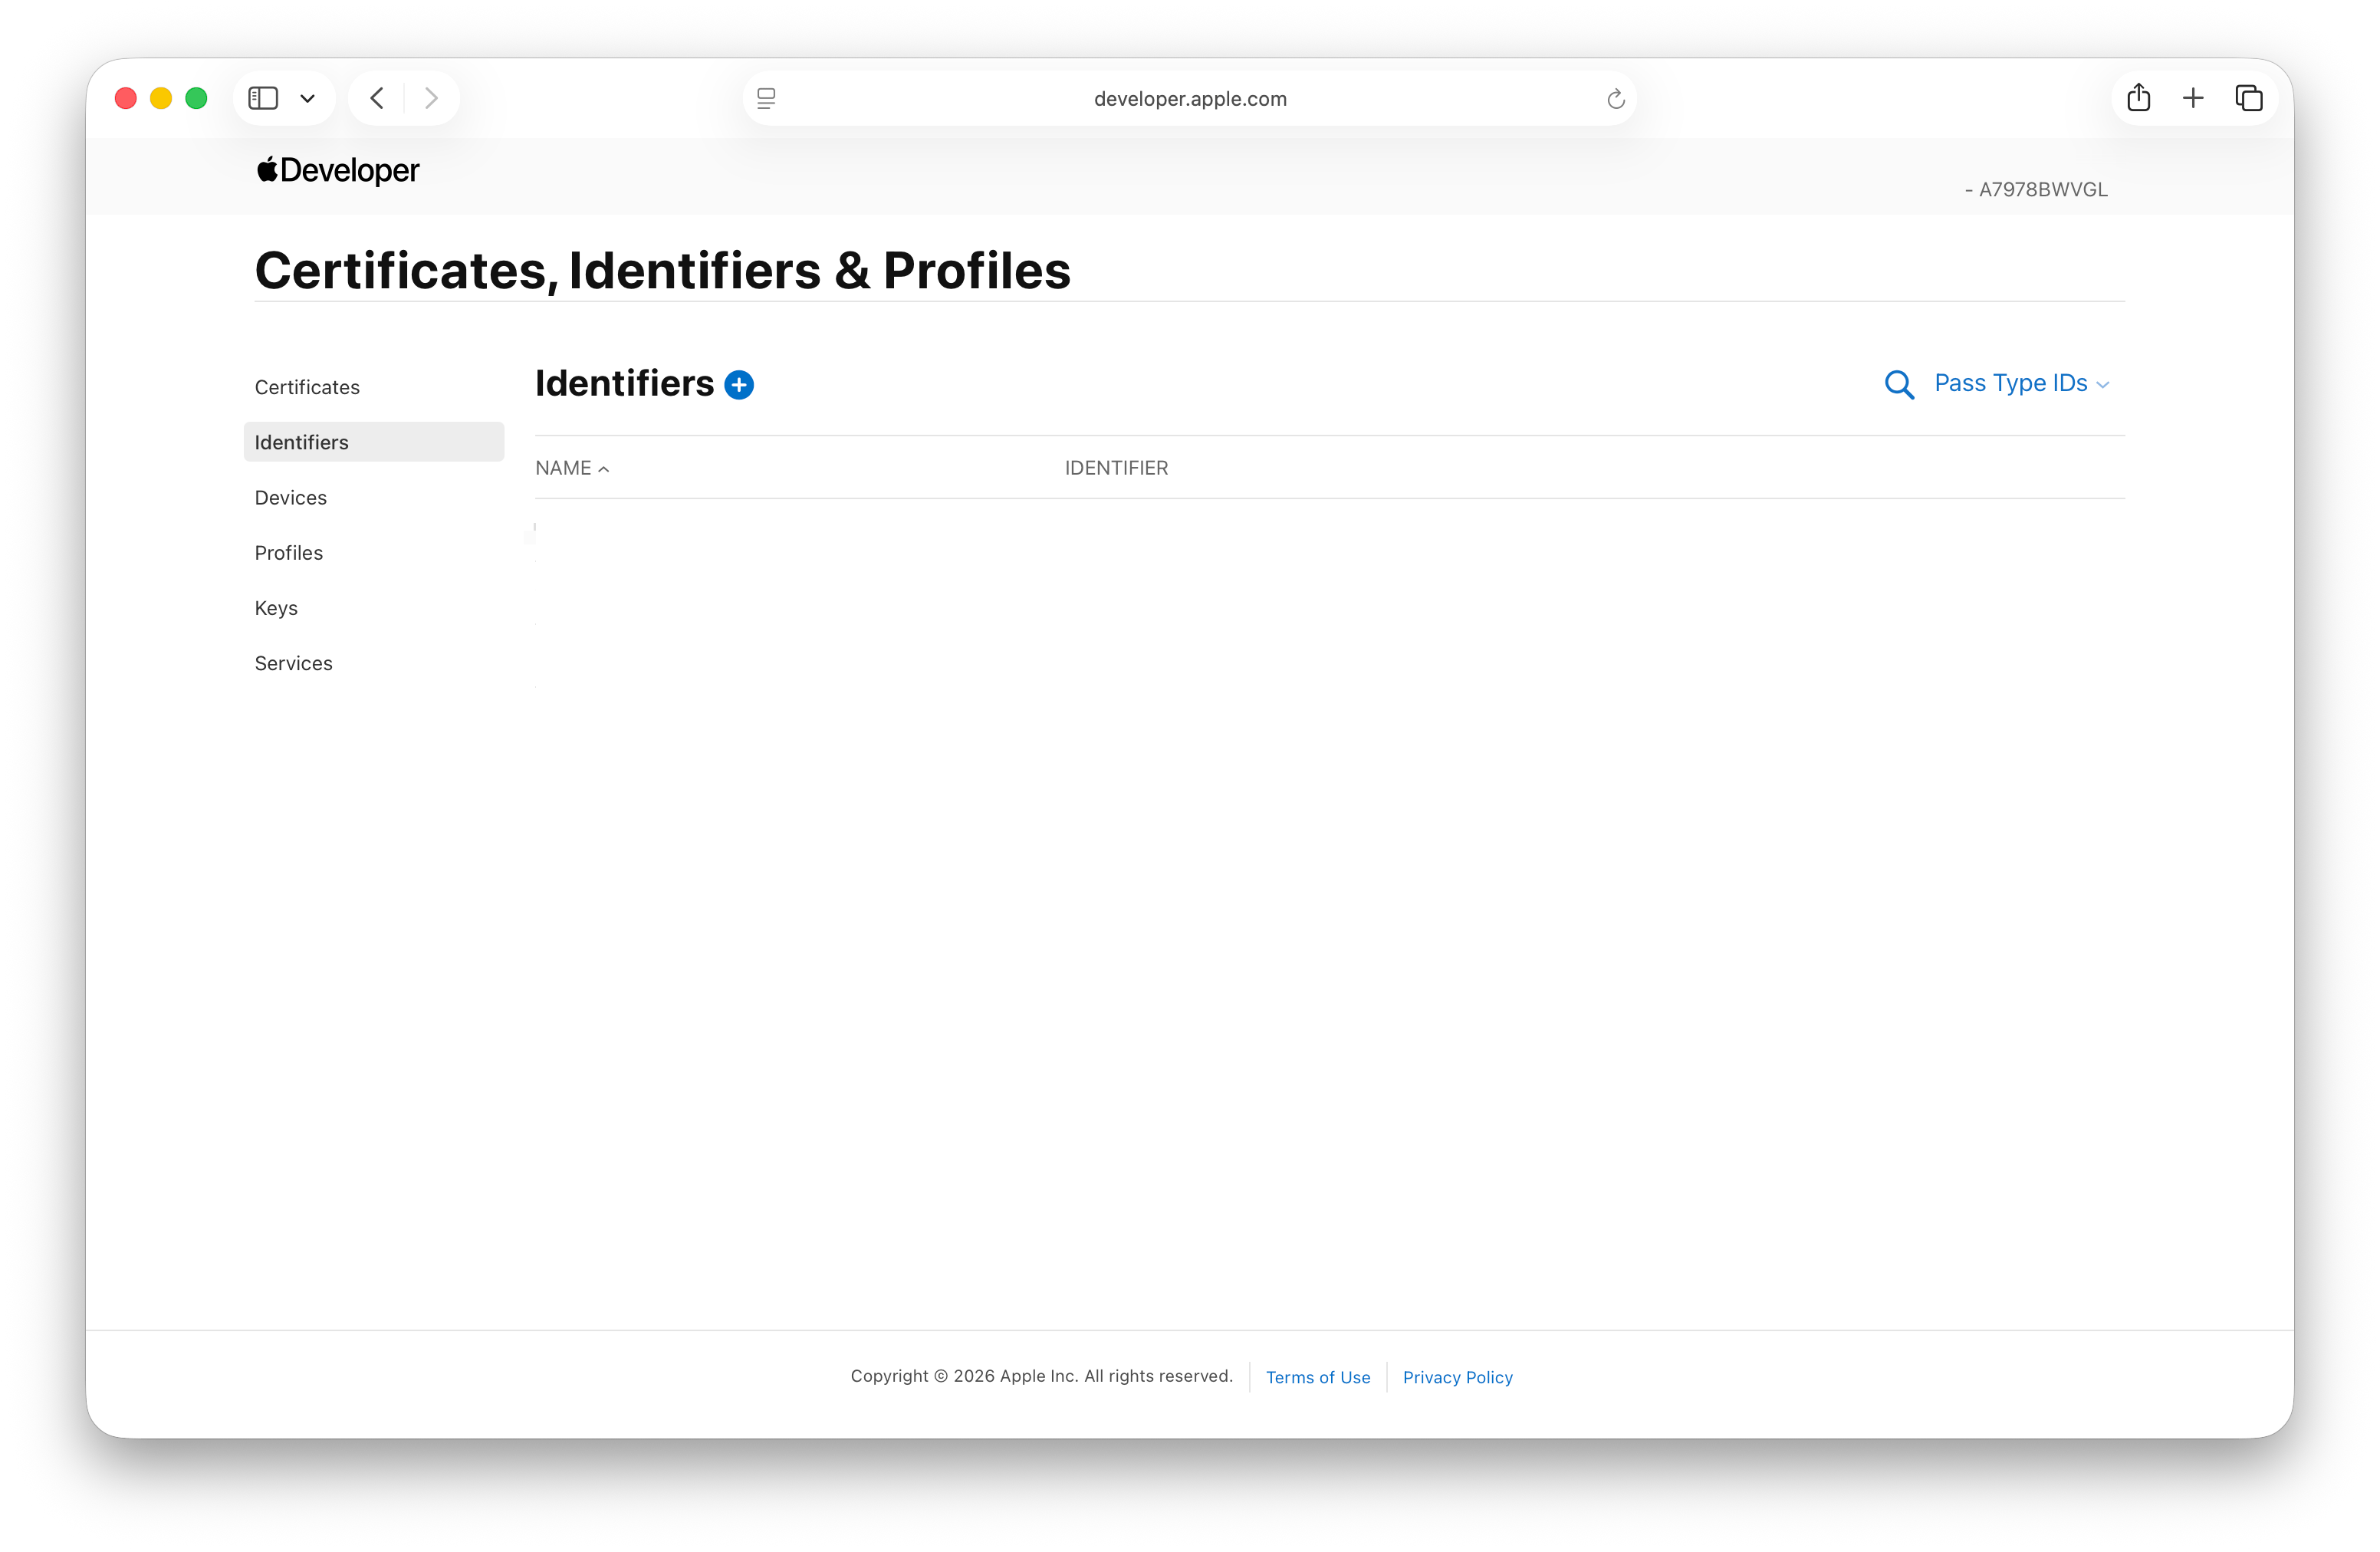
In your Apple Developer account, open Identifiers and click the plus button. Choose Pass Type IDs, continue, then enter a description and an identifier in the form pass.com.yourcompany.name. Skip this step if you already have one.
Start the Pass Type ID Certificate
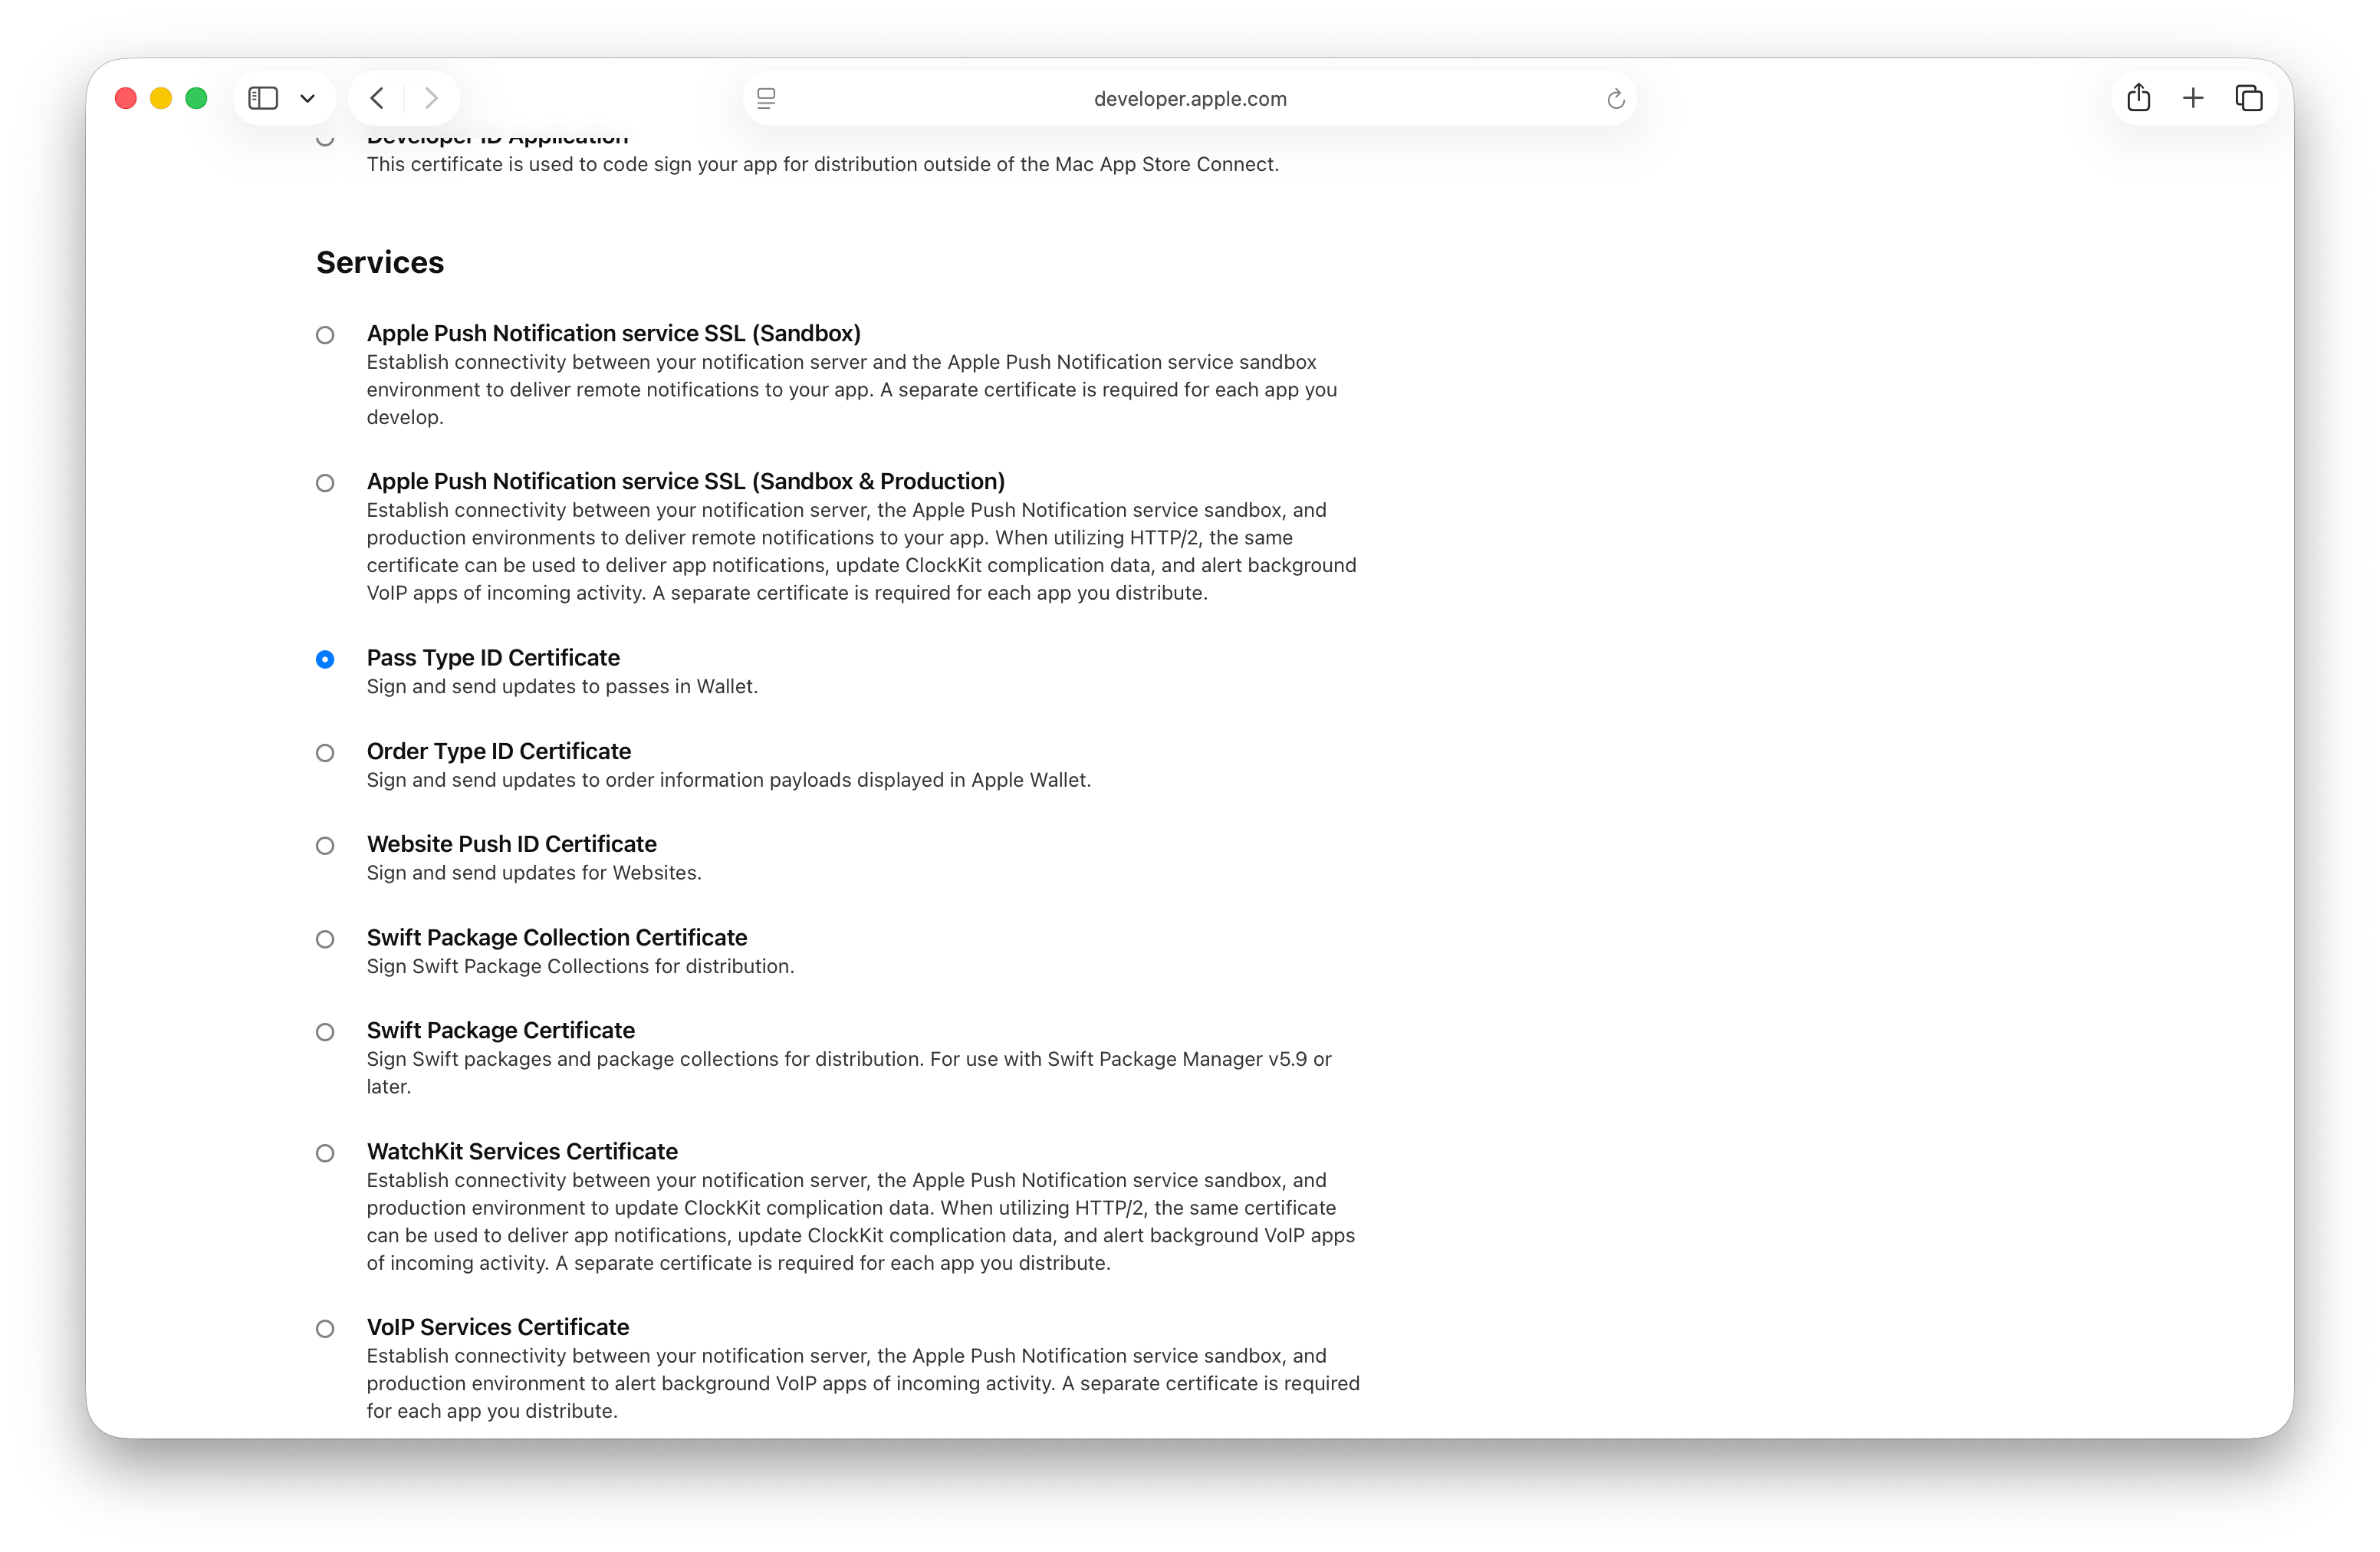
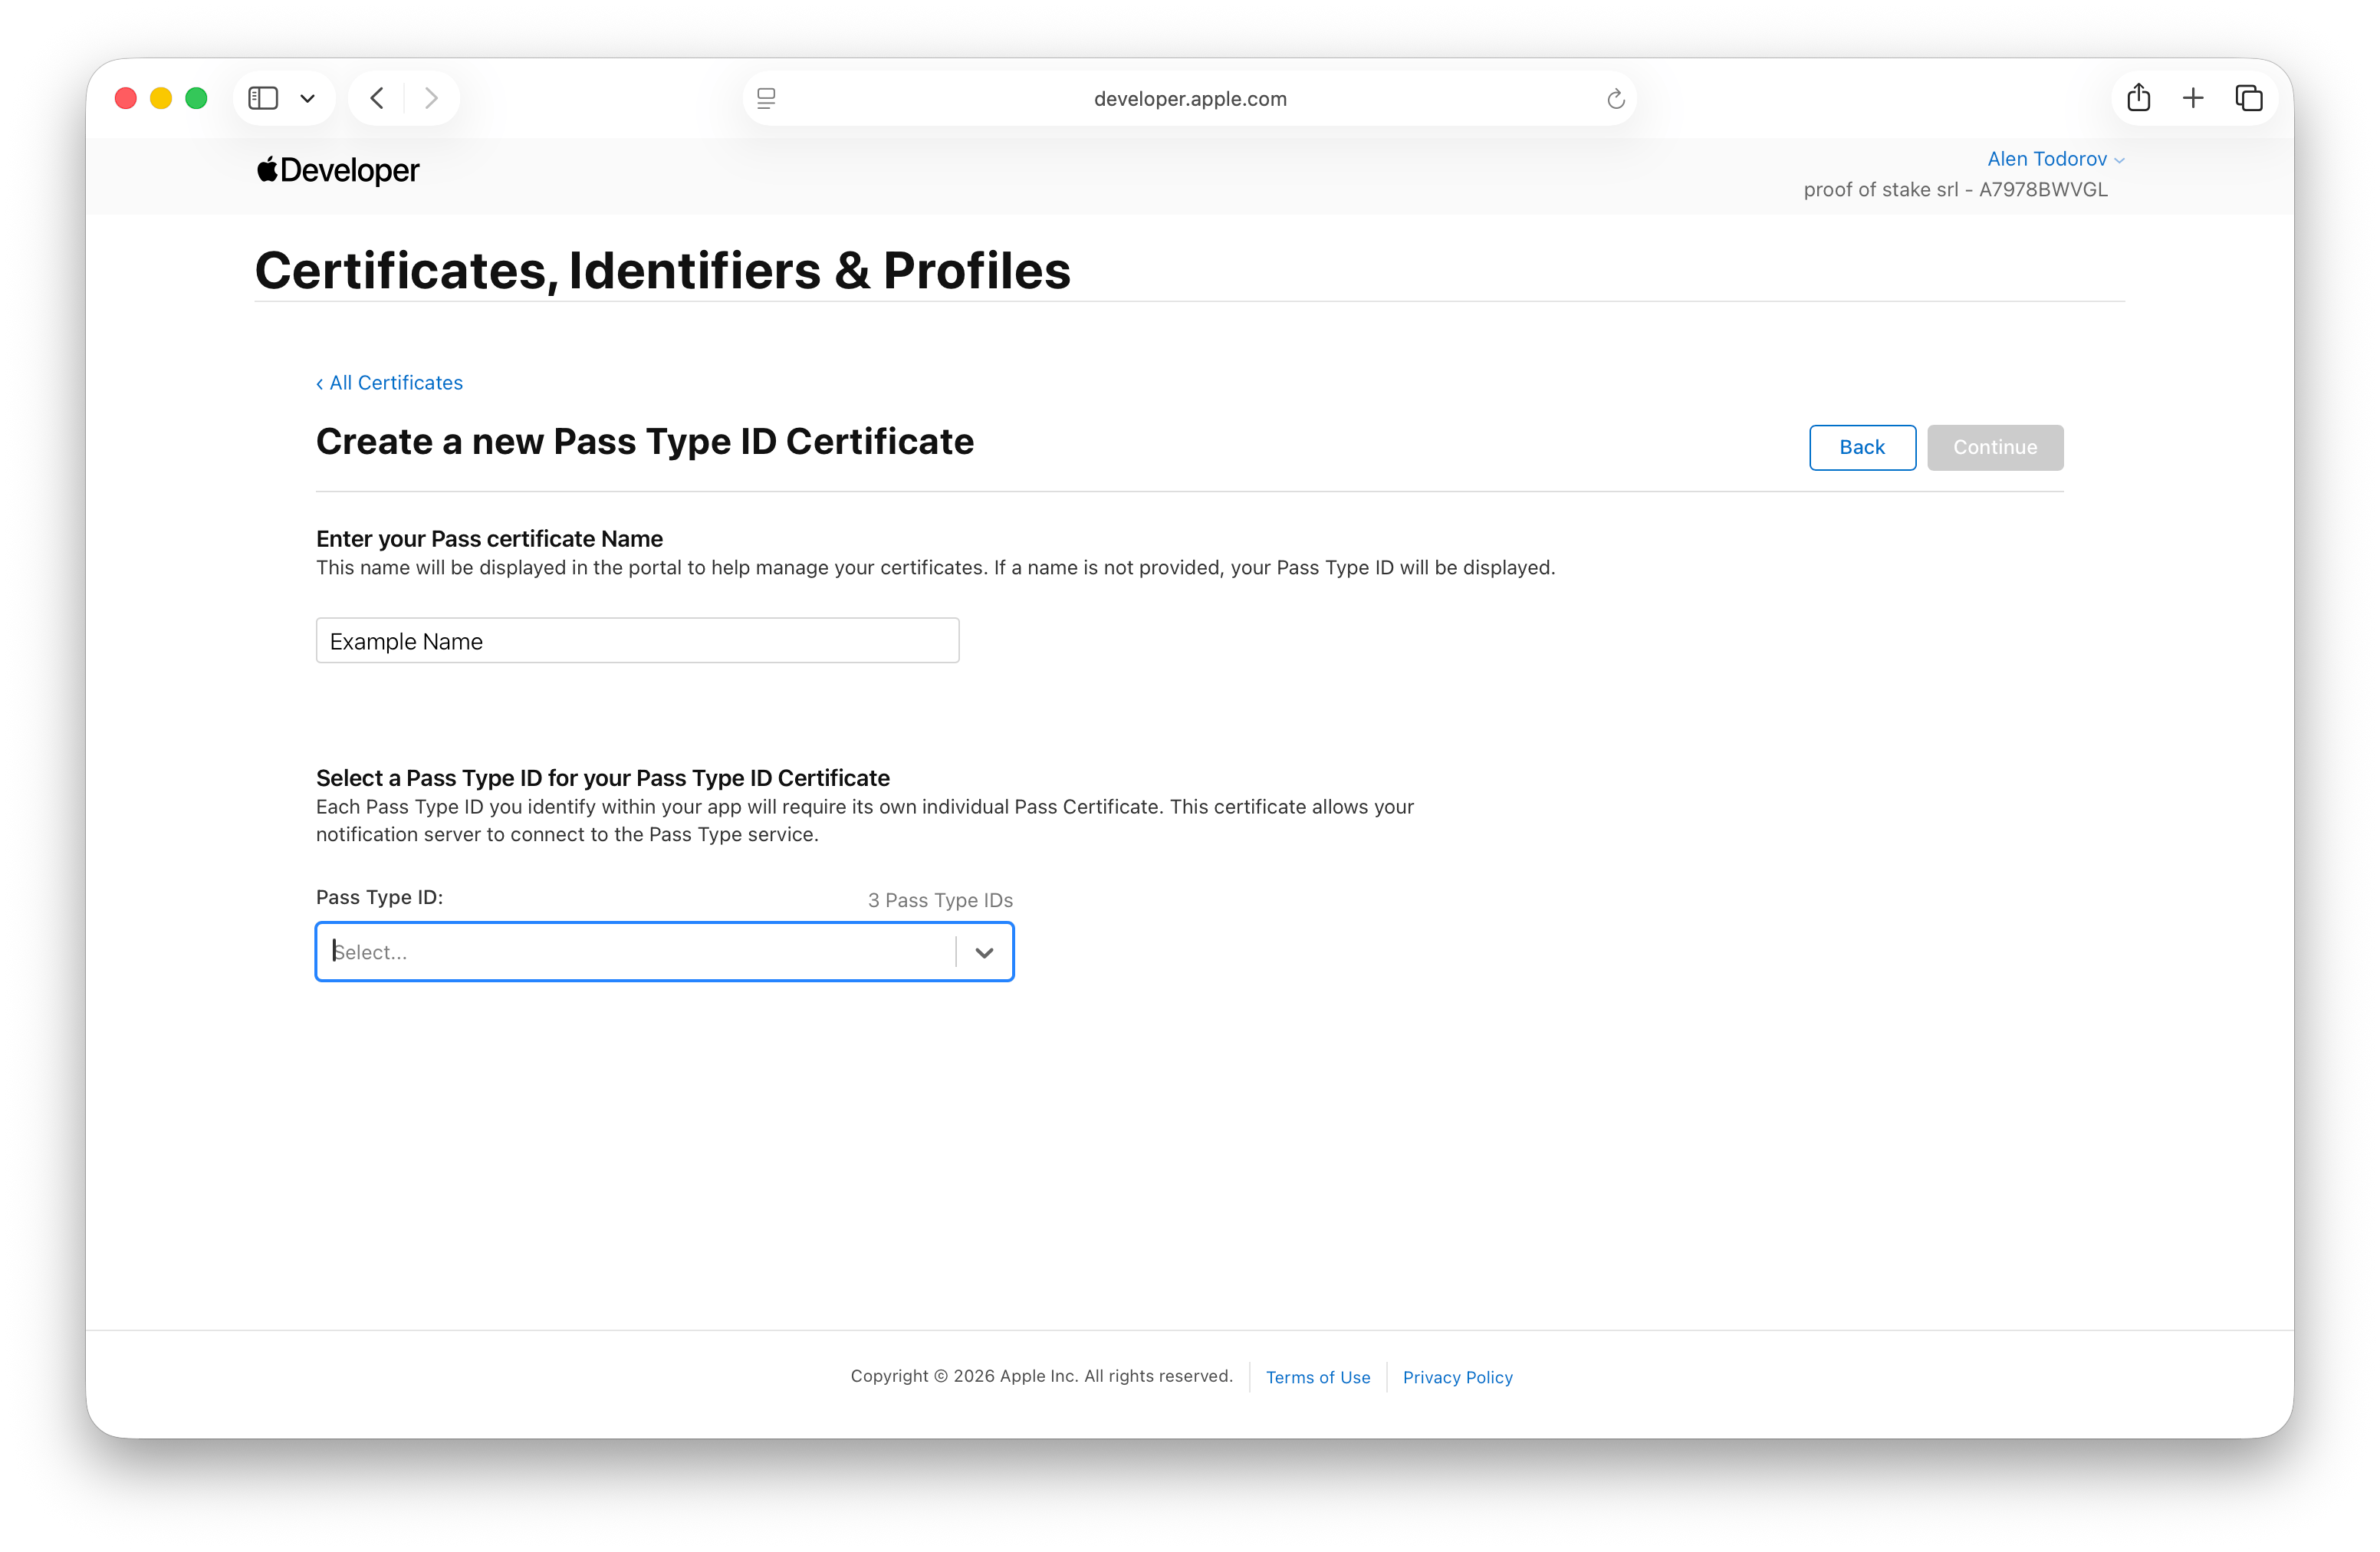
Create a certificate for that Pass Type ID. You can start from Certificates, where you pick Pass Type ID Certificate under the Services section (it is not under Software), or straight from your Pass Type ID. Apple then asks you to upload a Certificate Signing Request. You make that request in the next step.
Generate the signing request in WalletWallet
Open your credential set on the Certificates page and click Generate signing request under Apple Wallet. We create the keypair, keep the private key, and your browser downloads a .certSigningRequest file. If you lose that file before finishing, use Re-download signing request rather than generating a new one.
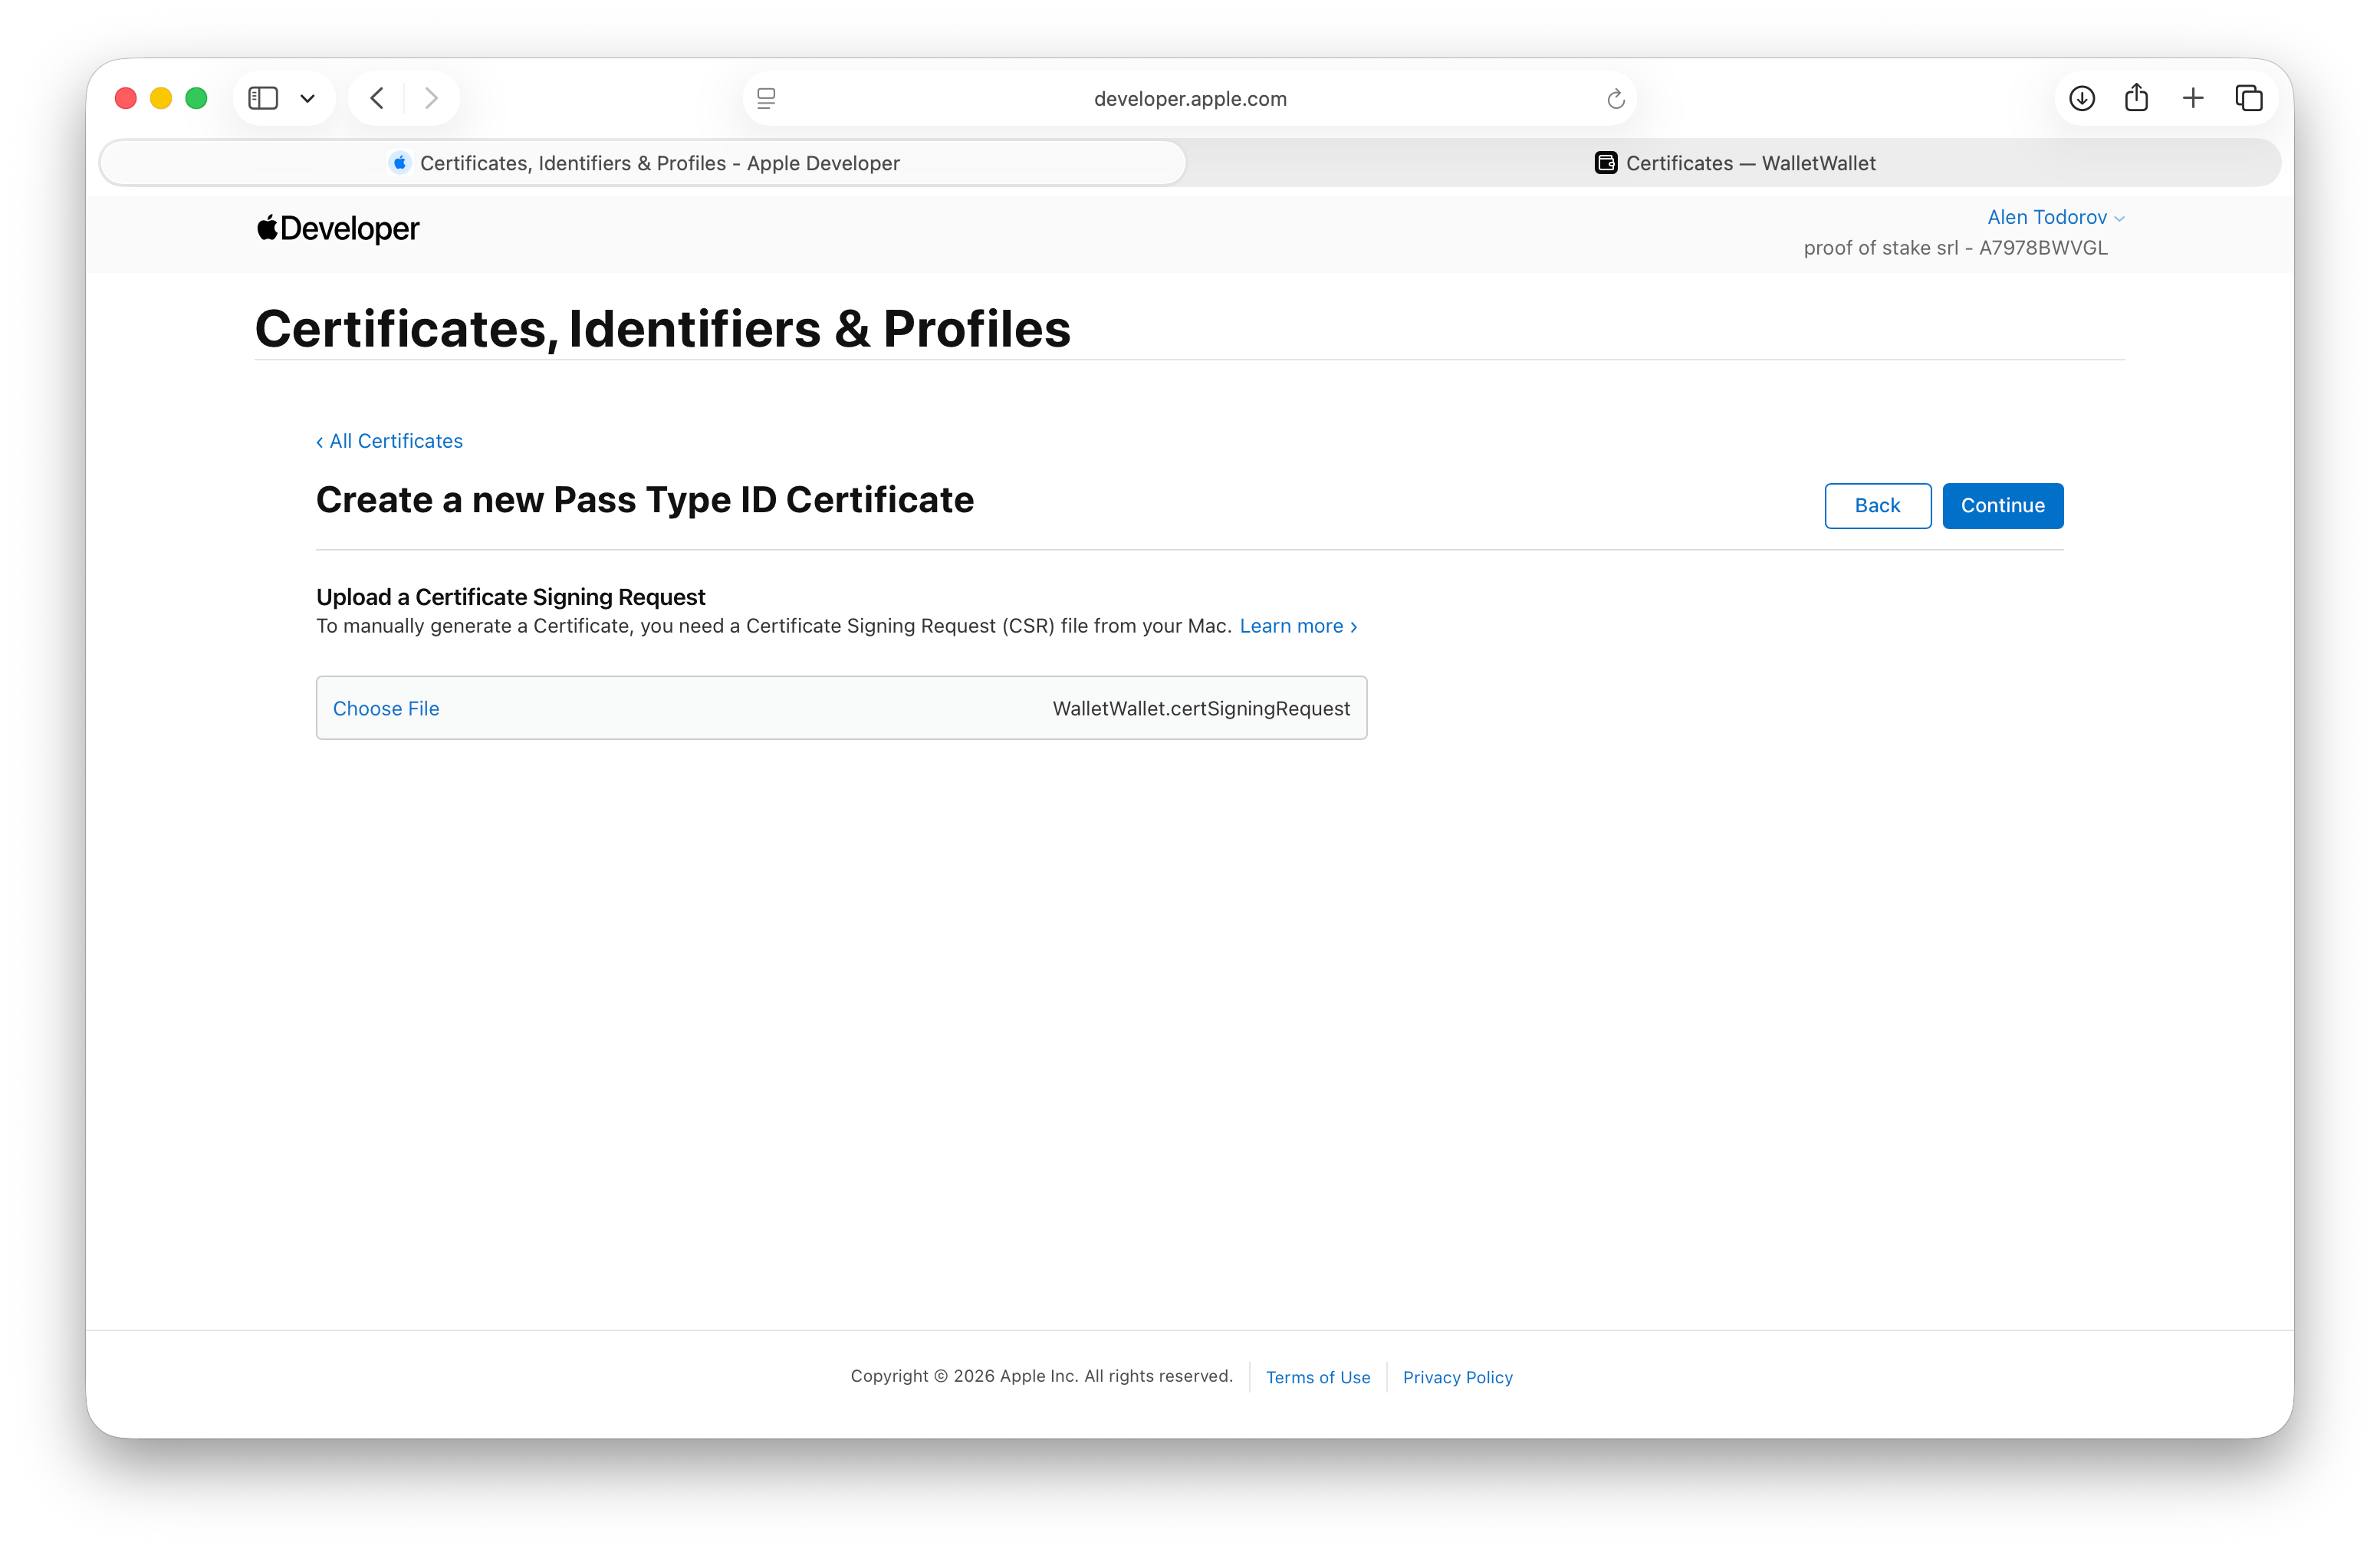
Upload the request to Apple
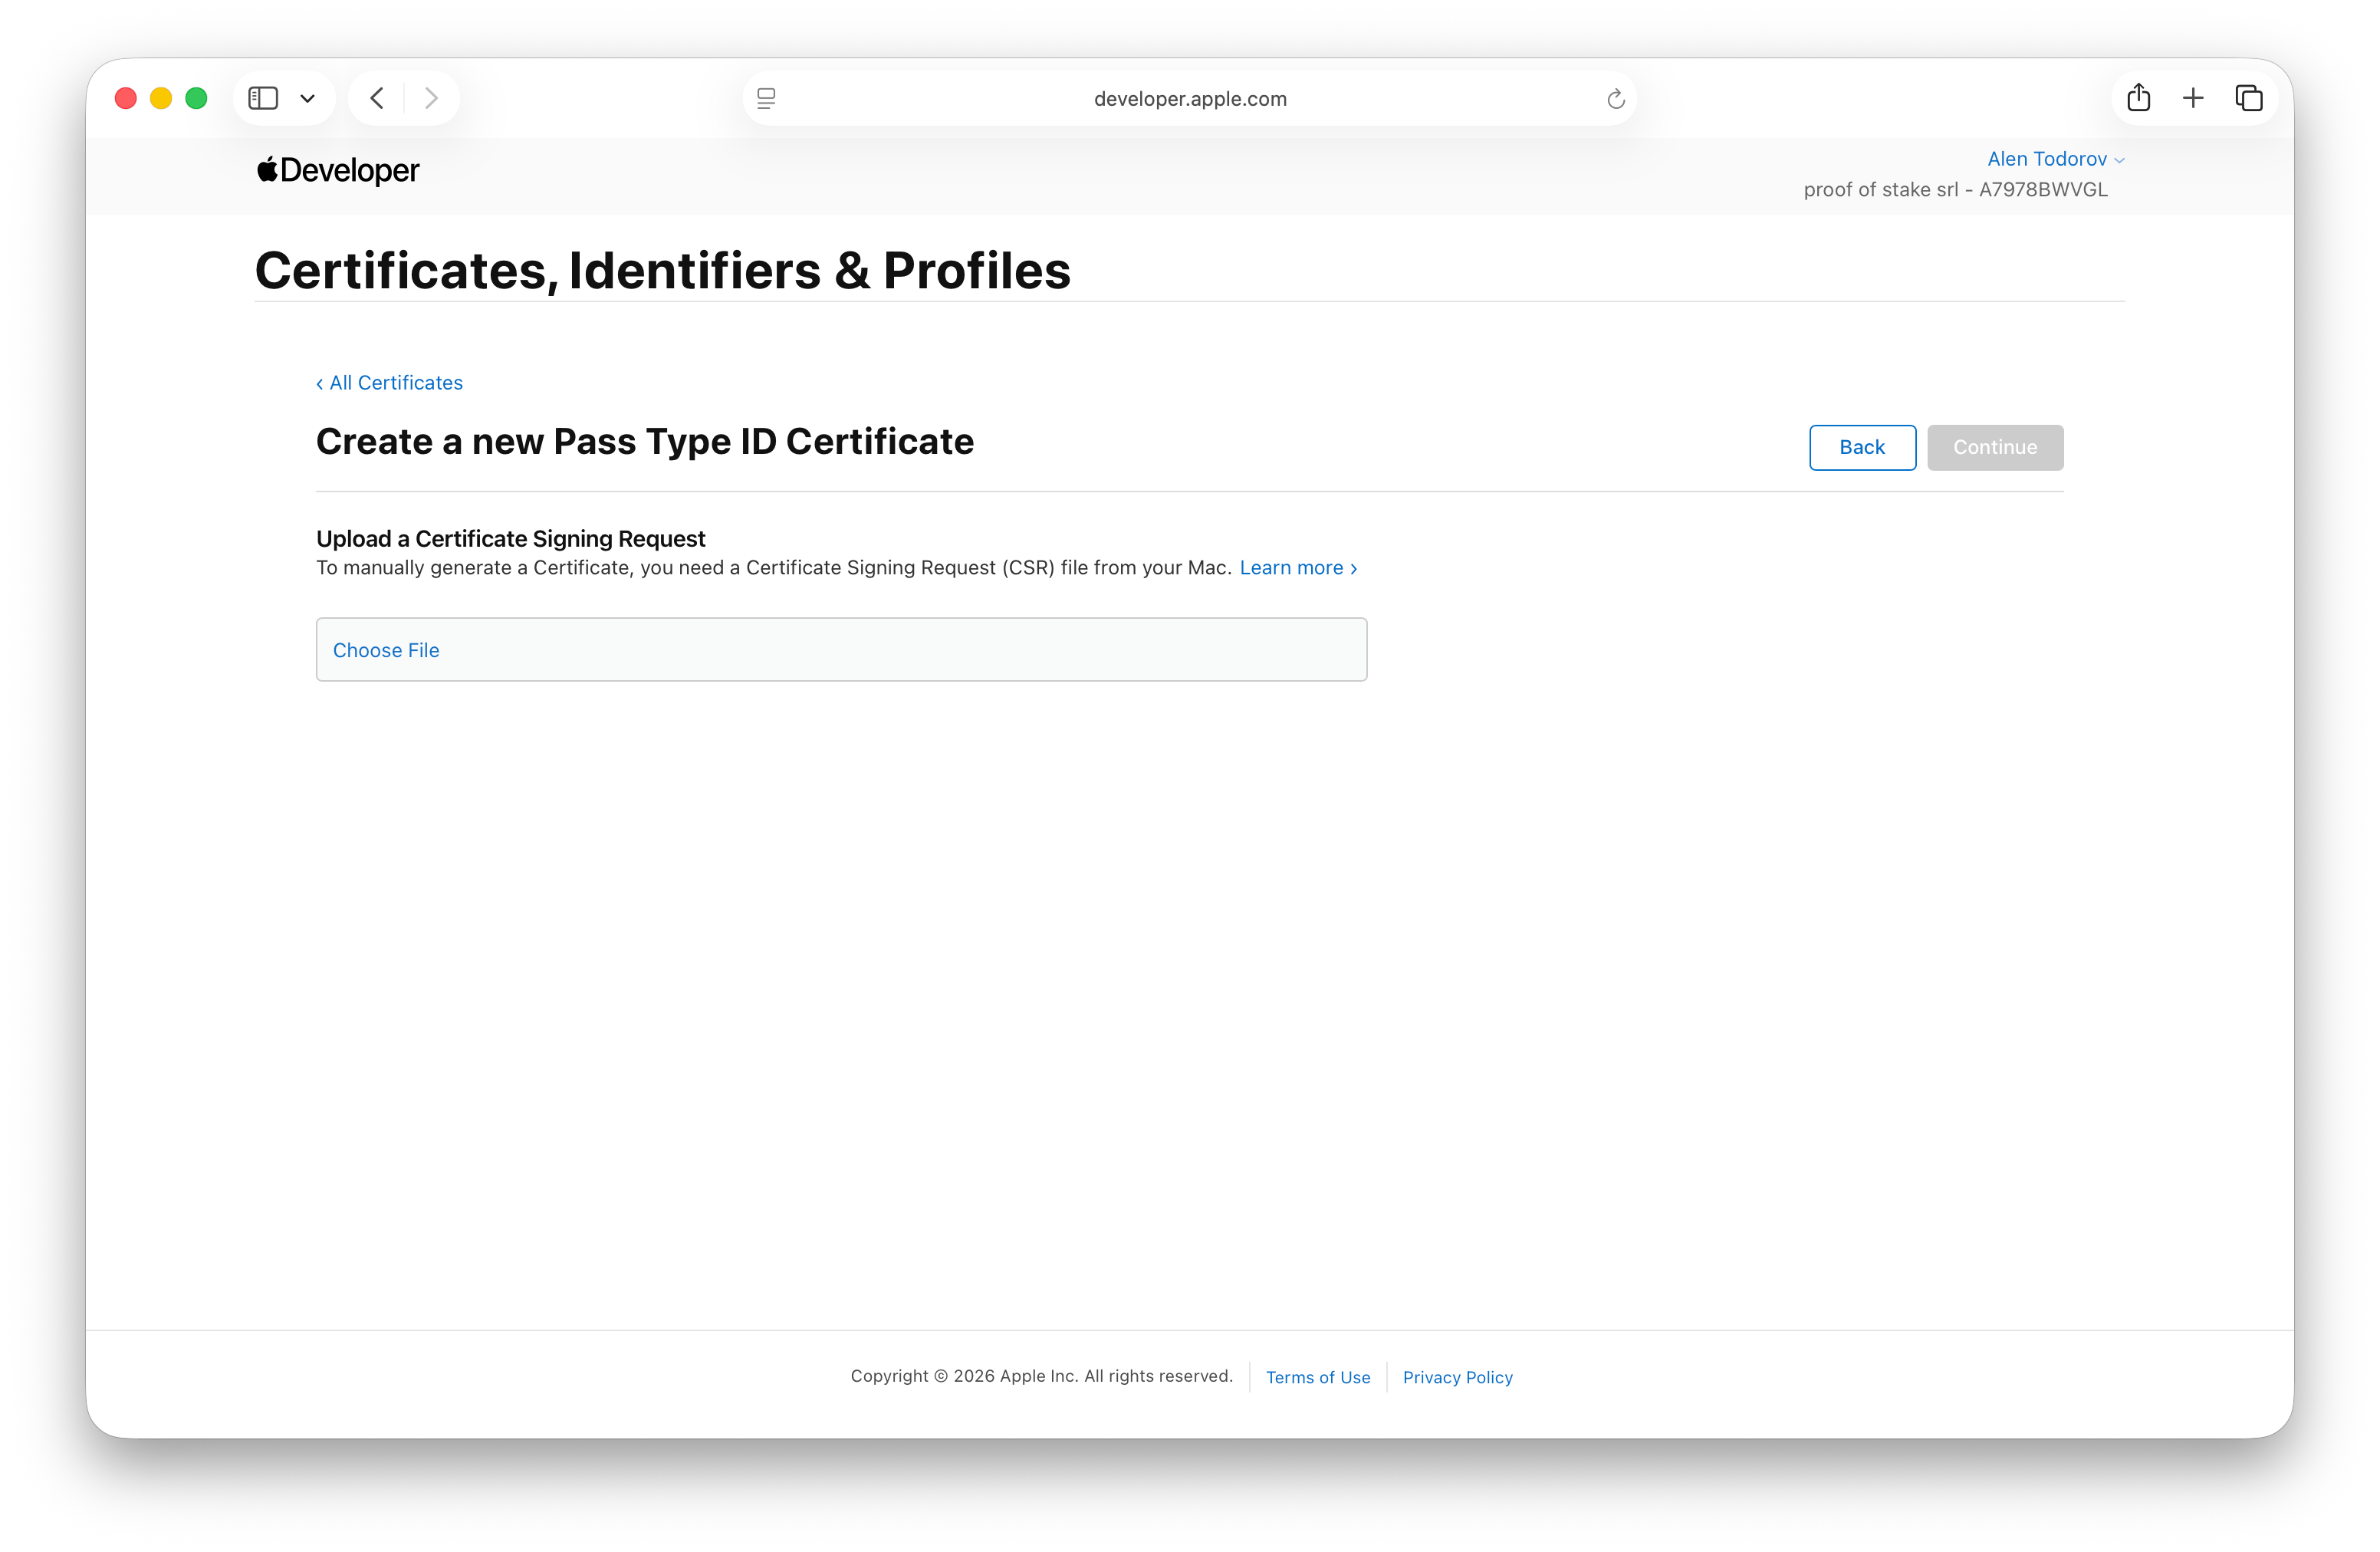
Back on Apple's "Upload a Certificate Signing Request" screen, click Choose File and select the .certSigningRequest you just downloaded, then Continue.
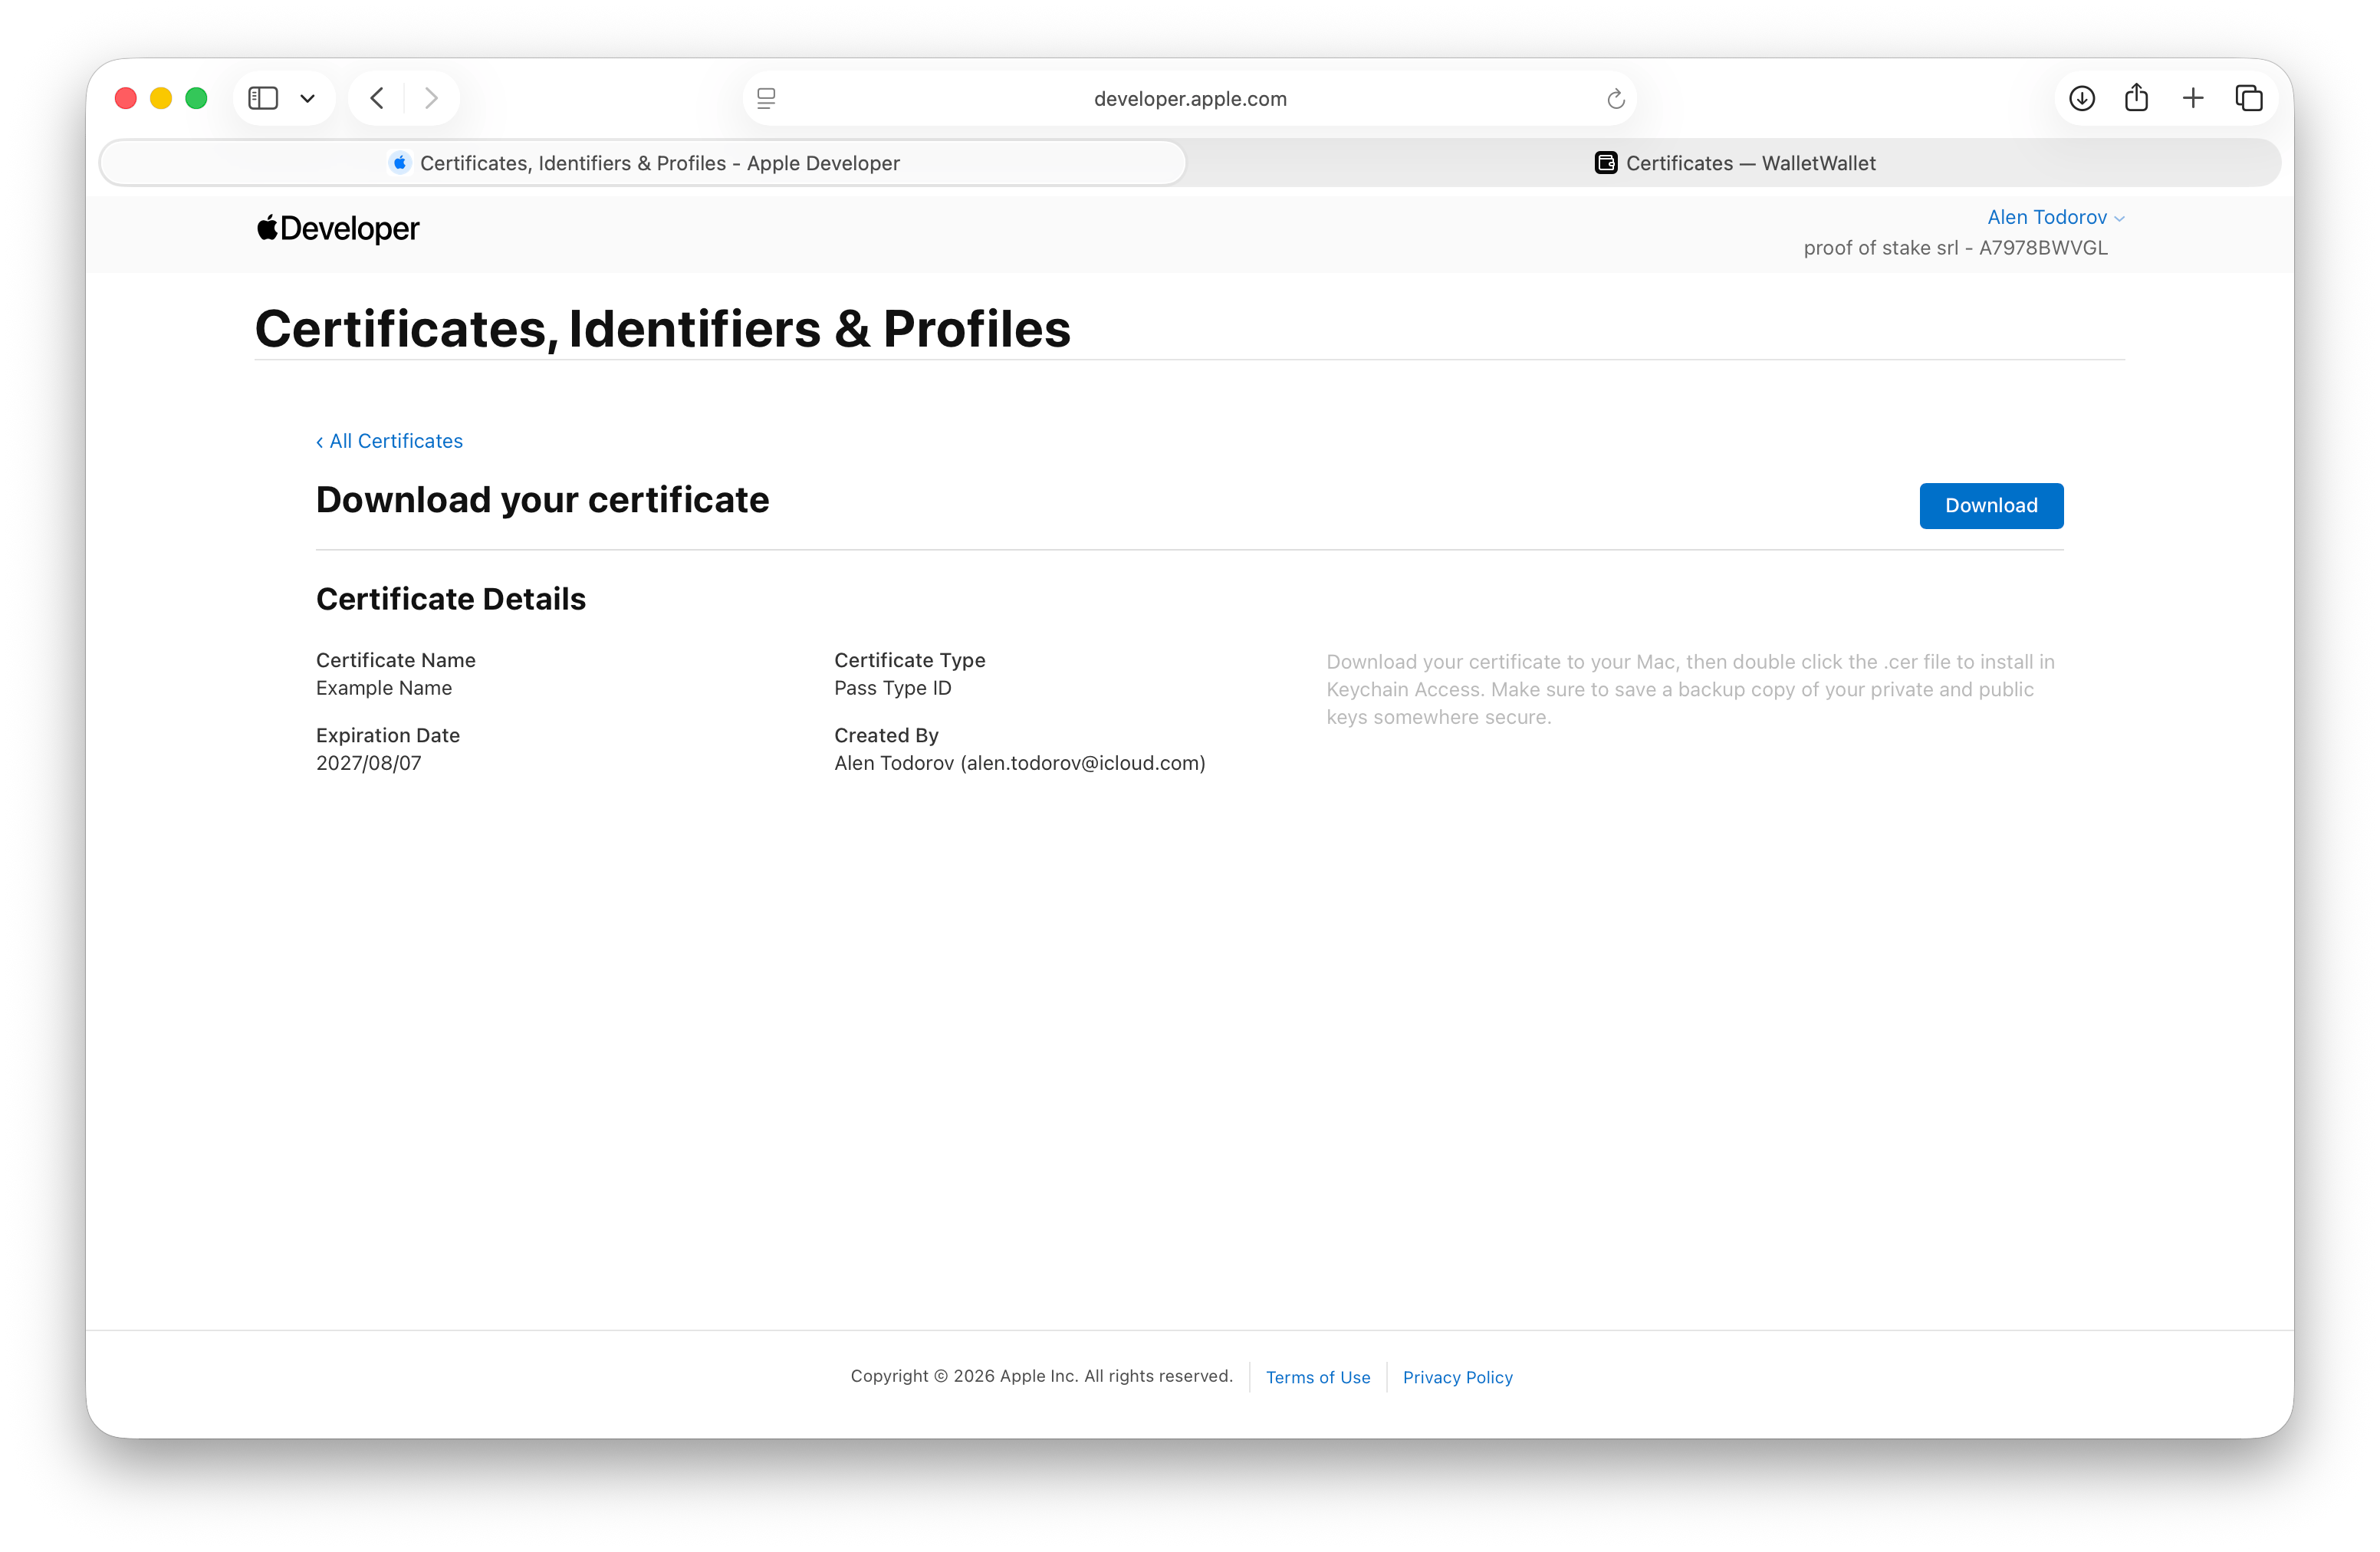
Download the certificate
Apple generates your certificate. Download the .cer file it hands back.
Upload the certificate to WalletWallet
In your credential set, under Upload your certificate, choose the .cer and click Upload certificate. We pair it with the private key held from step 3 and read your Pass Type ID and Team ID straight out of the certificate, so there is nothing to type.
Create your push key (APNs)
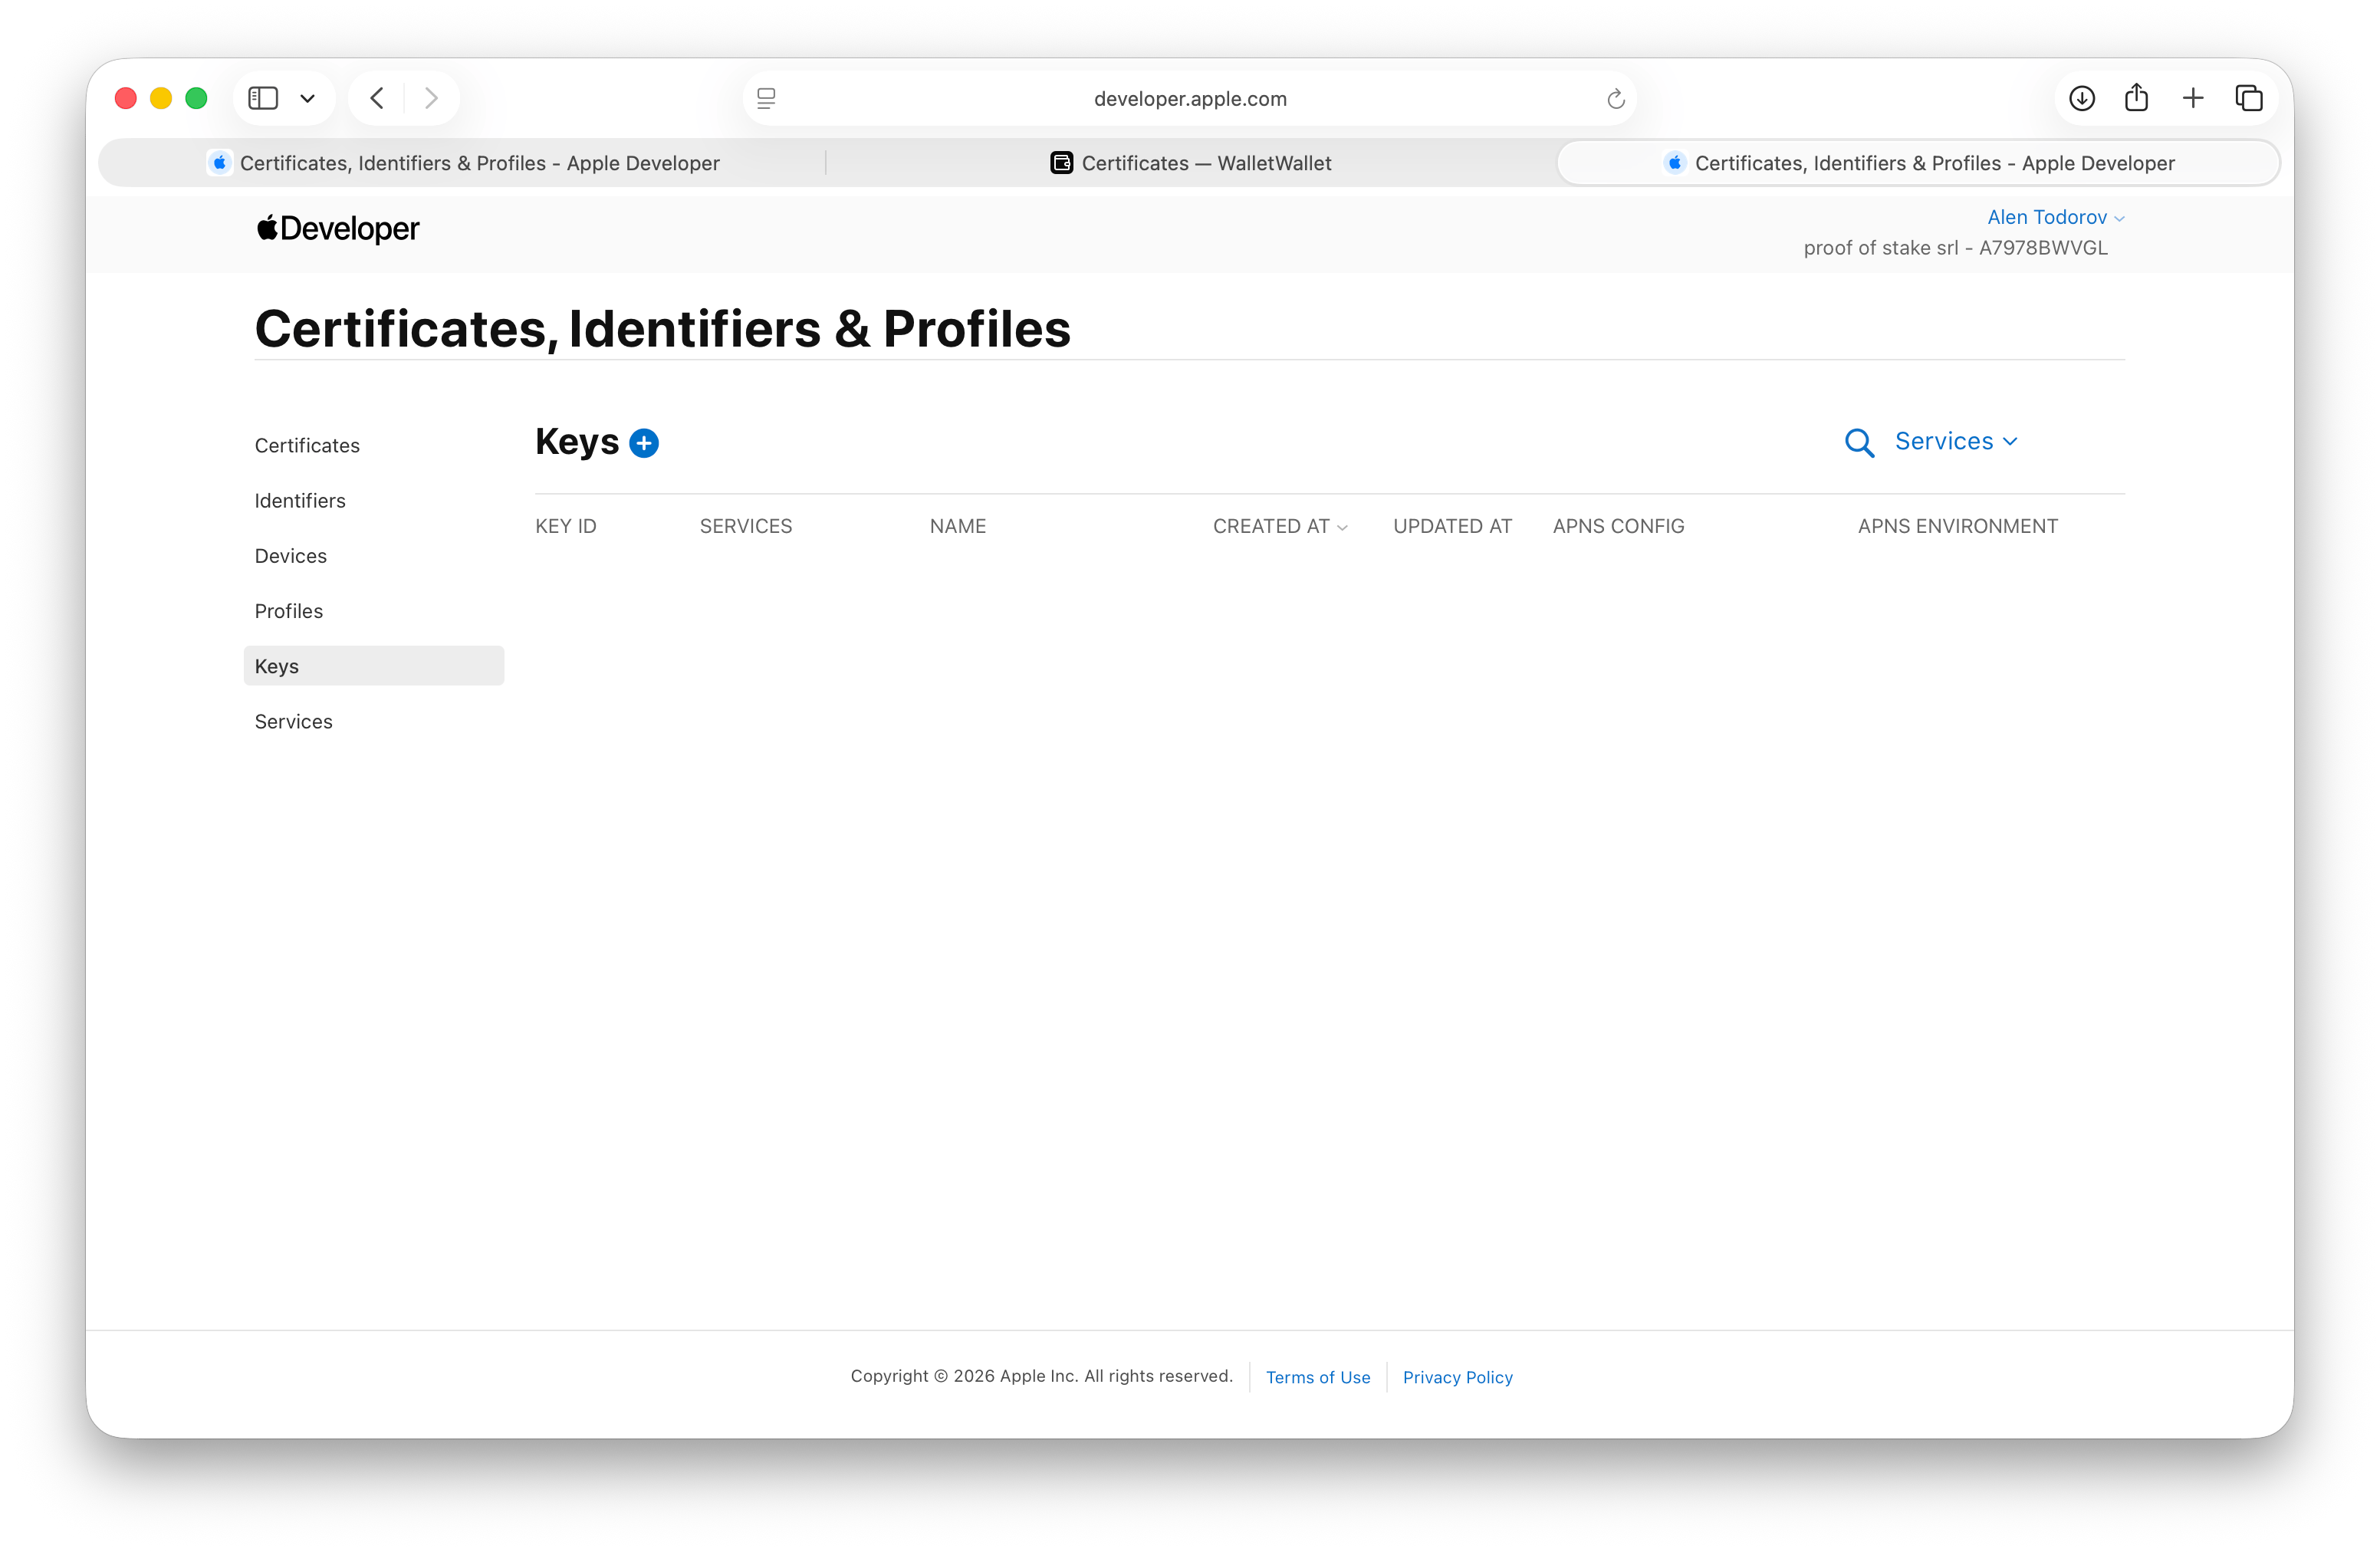
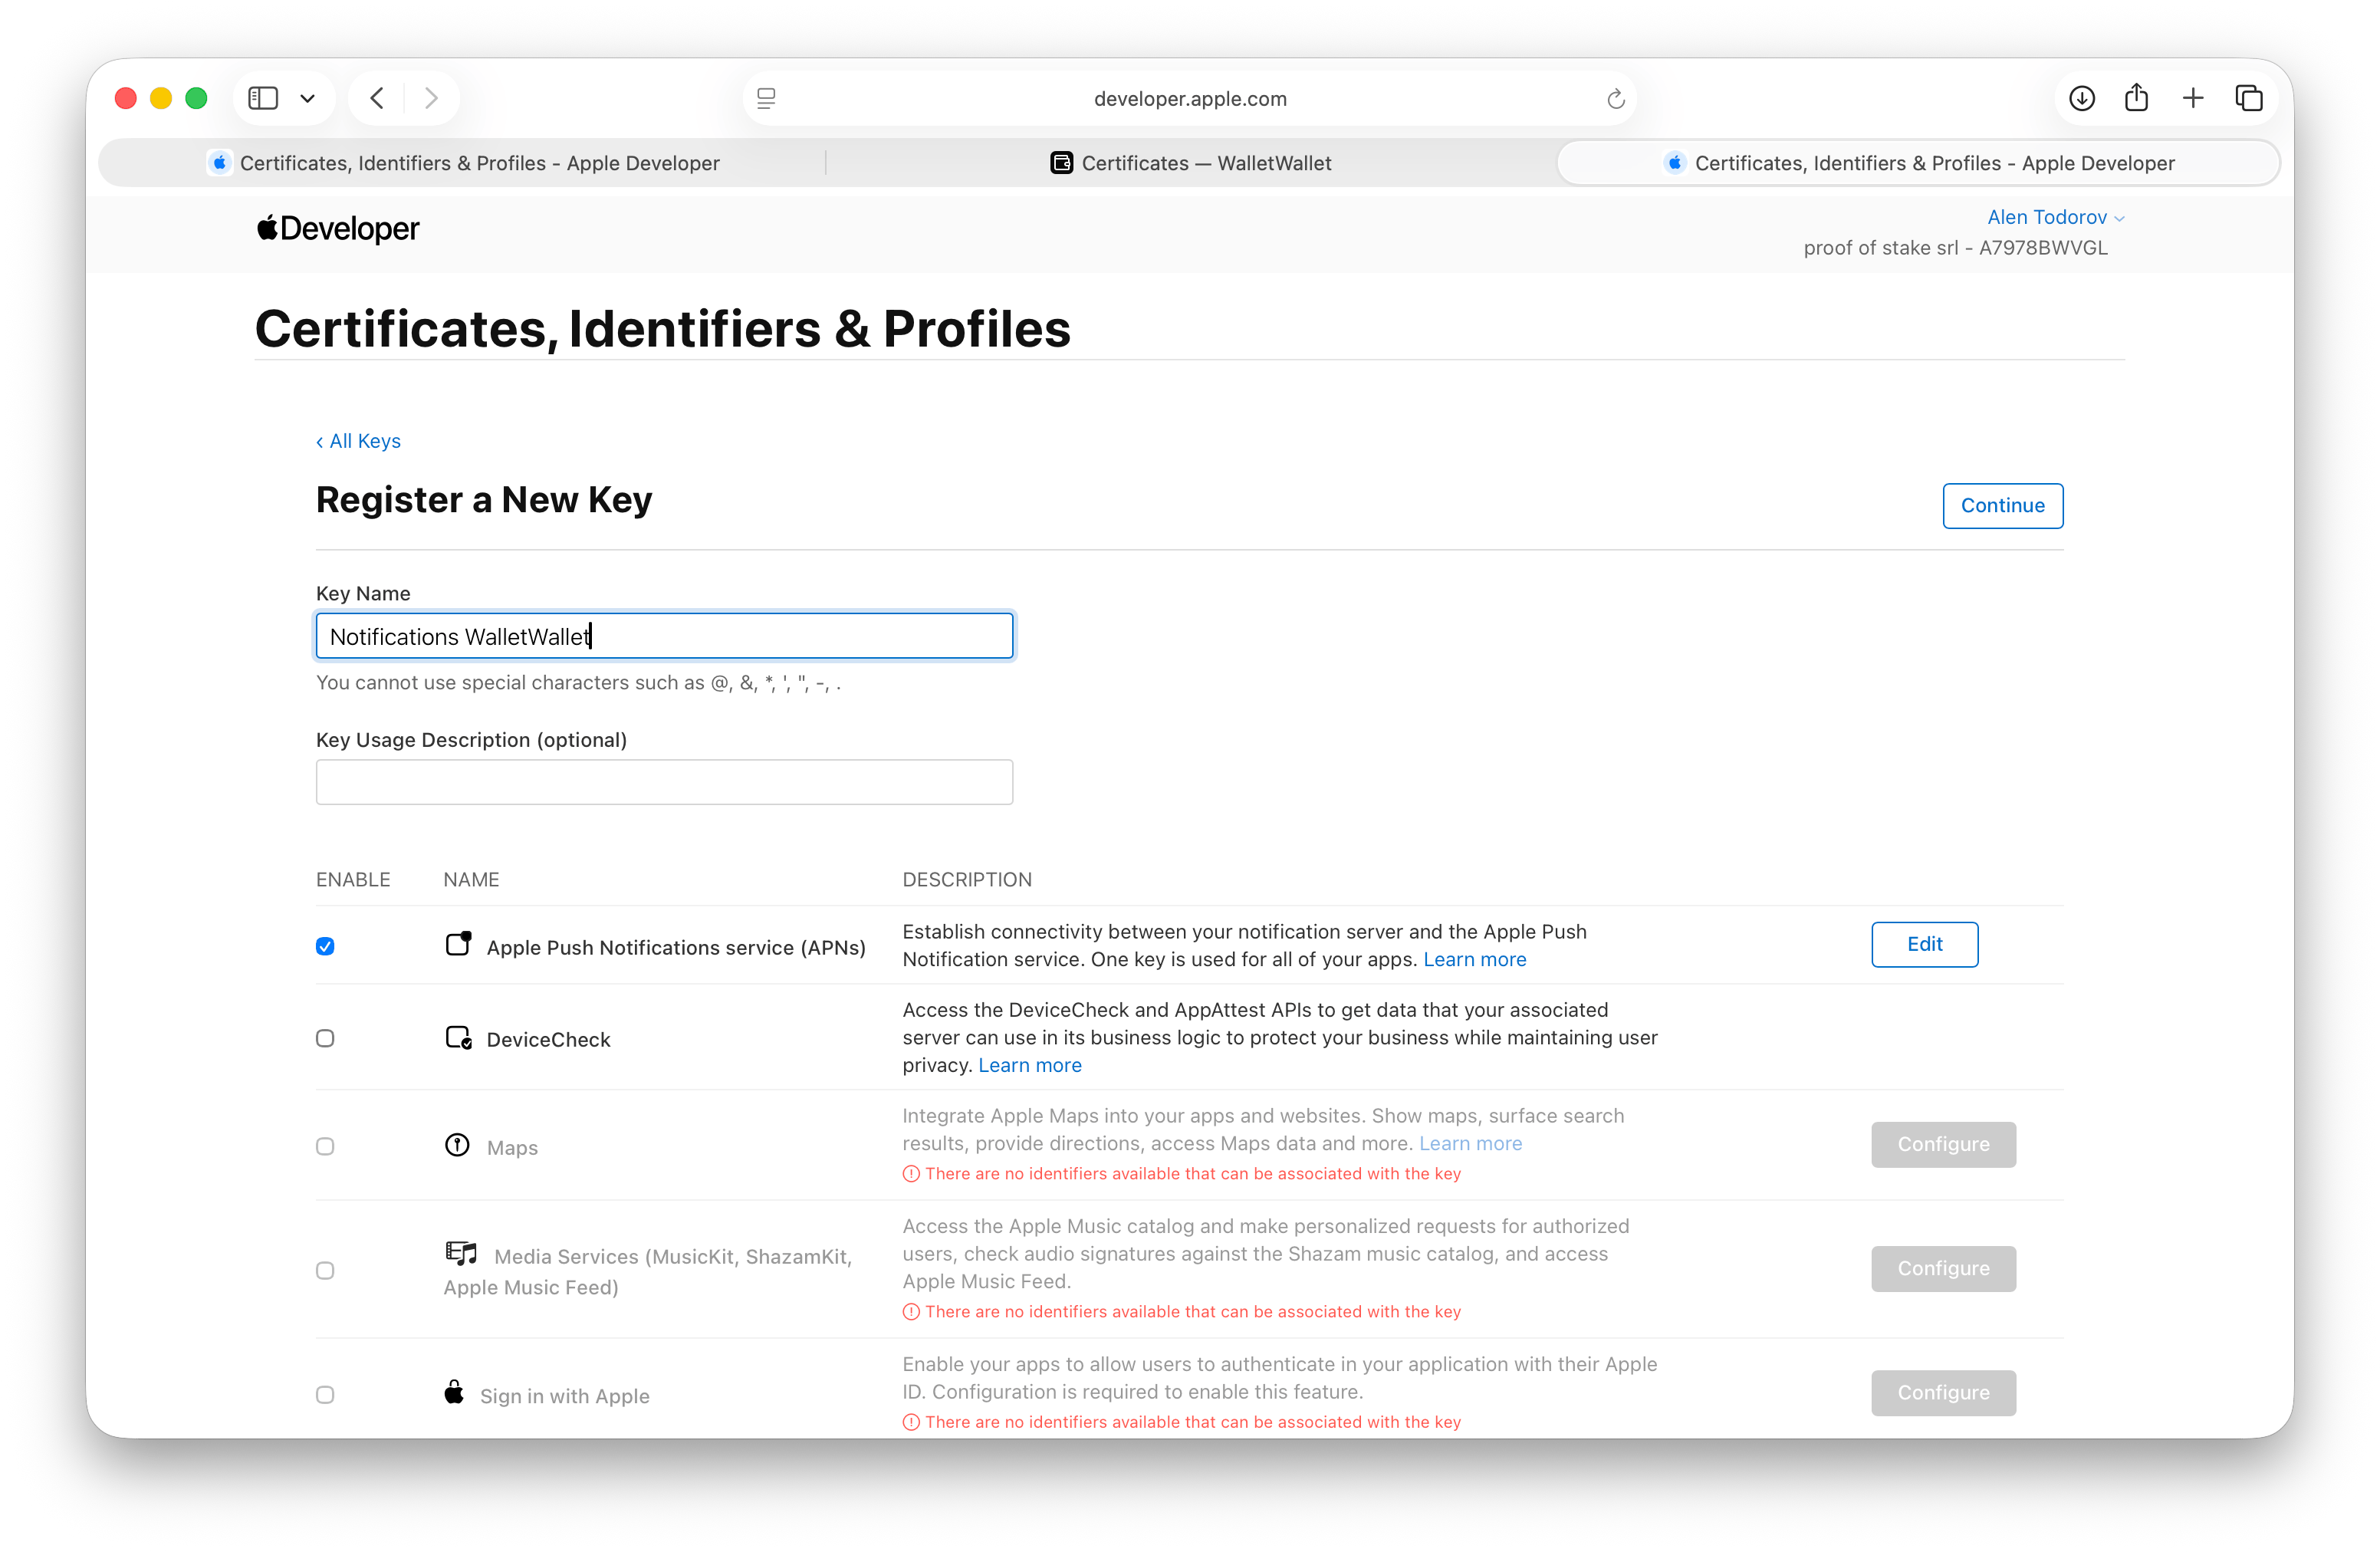
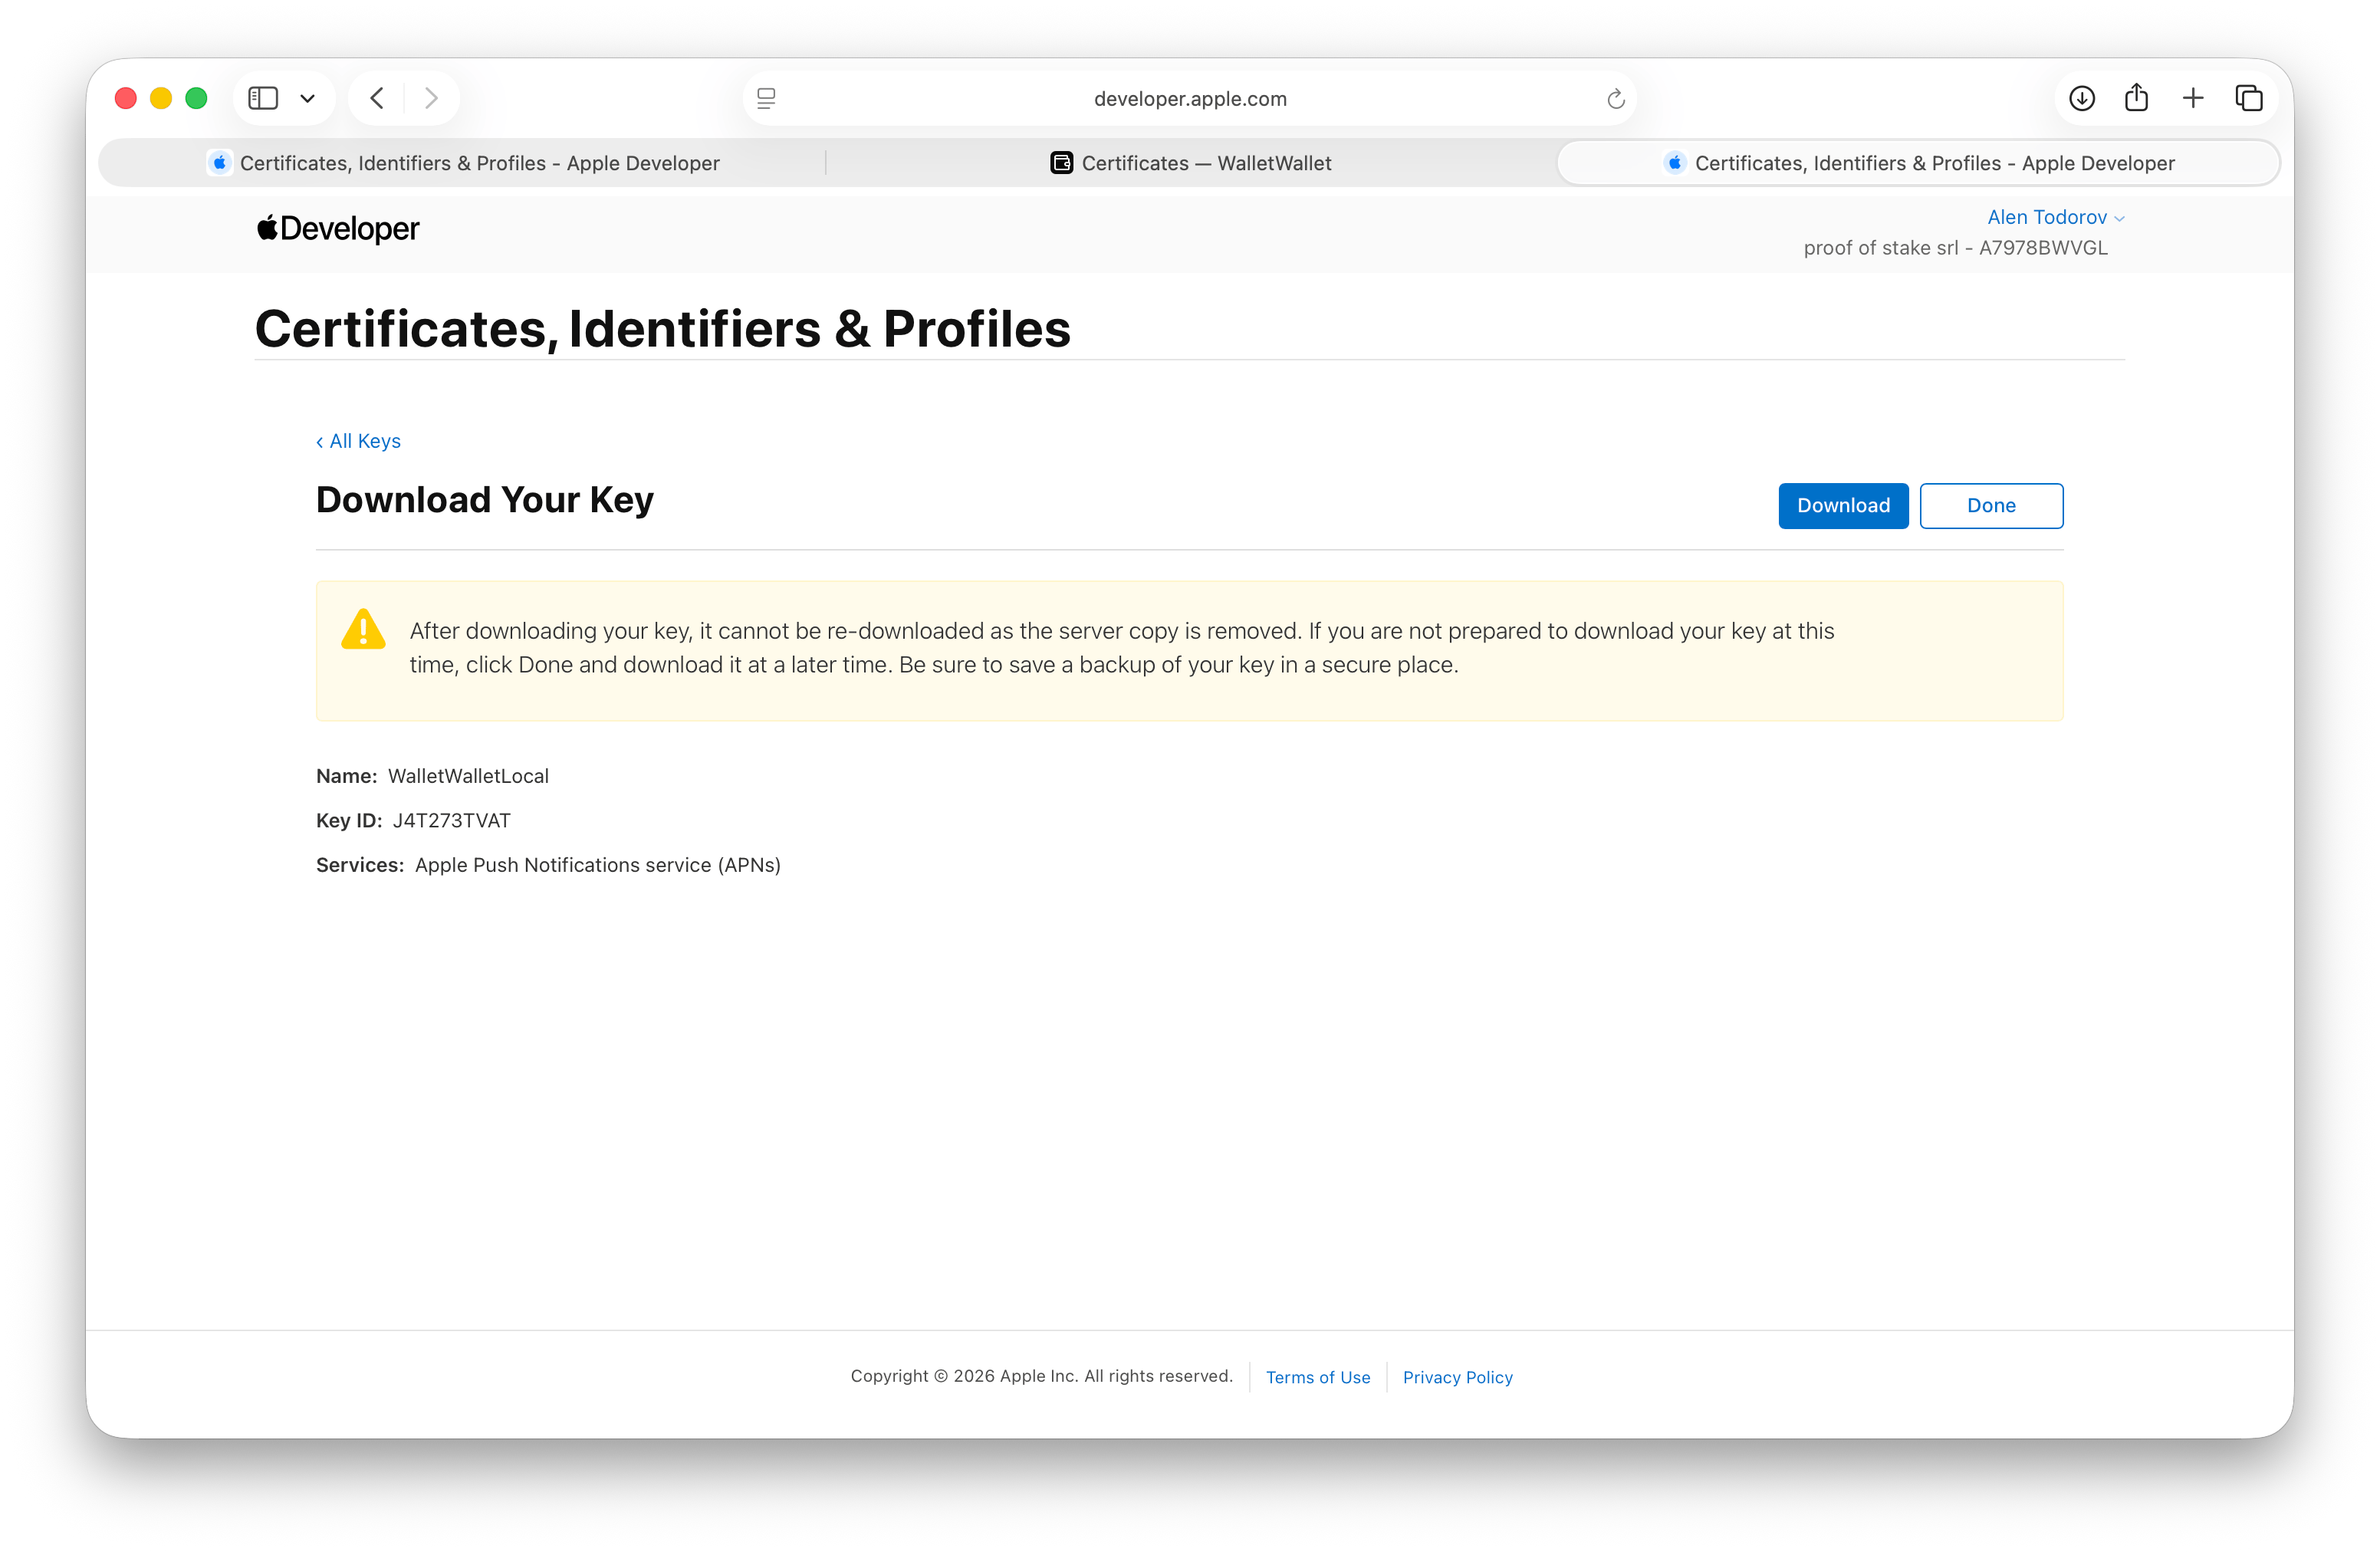
Pass updates need an APNs auth key. Open Keys, register a new key, enable Apple Push Notification service (APNs), and download the .p8. It downloads only once, so keep it safe. Apple also caps you at two APNs keys per team, so do not create one per project.
Add the push key to WalletWallet
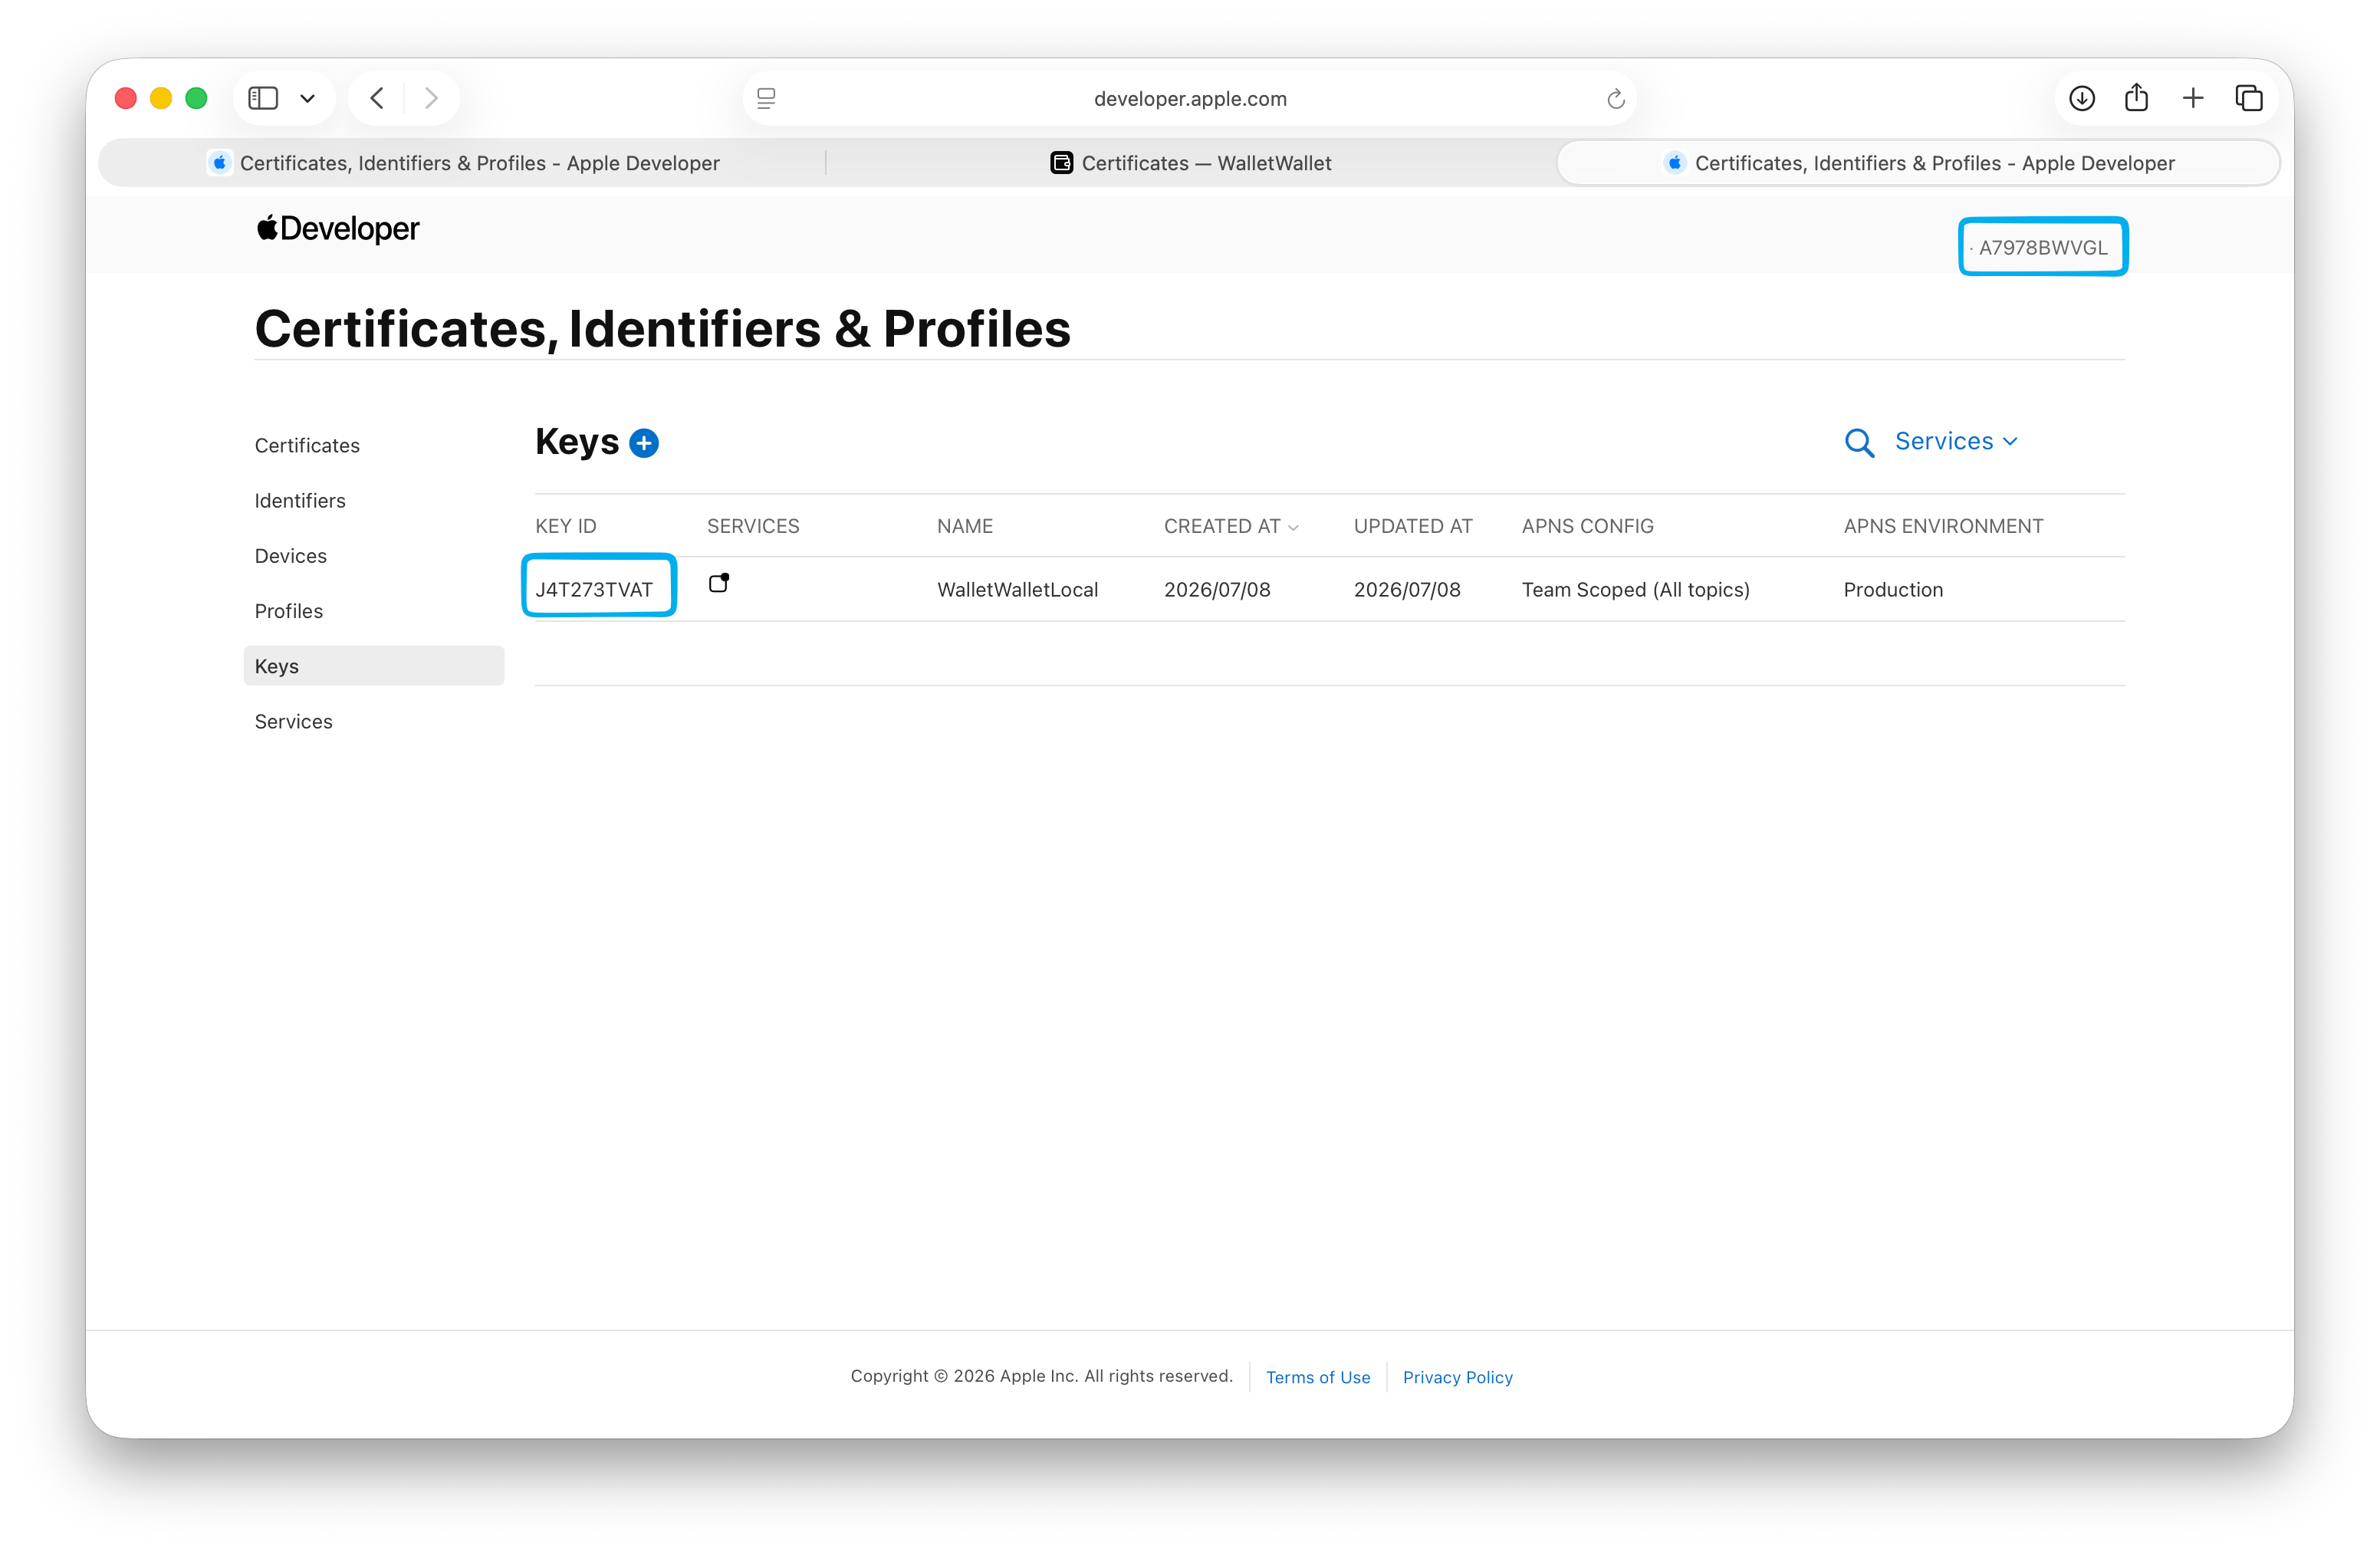
You need two things: the key's Key ID, shown on the key's page in the portal, and the .p8 file. In your credential set, under Add your push key, paste the Key ID, choose the file, and click Add push key. Your Team ID is read from your certificate, so upload the certificate first: the push key attaches to it.
Google Wallet
Your issuer ID and a service account key.
Find your Issuer ID
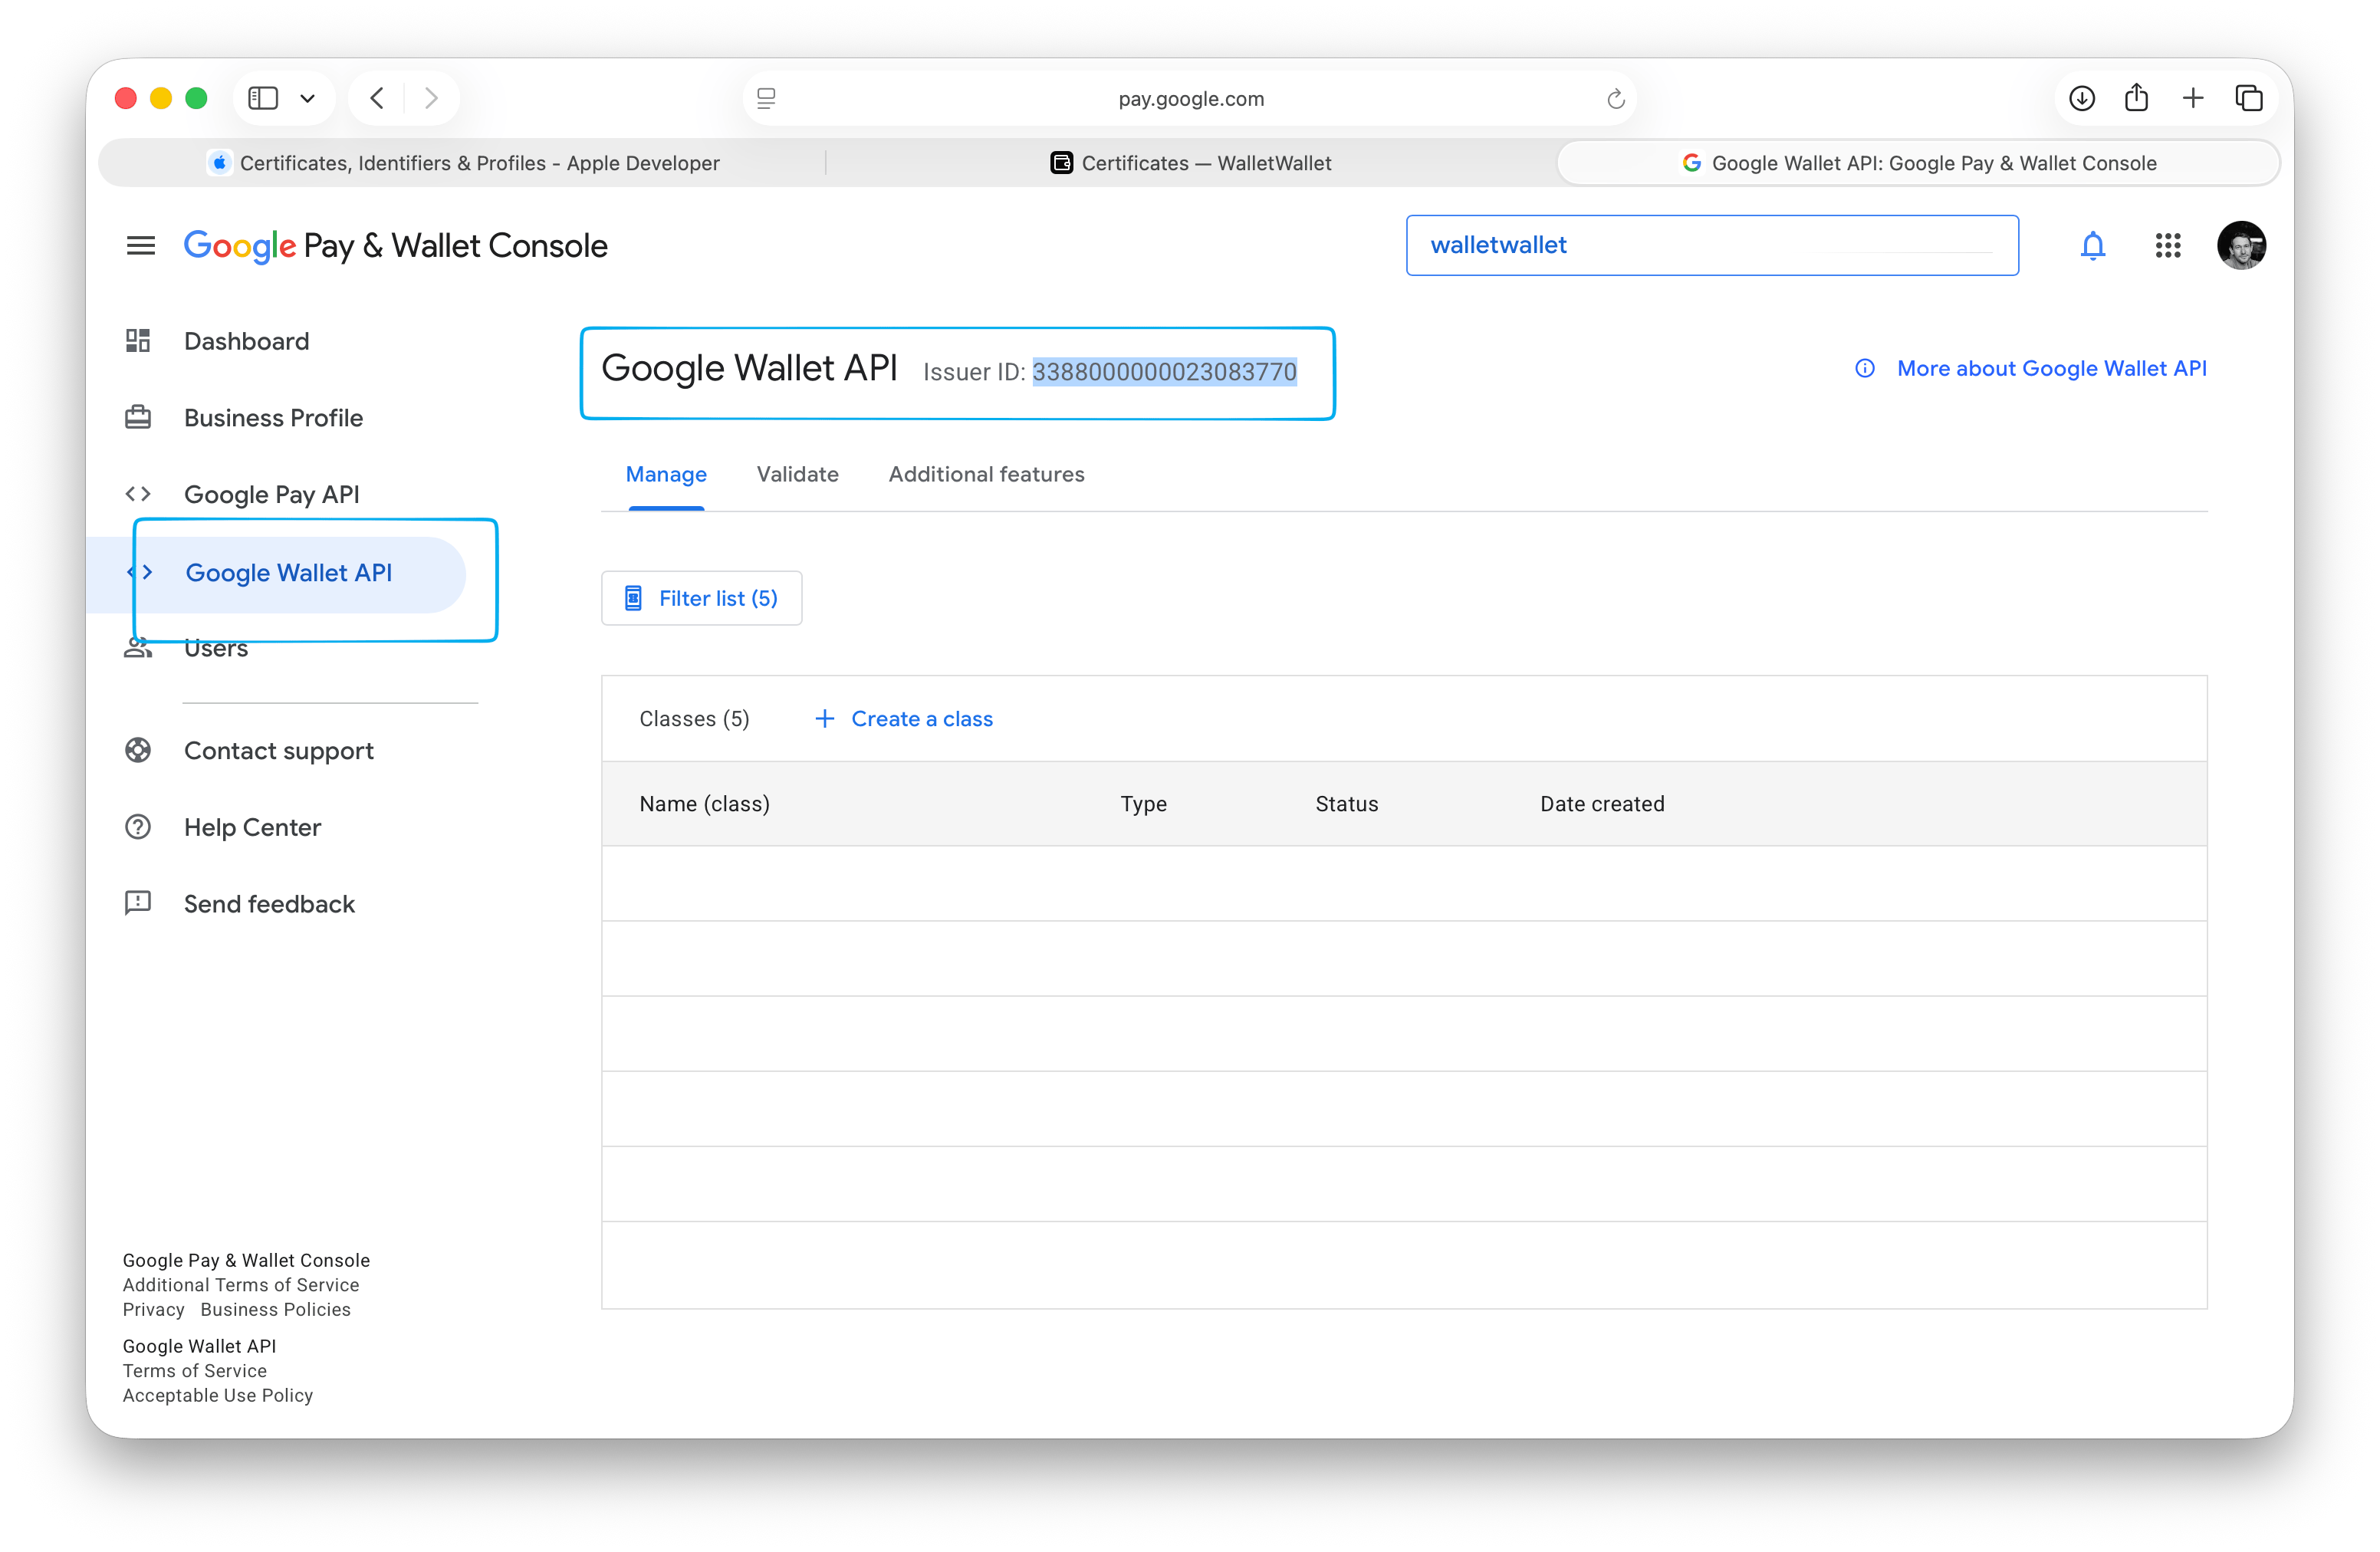
Your Issuer ID is your business's Google Wallet identity. Find it in the Google Pay & Wallet Console under the Google Wallet API. It is a long number like 3388000000012345678.
Enable the Google Wallet API
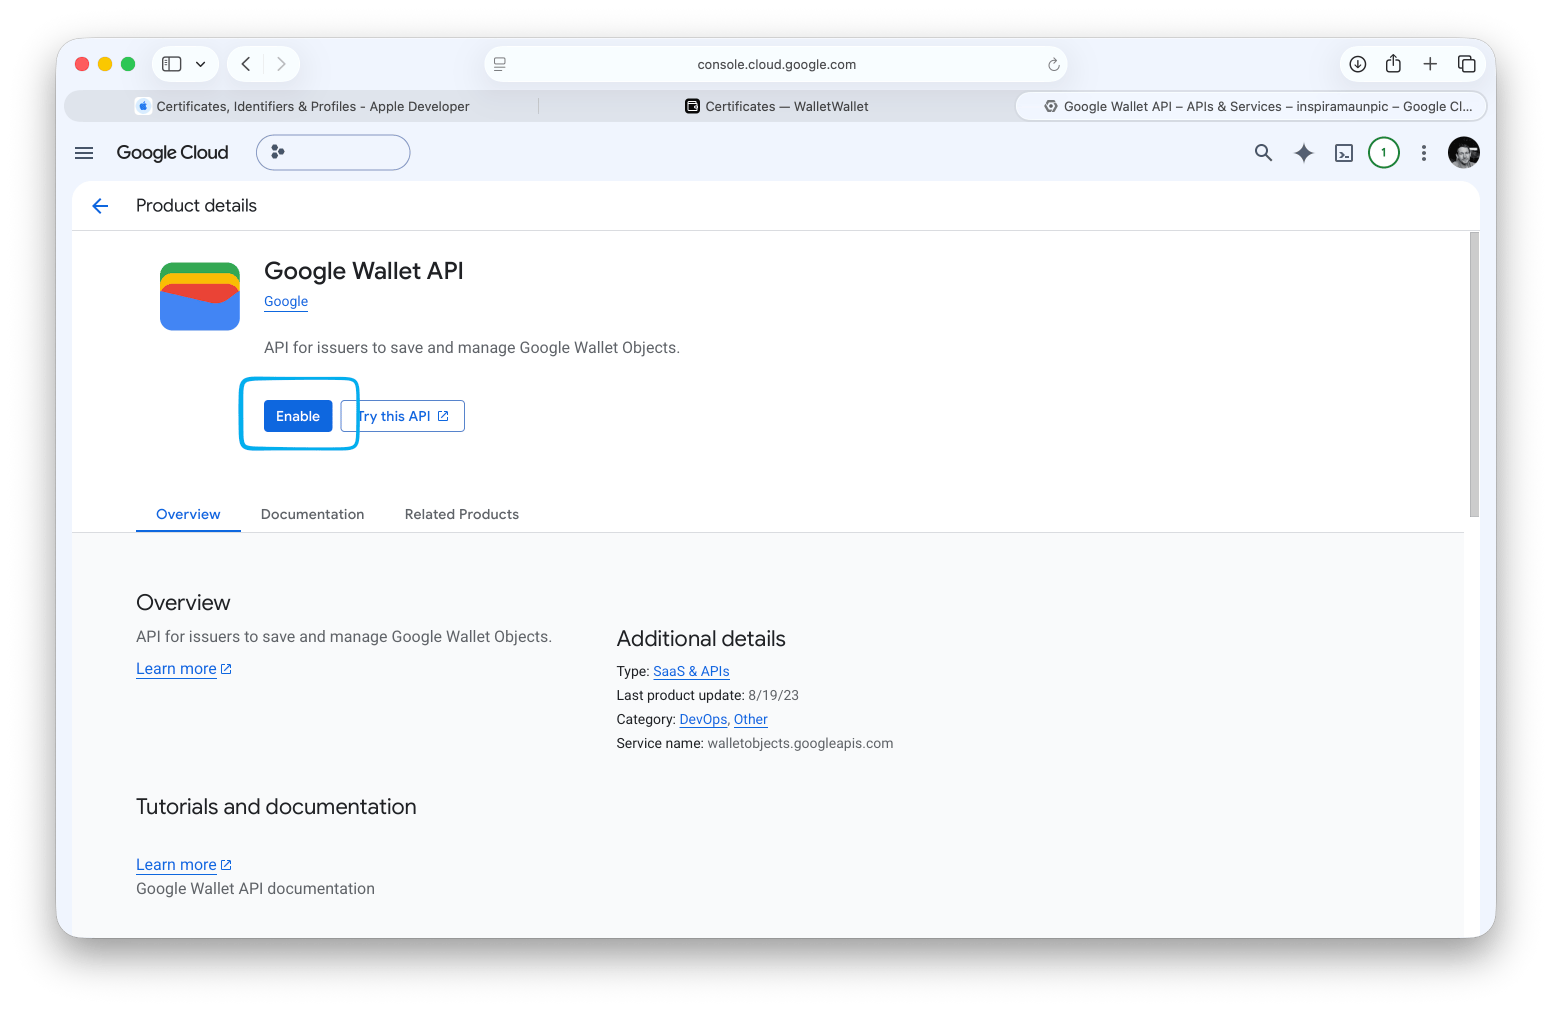
In the Google Cloud Console, enable the Google Wallet API for your project. This is a different console from the one above.
Create a service account
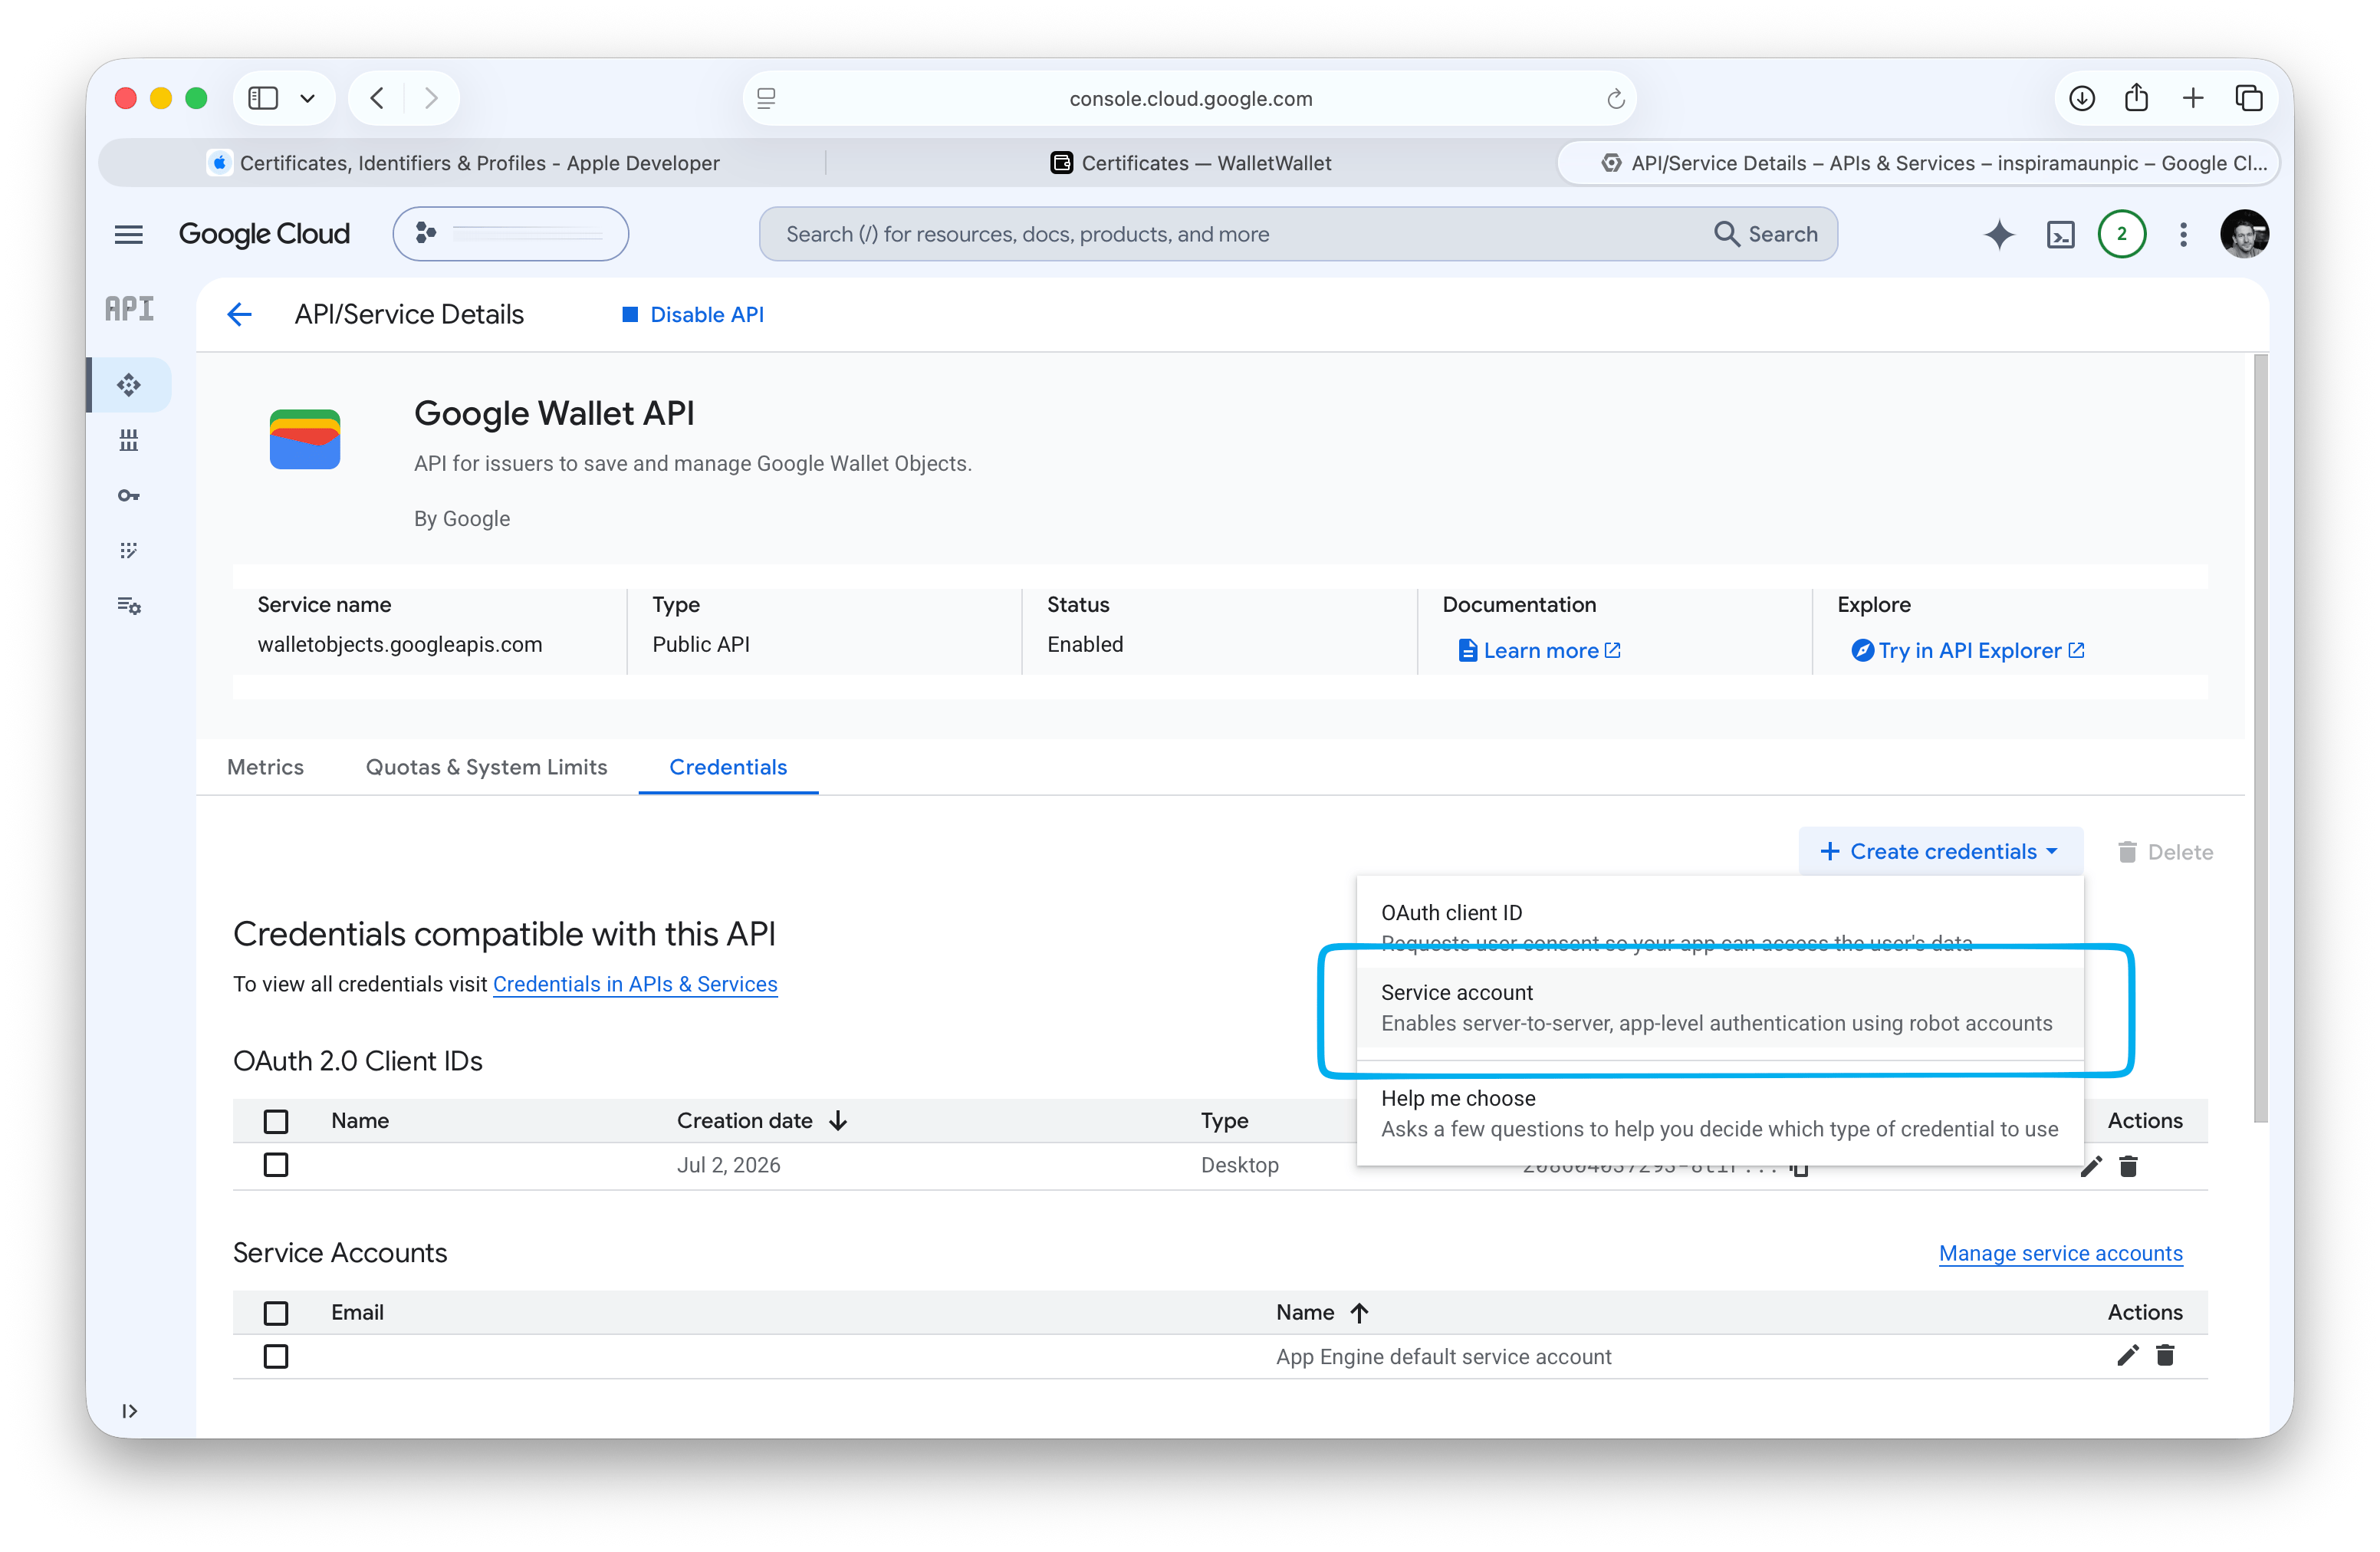
Do this right from the Google Wallet API page you just enabled. Open the Credentials tab, click Create credentials, and choose Service account. Give it a name and finish. It then shows up under this API's credentials, so you never need the generic IAM Service Accounts area.
Create a JSON key
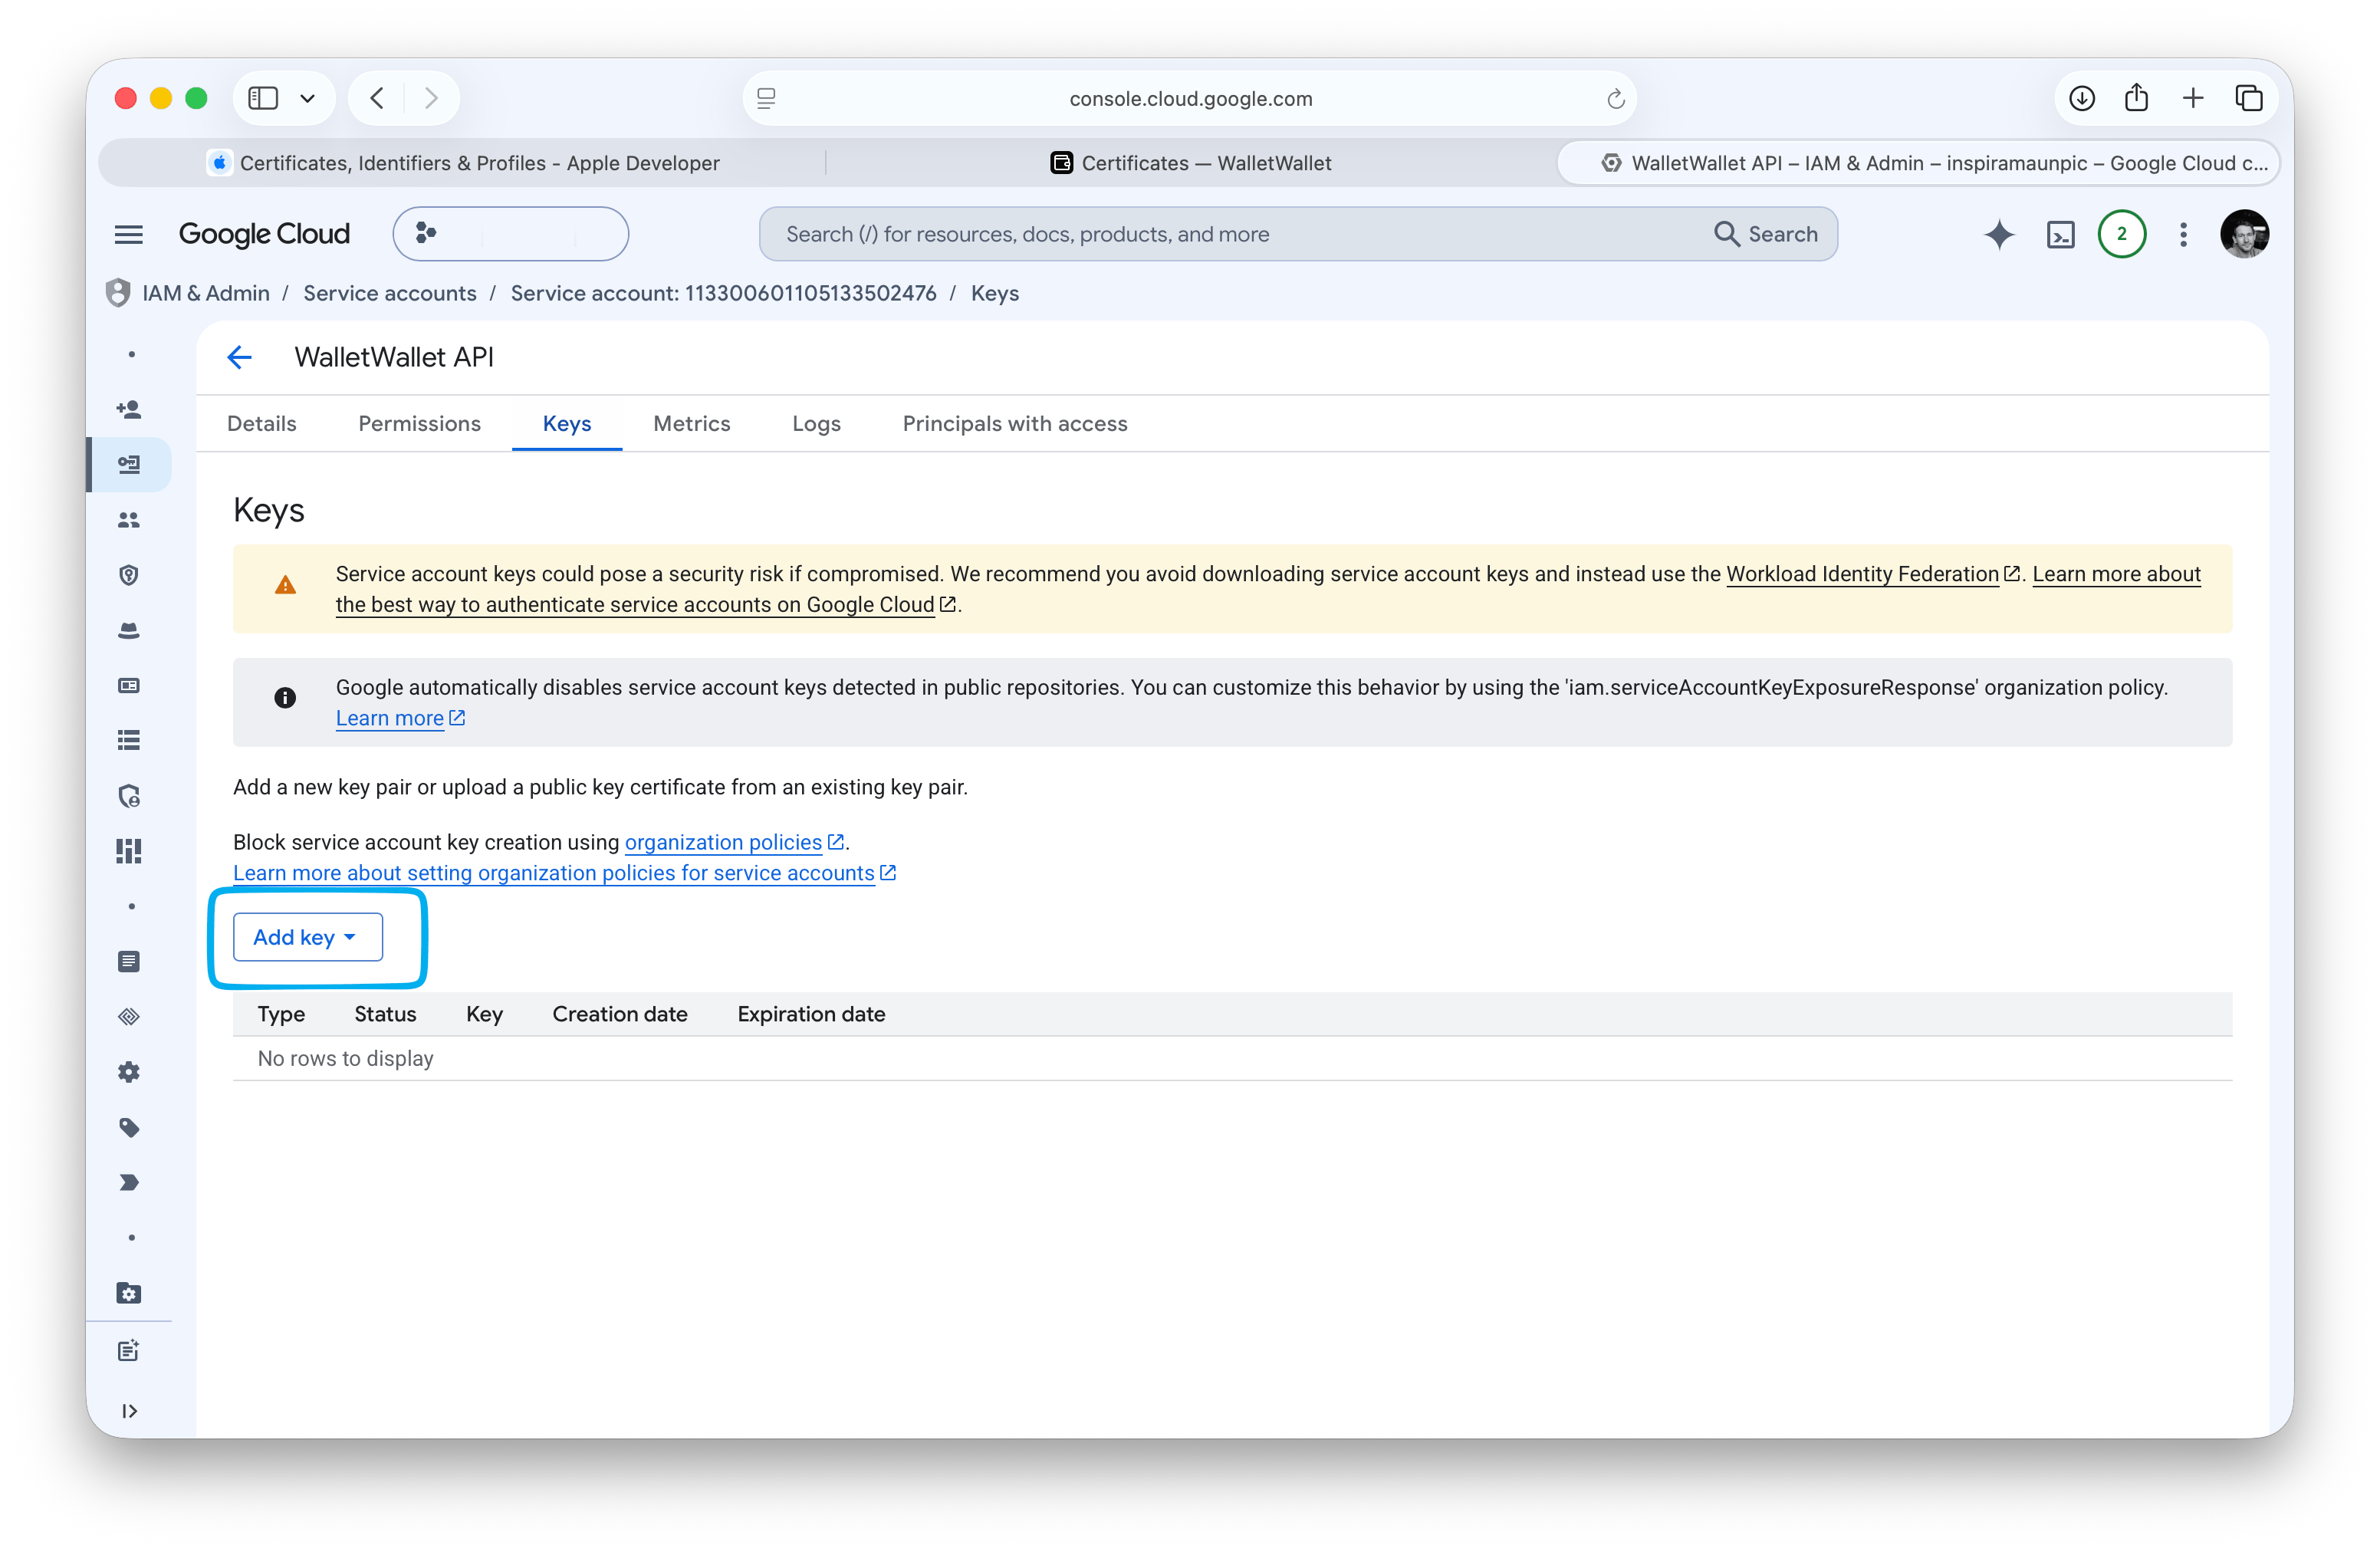
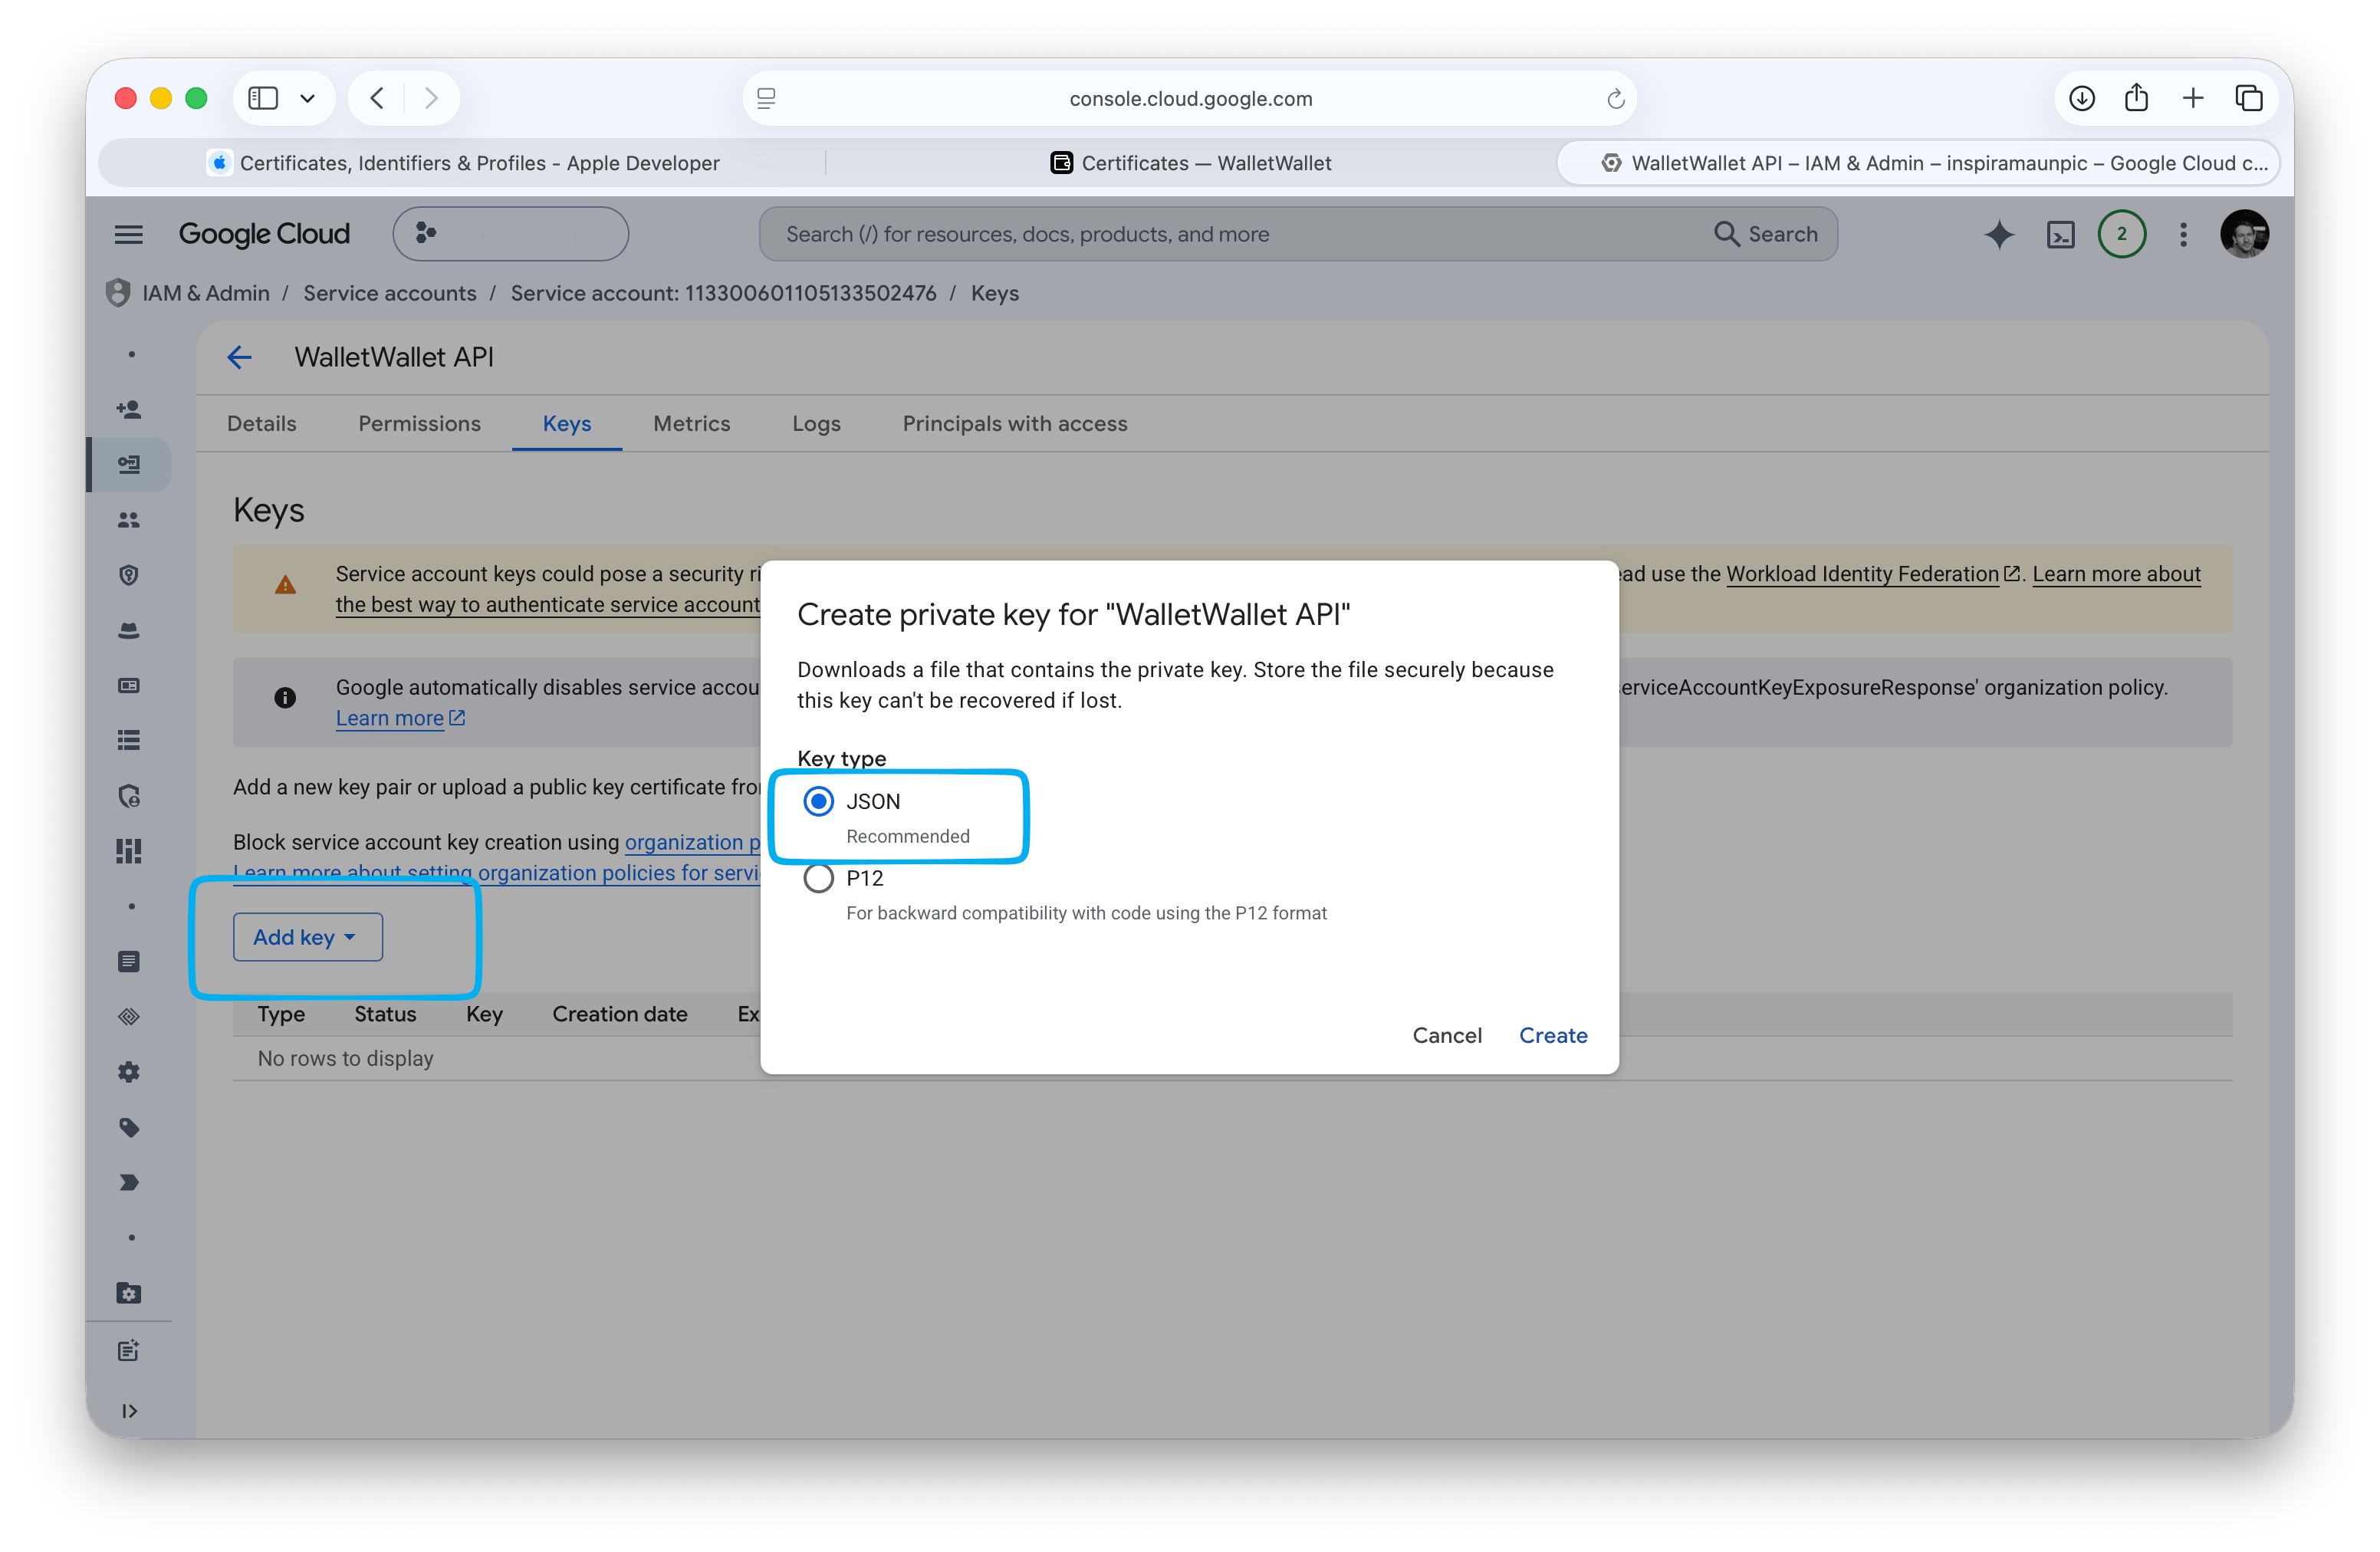
Open the service account, go to the Keys tab, click Add key, then Create new key, and choose JSON. A .json file downloads. This is what you upload to WalletWallet.
Authorize the service account on your issuer
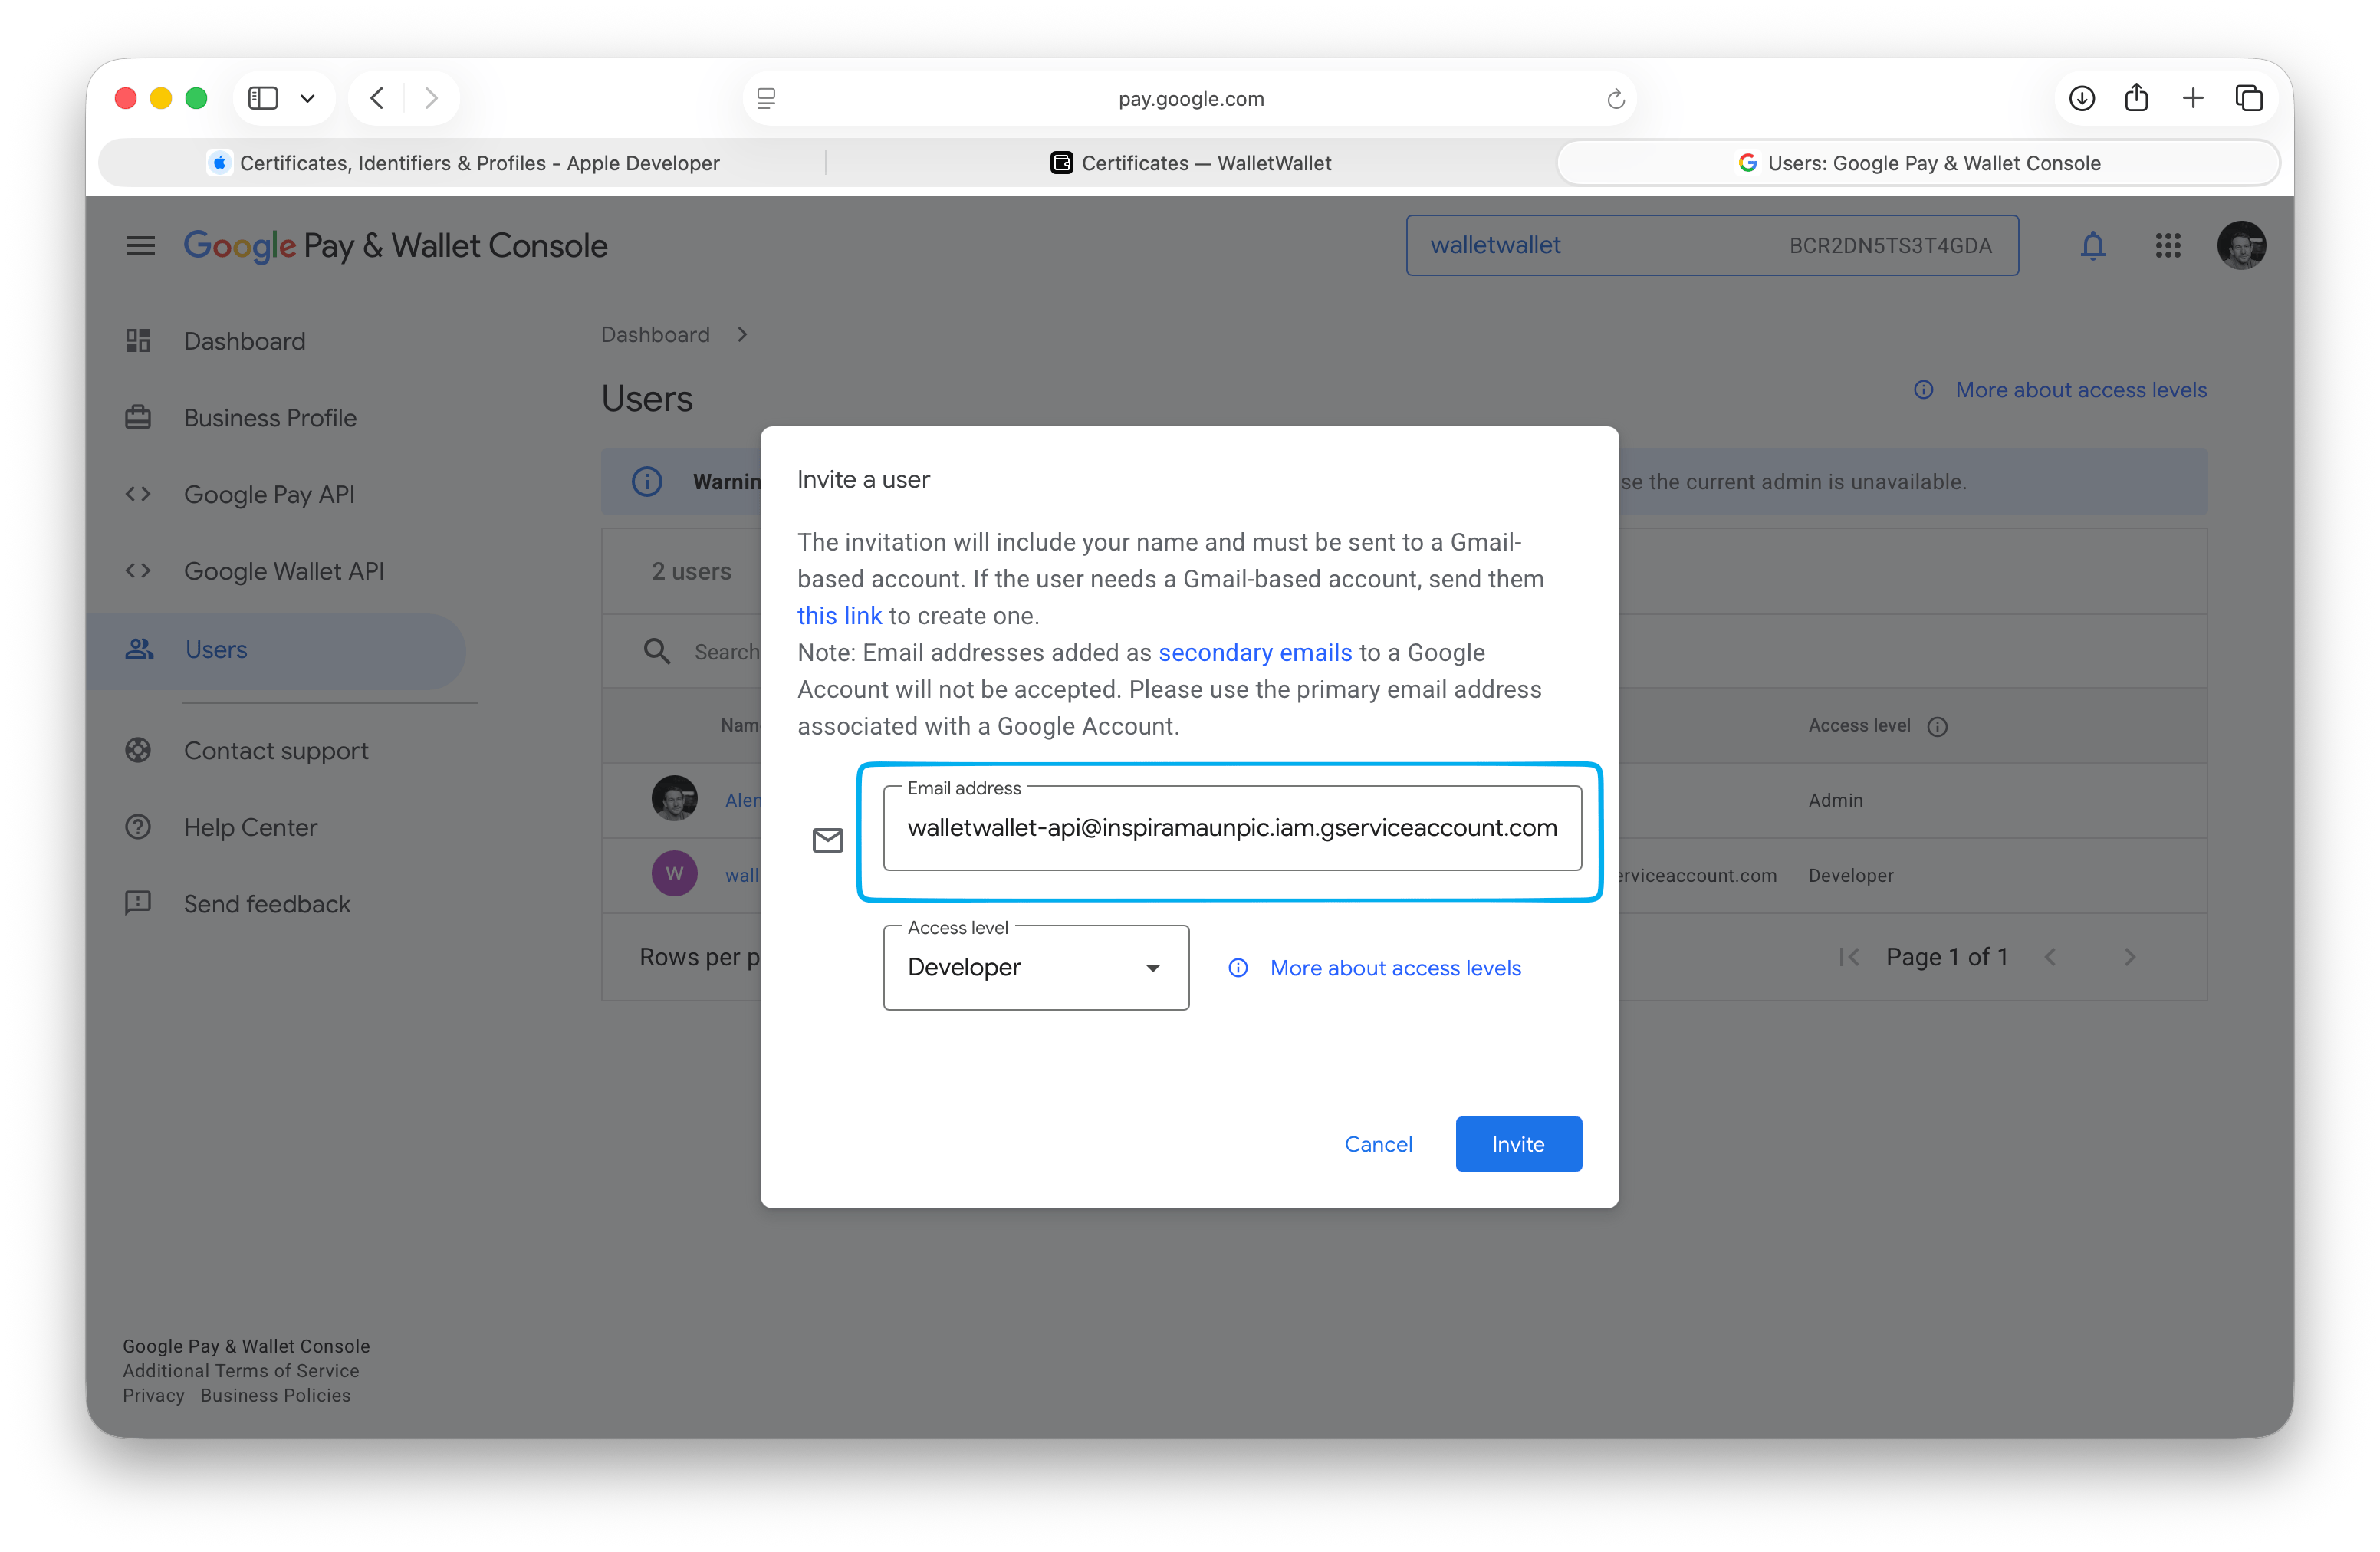
Creating the key is not enough. The service account also has to be granted access to your issuer. In the Pay & Wallet Console, open Users, click Invite a user, paste the service account email (it ends in .iam.gserviceaccount.com), set the access level to Developer, and click Invite. Until you do this, the key authenticates but cannot manage any passes.
Add the issuer ID and key to WalletWallet
In your credential set, under Google Wallet, paste your Issuer ID, choose the .json key, and click Save Google credentials. Leave Class suffix empty unless we asked you to set it.