How to Create a Google Wallet Issuer Account and Service Account Key (2026)
Set up a Google Wallet issuer in the Google Pay & Wallet Console, find your Issuer ID, create and authorize a service account key, and request publishing access so any Google Wallet user can save your passes.
A Google Wallet pass is issued from an issuer account in the Google Pay & Wallet Console and authenticated with a service account key from Google Cloud. This guide sets up both, connects them, adds them to WalletWallet, and takes the issuer out of demo mode so any Google Wallet user can save your passes.
Every step here was checked in the Google Pay & Wallet Console in October 2026.
The Google side needs no D-U-N-S number. Expect about 30 minutes of hands-on work, plus Google’s review of your publishing access request at the end.
Google calls it a Google Wallet API Issuer account, and it is often searched for
as a Google Wallet merchant account. It lives in the Google Pay & Wallet Console at pay.google.com/business/console,
and it is a different product from Google Merchant Center, which manages
Shopping product listings.
What you need before you start
- A Google Account that will own the issuer. Use one tied to the business (a Google Workspace address on your domain is best) rather than a personal Gmail, so the issuer does not depend on one person’s login.
- Your public business name, as customers should see it.
- Access to a Google Cloud project. You can create one for free during the setup.
Step 1: Create the issuer account
Open the Google Pay & Wallet Console and sign in with the business Google Account. If the account has never used the console, it asks for your public business name and for you to accept the terms.
On the console dashboard, find the Google Wallet API card and click Create a pass, then Build your first pass, and accept the Google Wallet API Terms of Service. This creates the issuer.
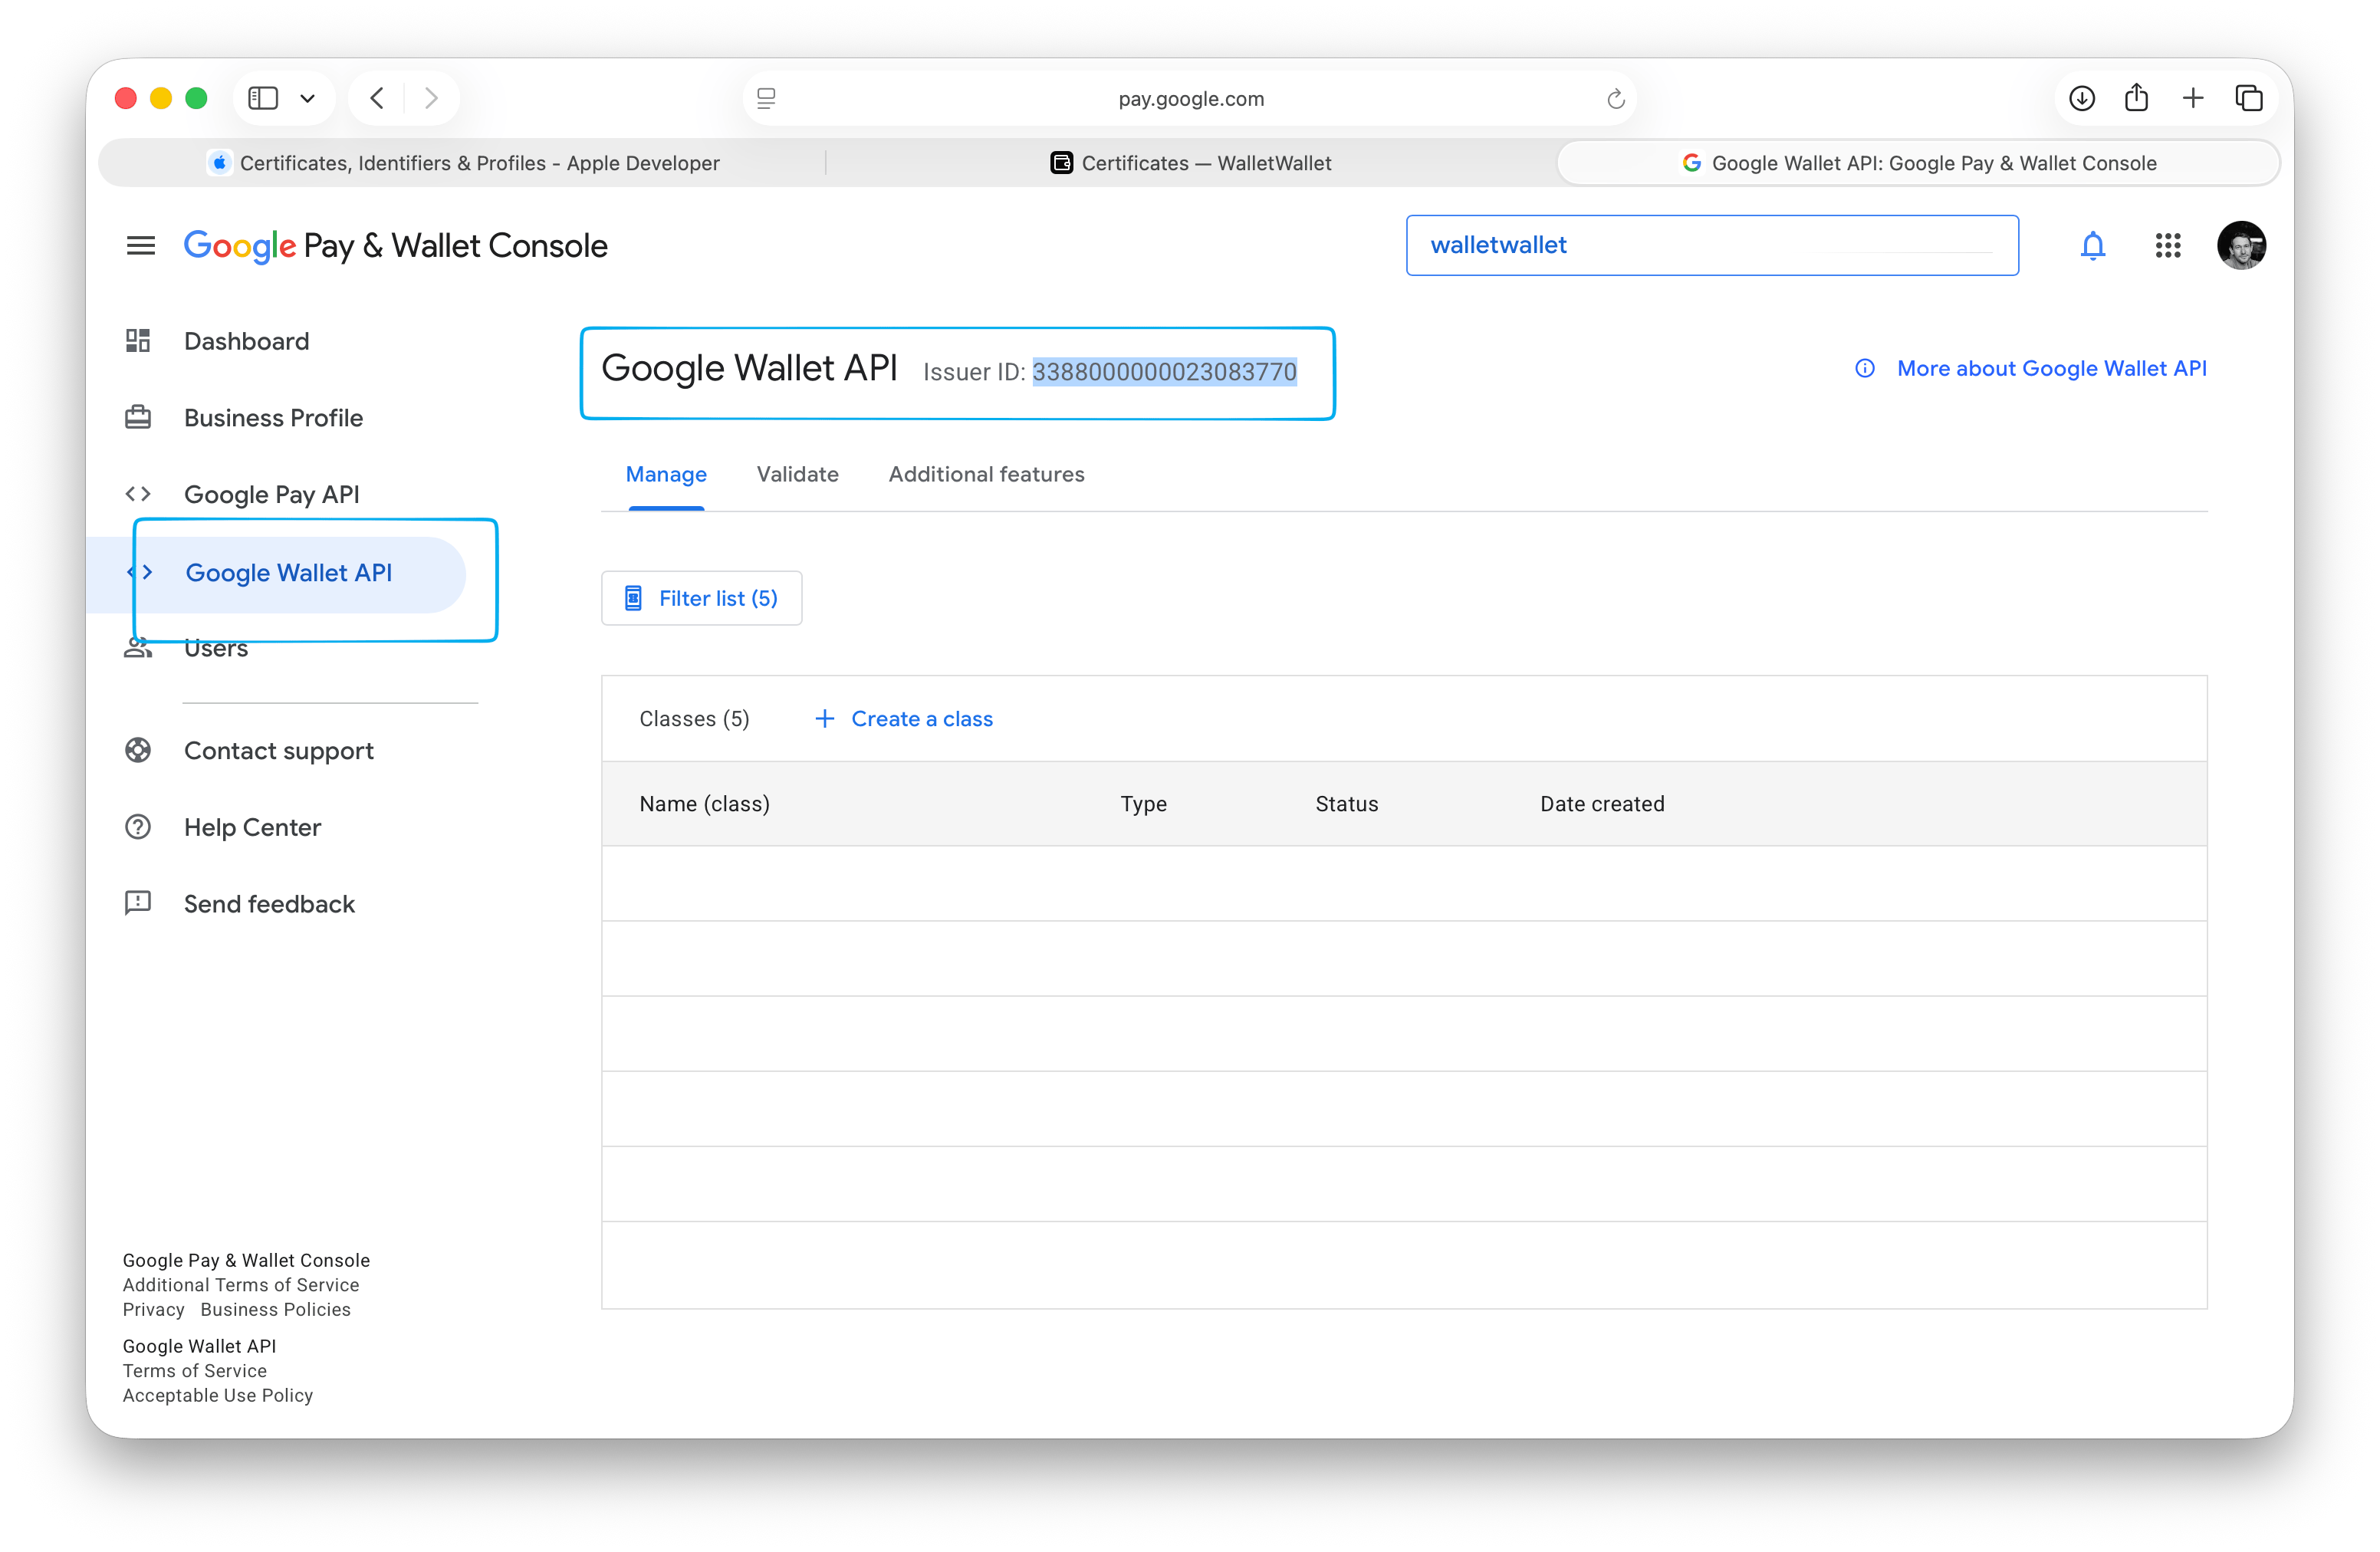
Open Google Wallet API in the left menu. The page shows your Issuer ID
next to the heading: a long number such as 3388000000012345678. Copy it.
Step 2: Complete the Business Profile
Open Business Profile in the same left menu and fill in your business details. Google also asks you to connect a payments profile or create one. Google needs a completed profile before it will review the publishing access request in step 8, so do it now while you are in the console.
Step 3: Enable the Google Wallet API in Google Cloud
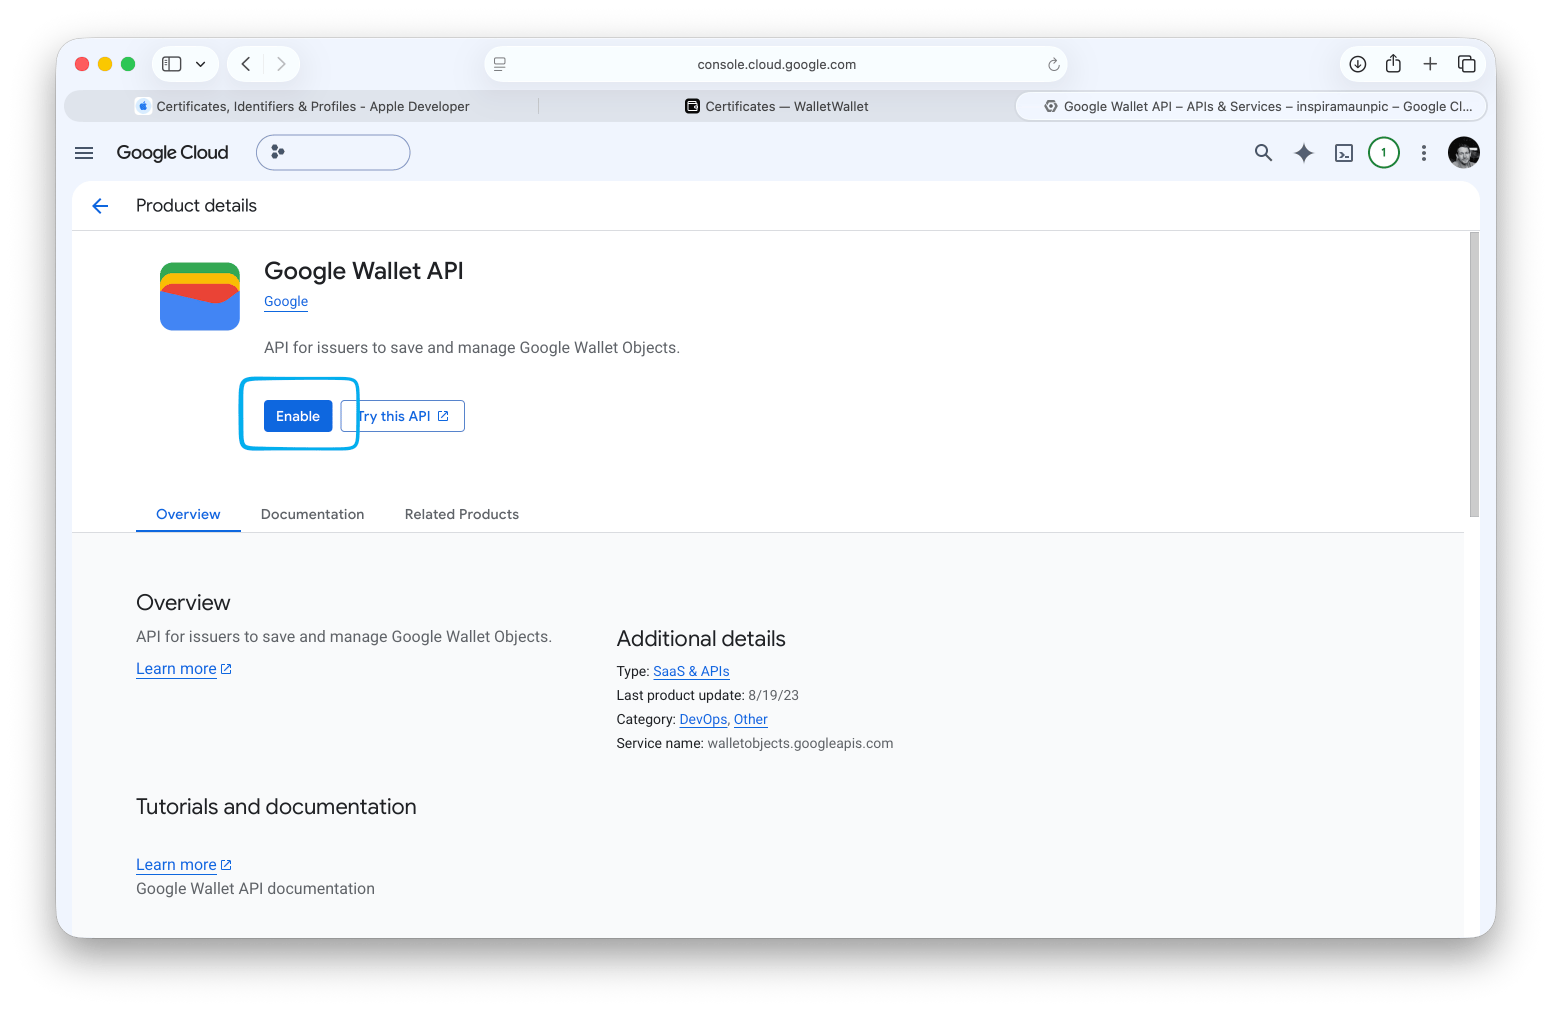
The API itself is switched on in a different console. Open the Google Wallet API page in Google Cloud, select or create a project, and click Enable.
Step 4: Create a service account
A service account is the identity WalletWallet uses to create and update passes
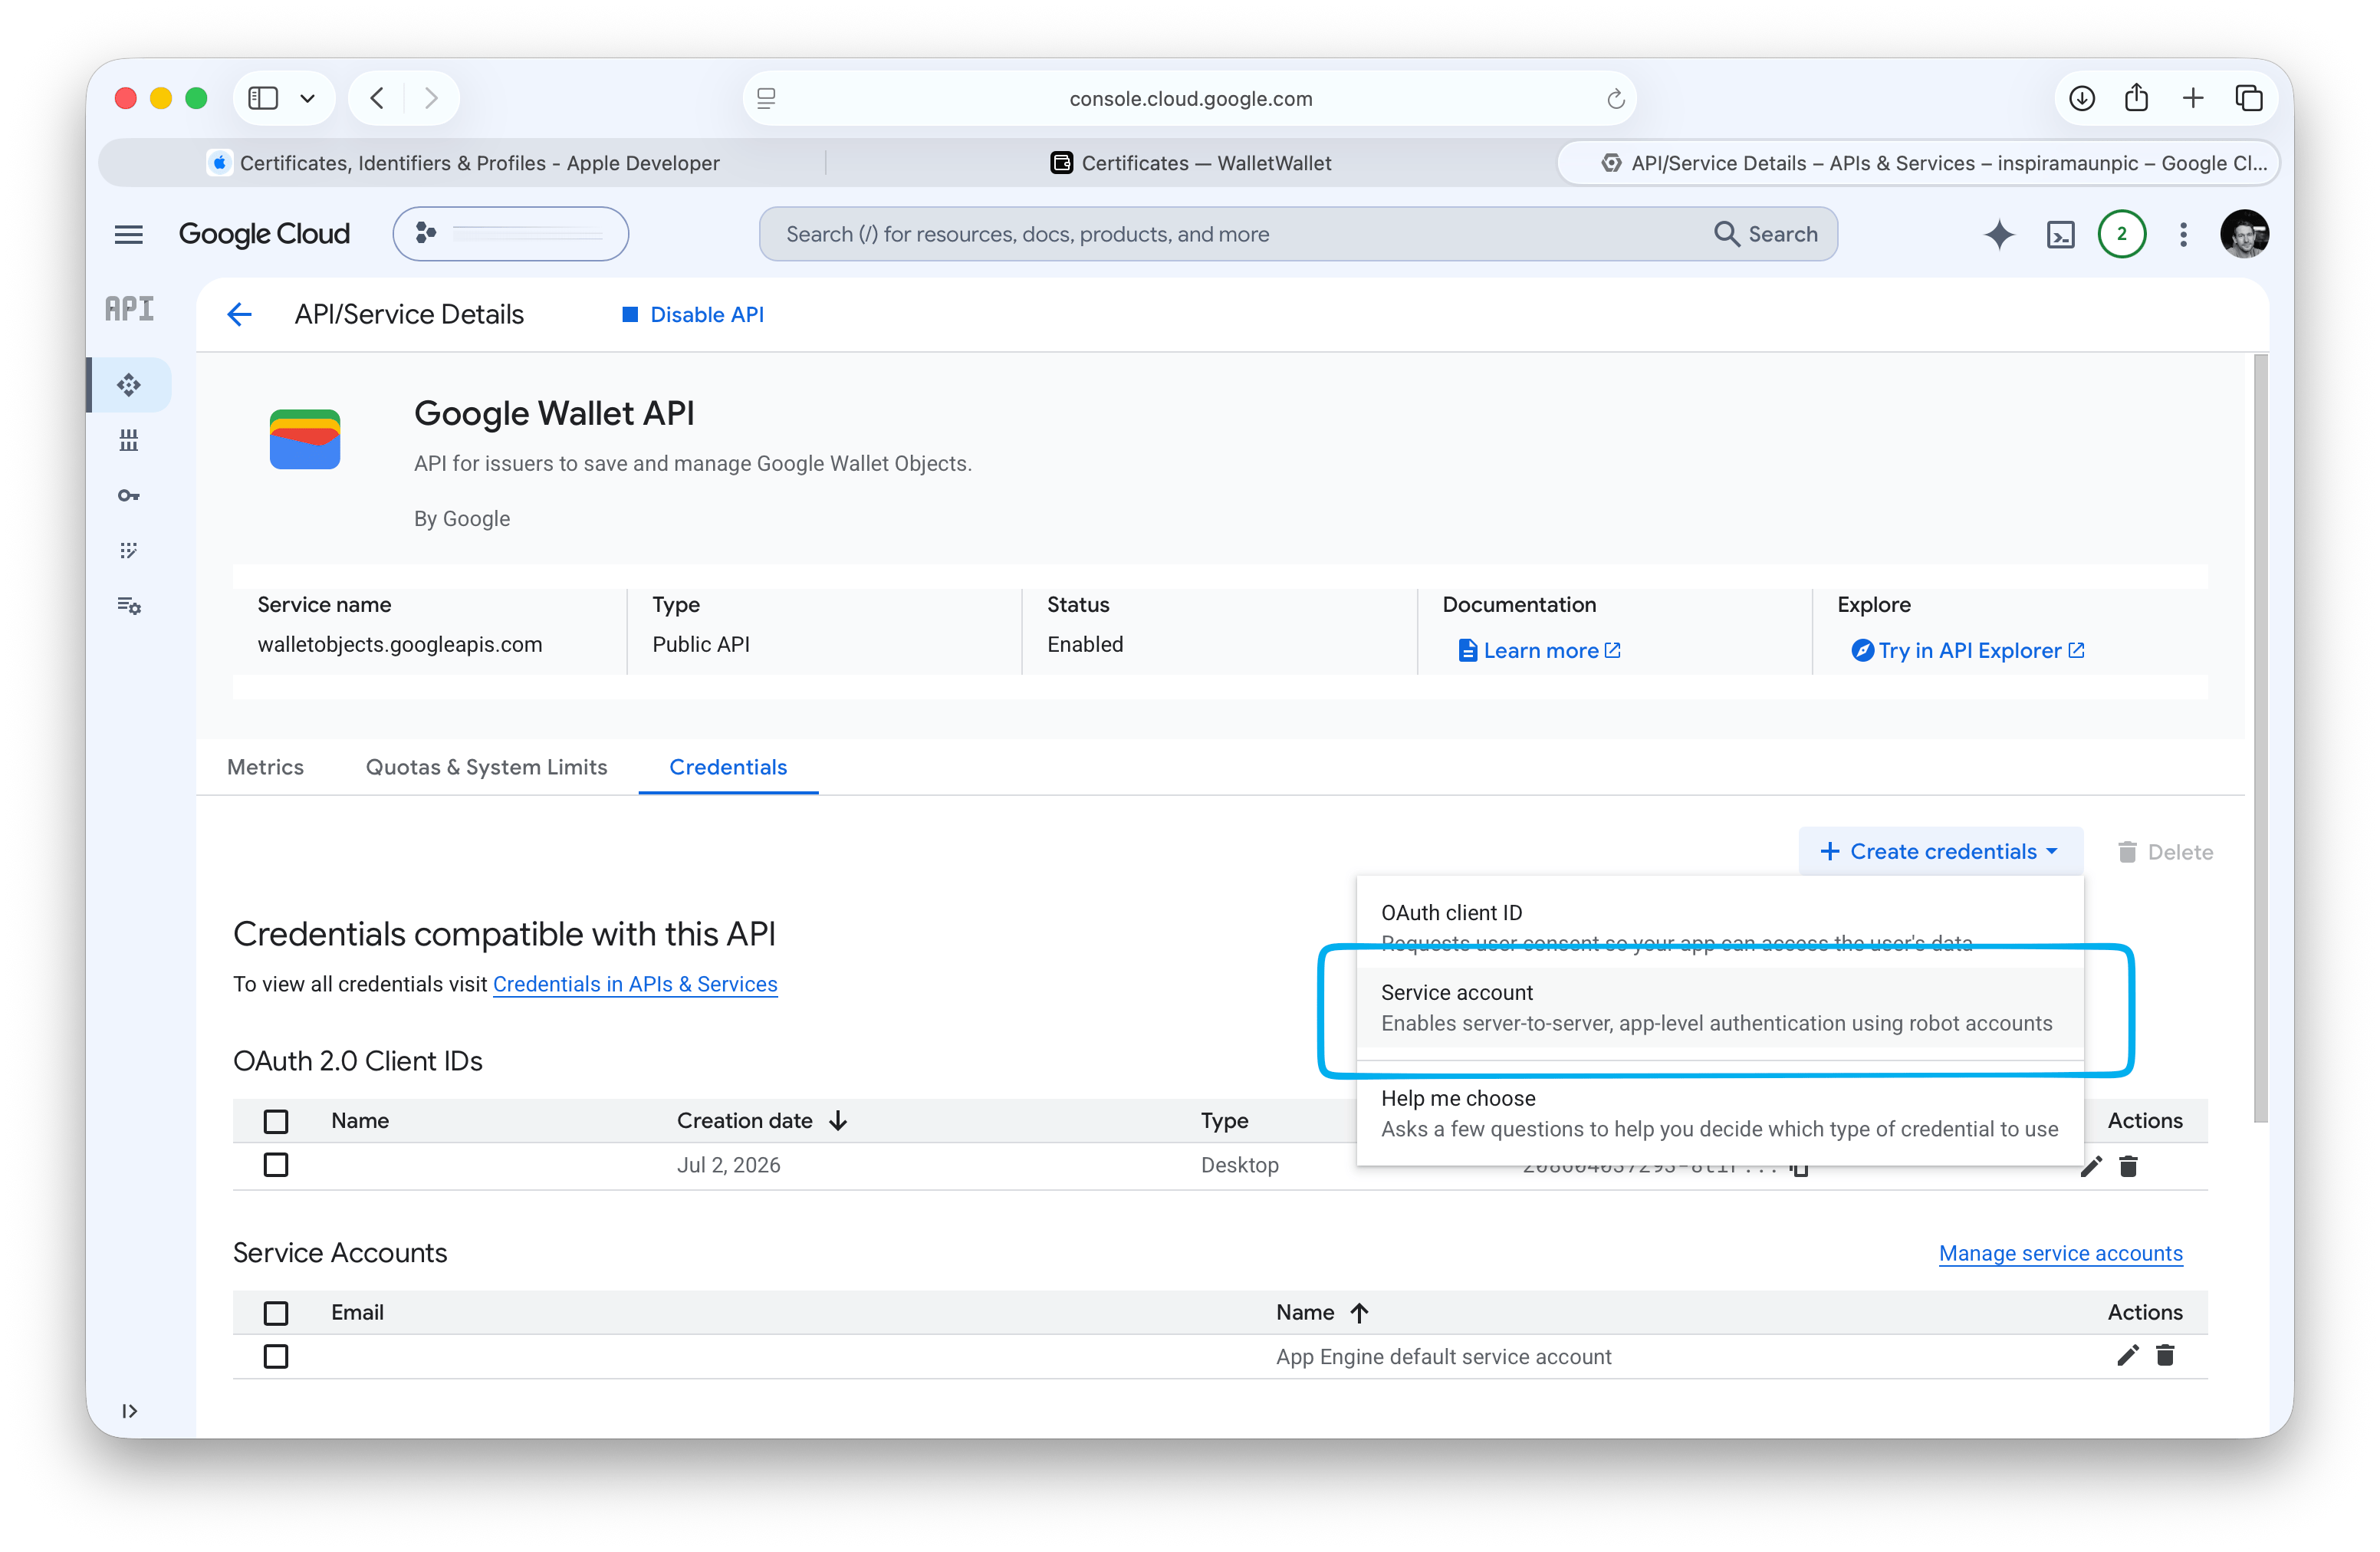
on your issuer. On the Google Wallet API page you just enabled, open the
Credentials tab, click Create credentials, and choose Service
account. Give it a name such as walletwallet and click Done.
Step 5: Create a JSON key
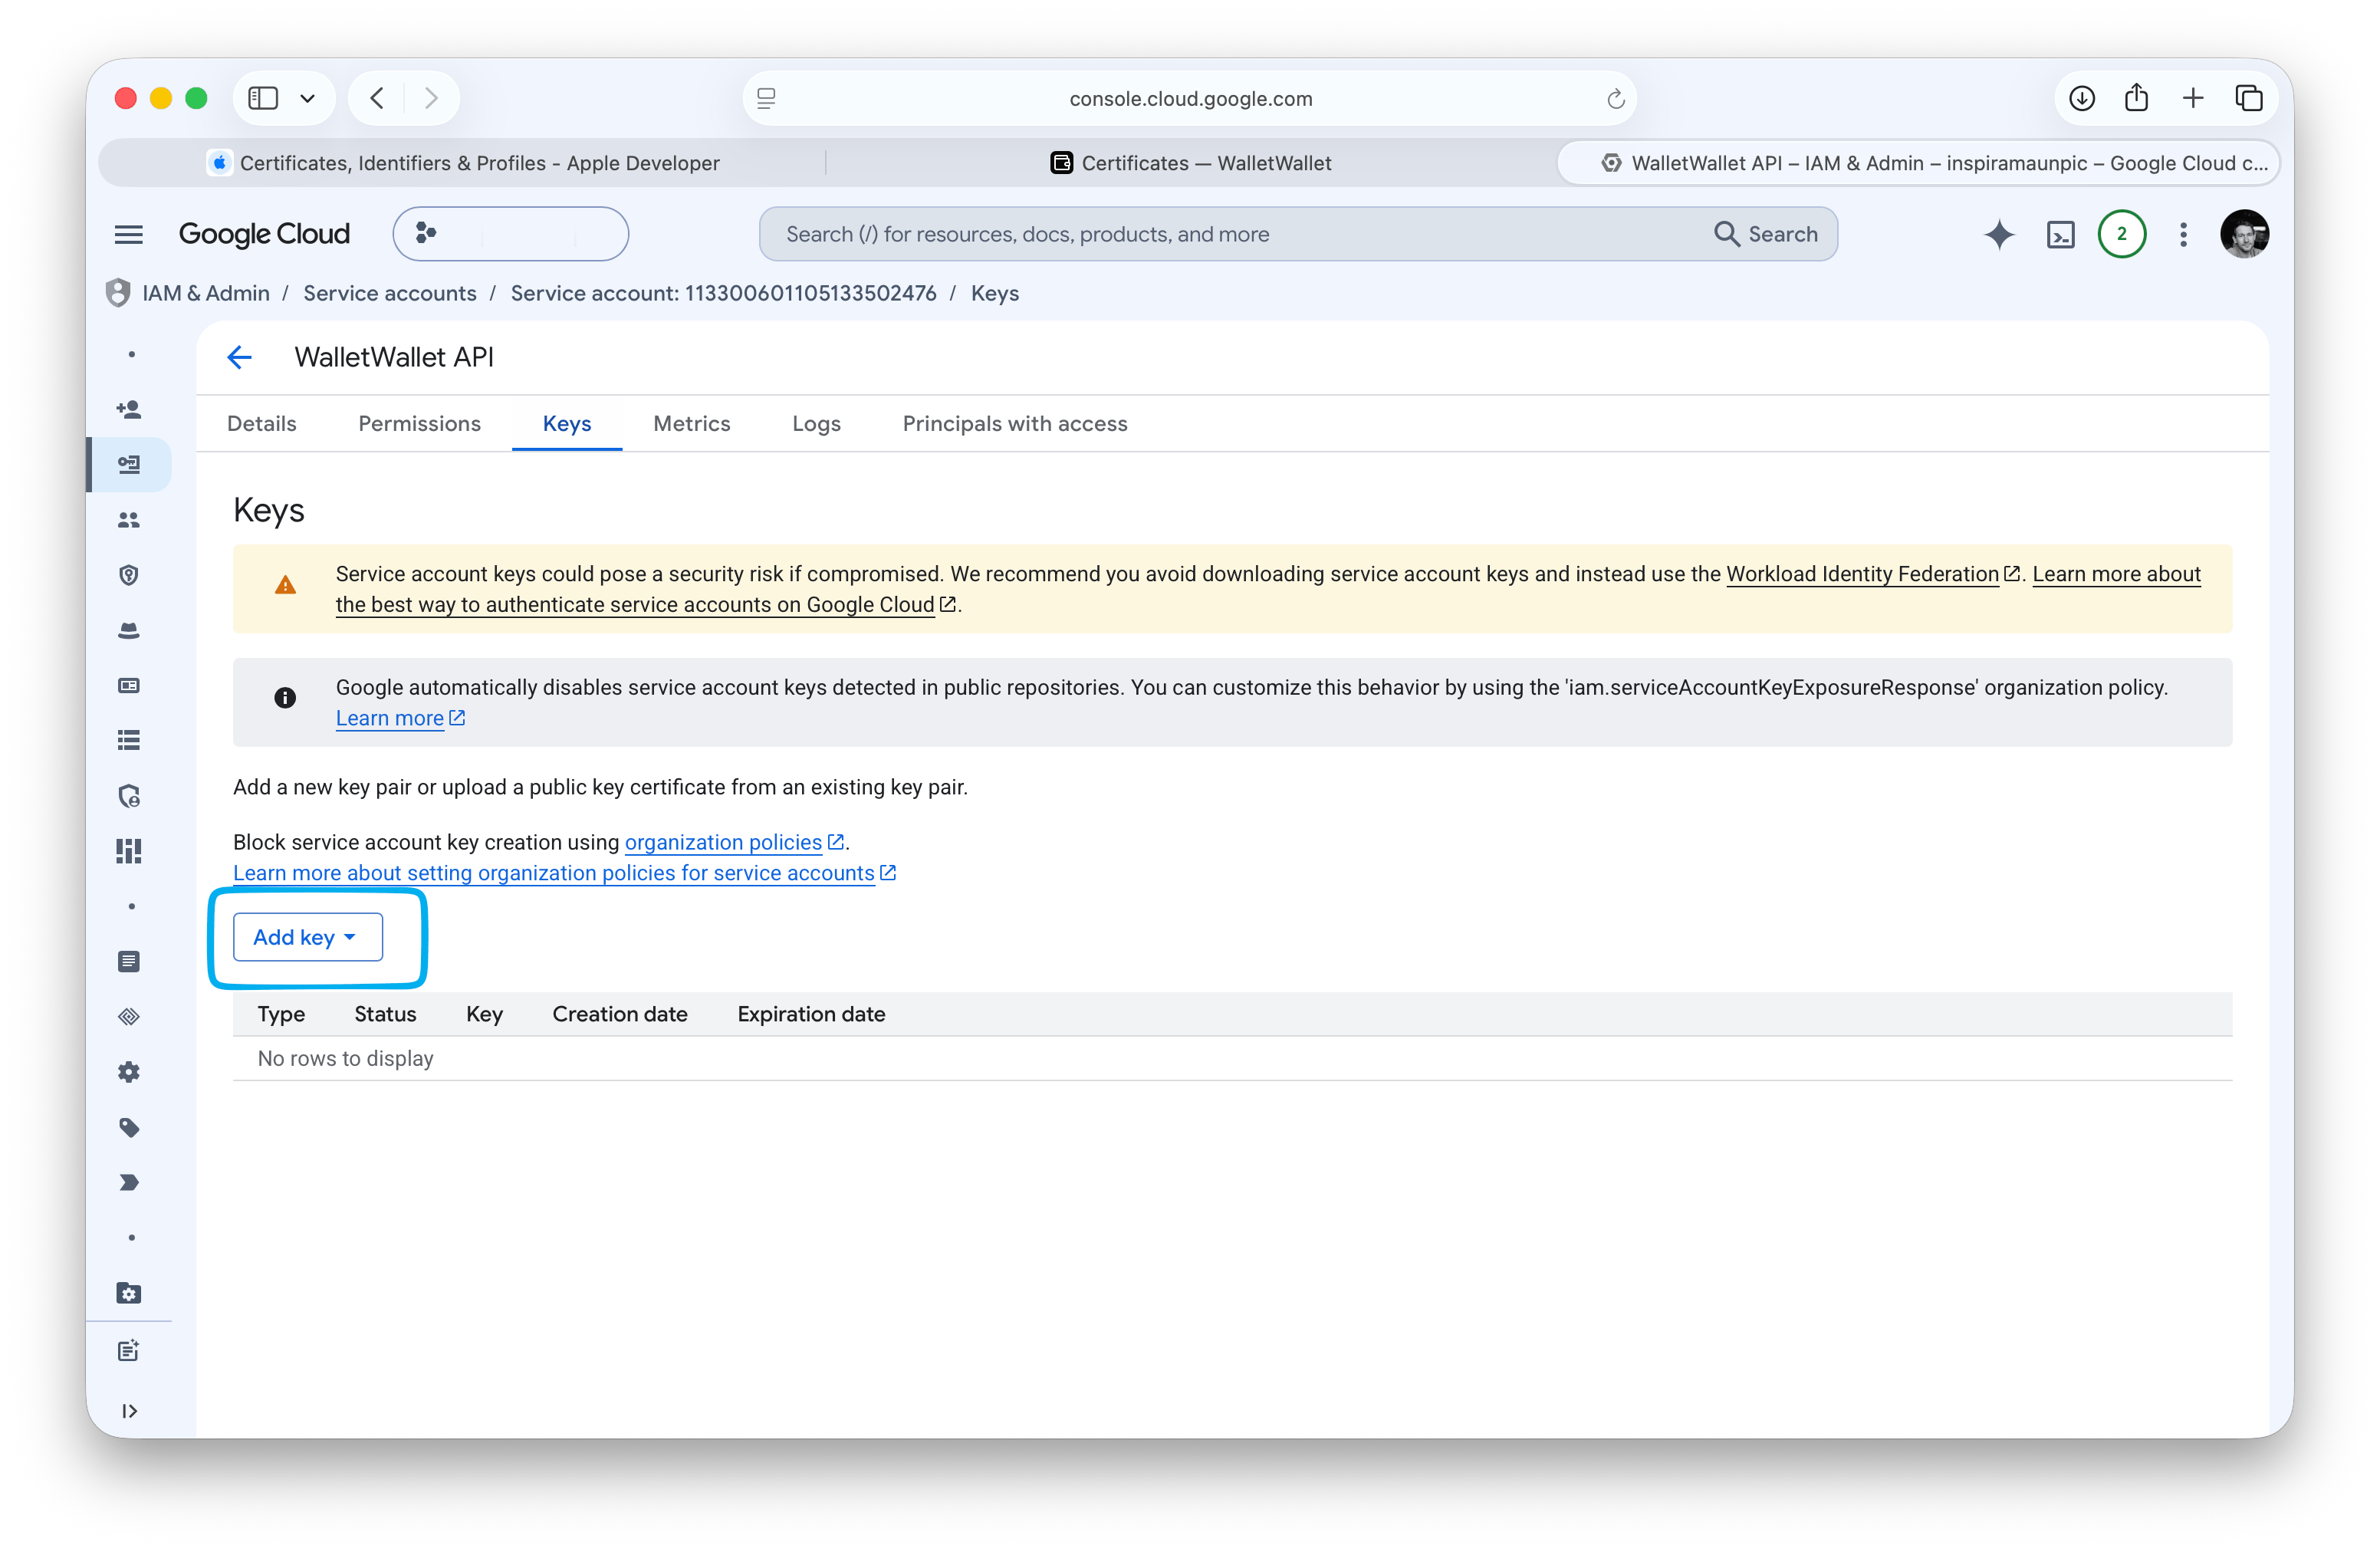
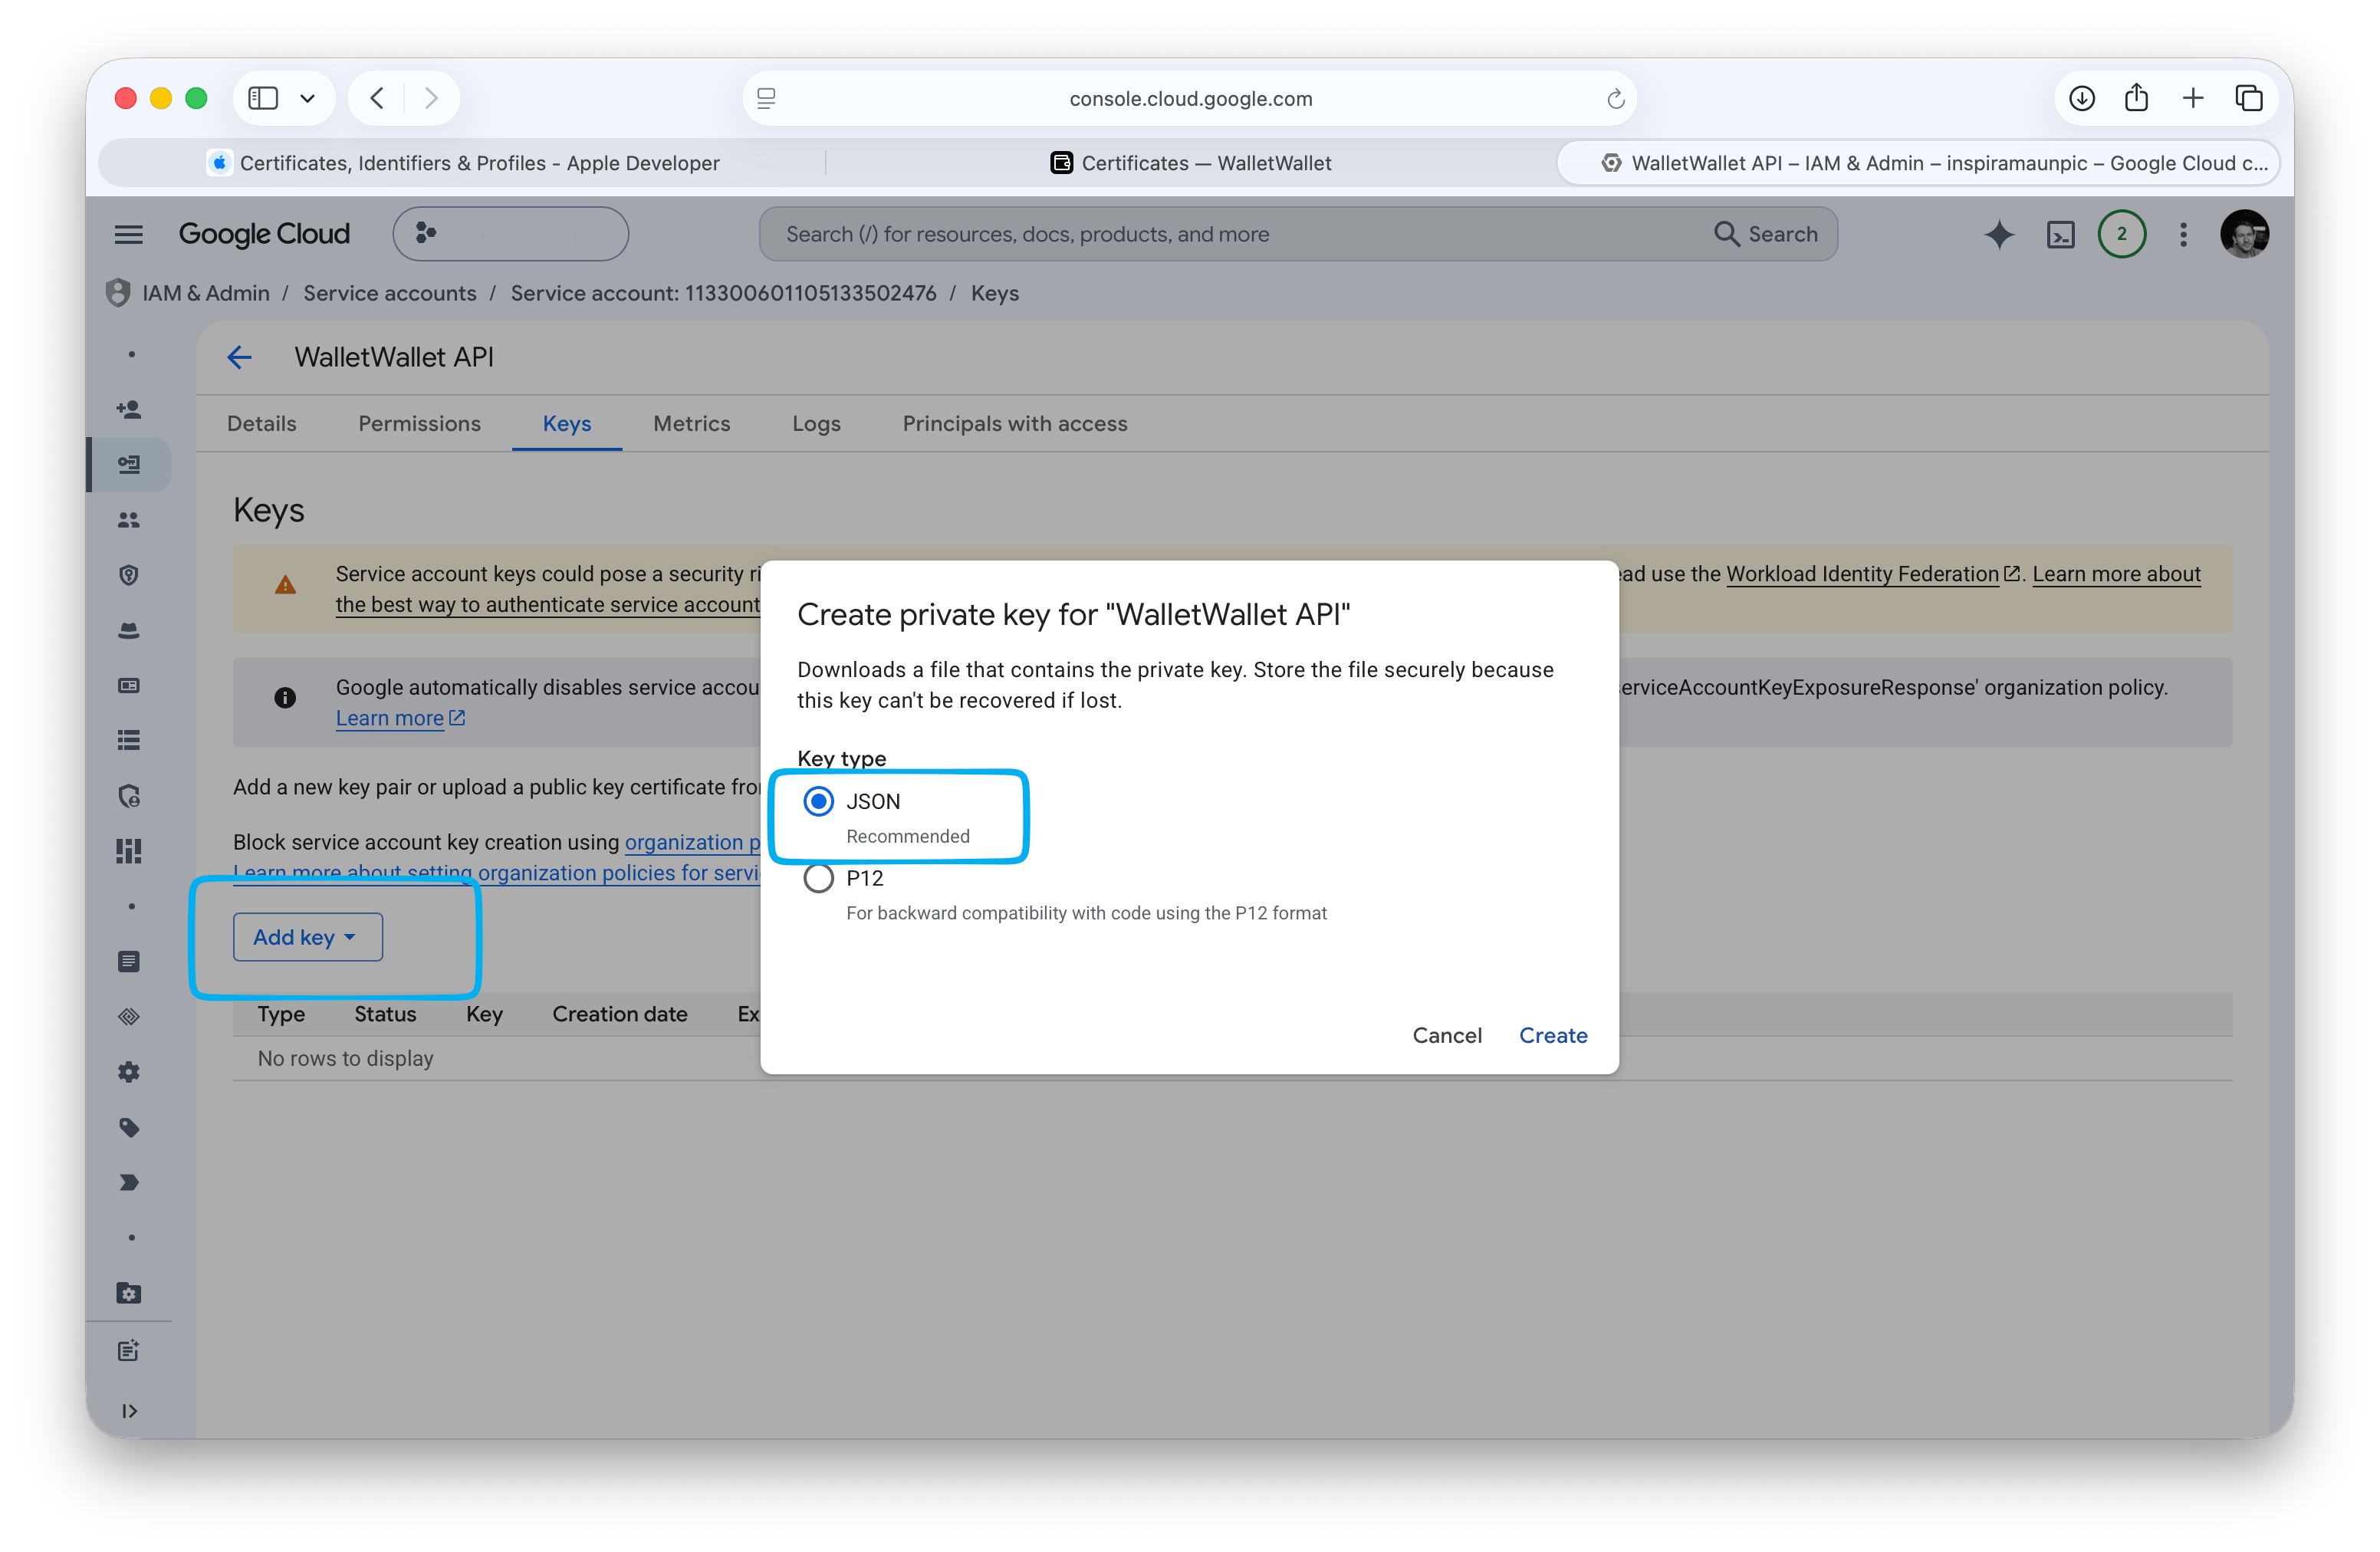
Open the new service account and go to the Keys tab. Click Add key, then Create new key.
Choose JSON and click Create. A .json file downloads. It is a private
key, so keep it out of email and shared drives.
Some Google Cloud organizations block key creation with the policy
iam.disableServiceAccountKeyCreation. If Create new key is refused, an
organization admin has to allow keys for this project.
Step 6: Authorize the service account on your issuer
The key authenticates, but it cannot touch your passes until the issuer grants
it access. Copy the service account’s email address (it ends in
.iam.gserviceaccount.com). In the Pay & Wallet Console, open Users, click
Invite a user, paste the email, set the access level to Developer, and
click Invite.
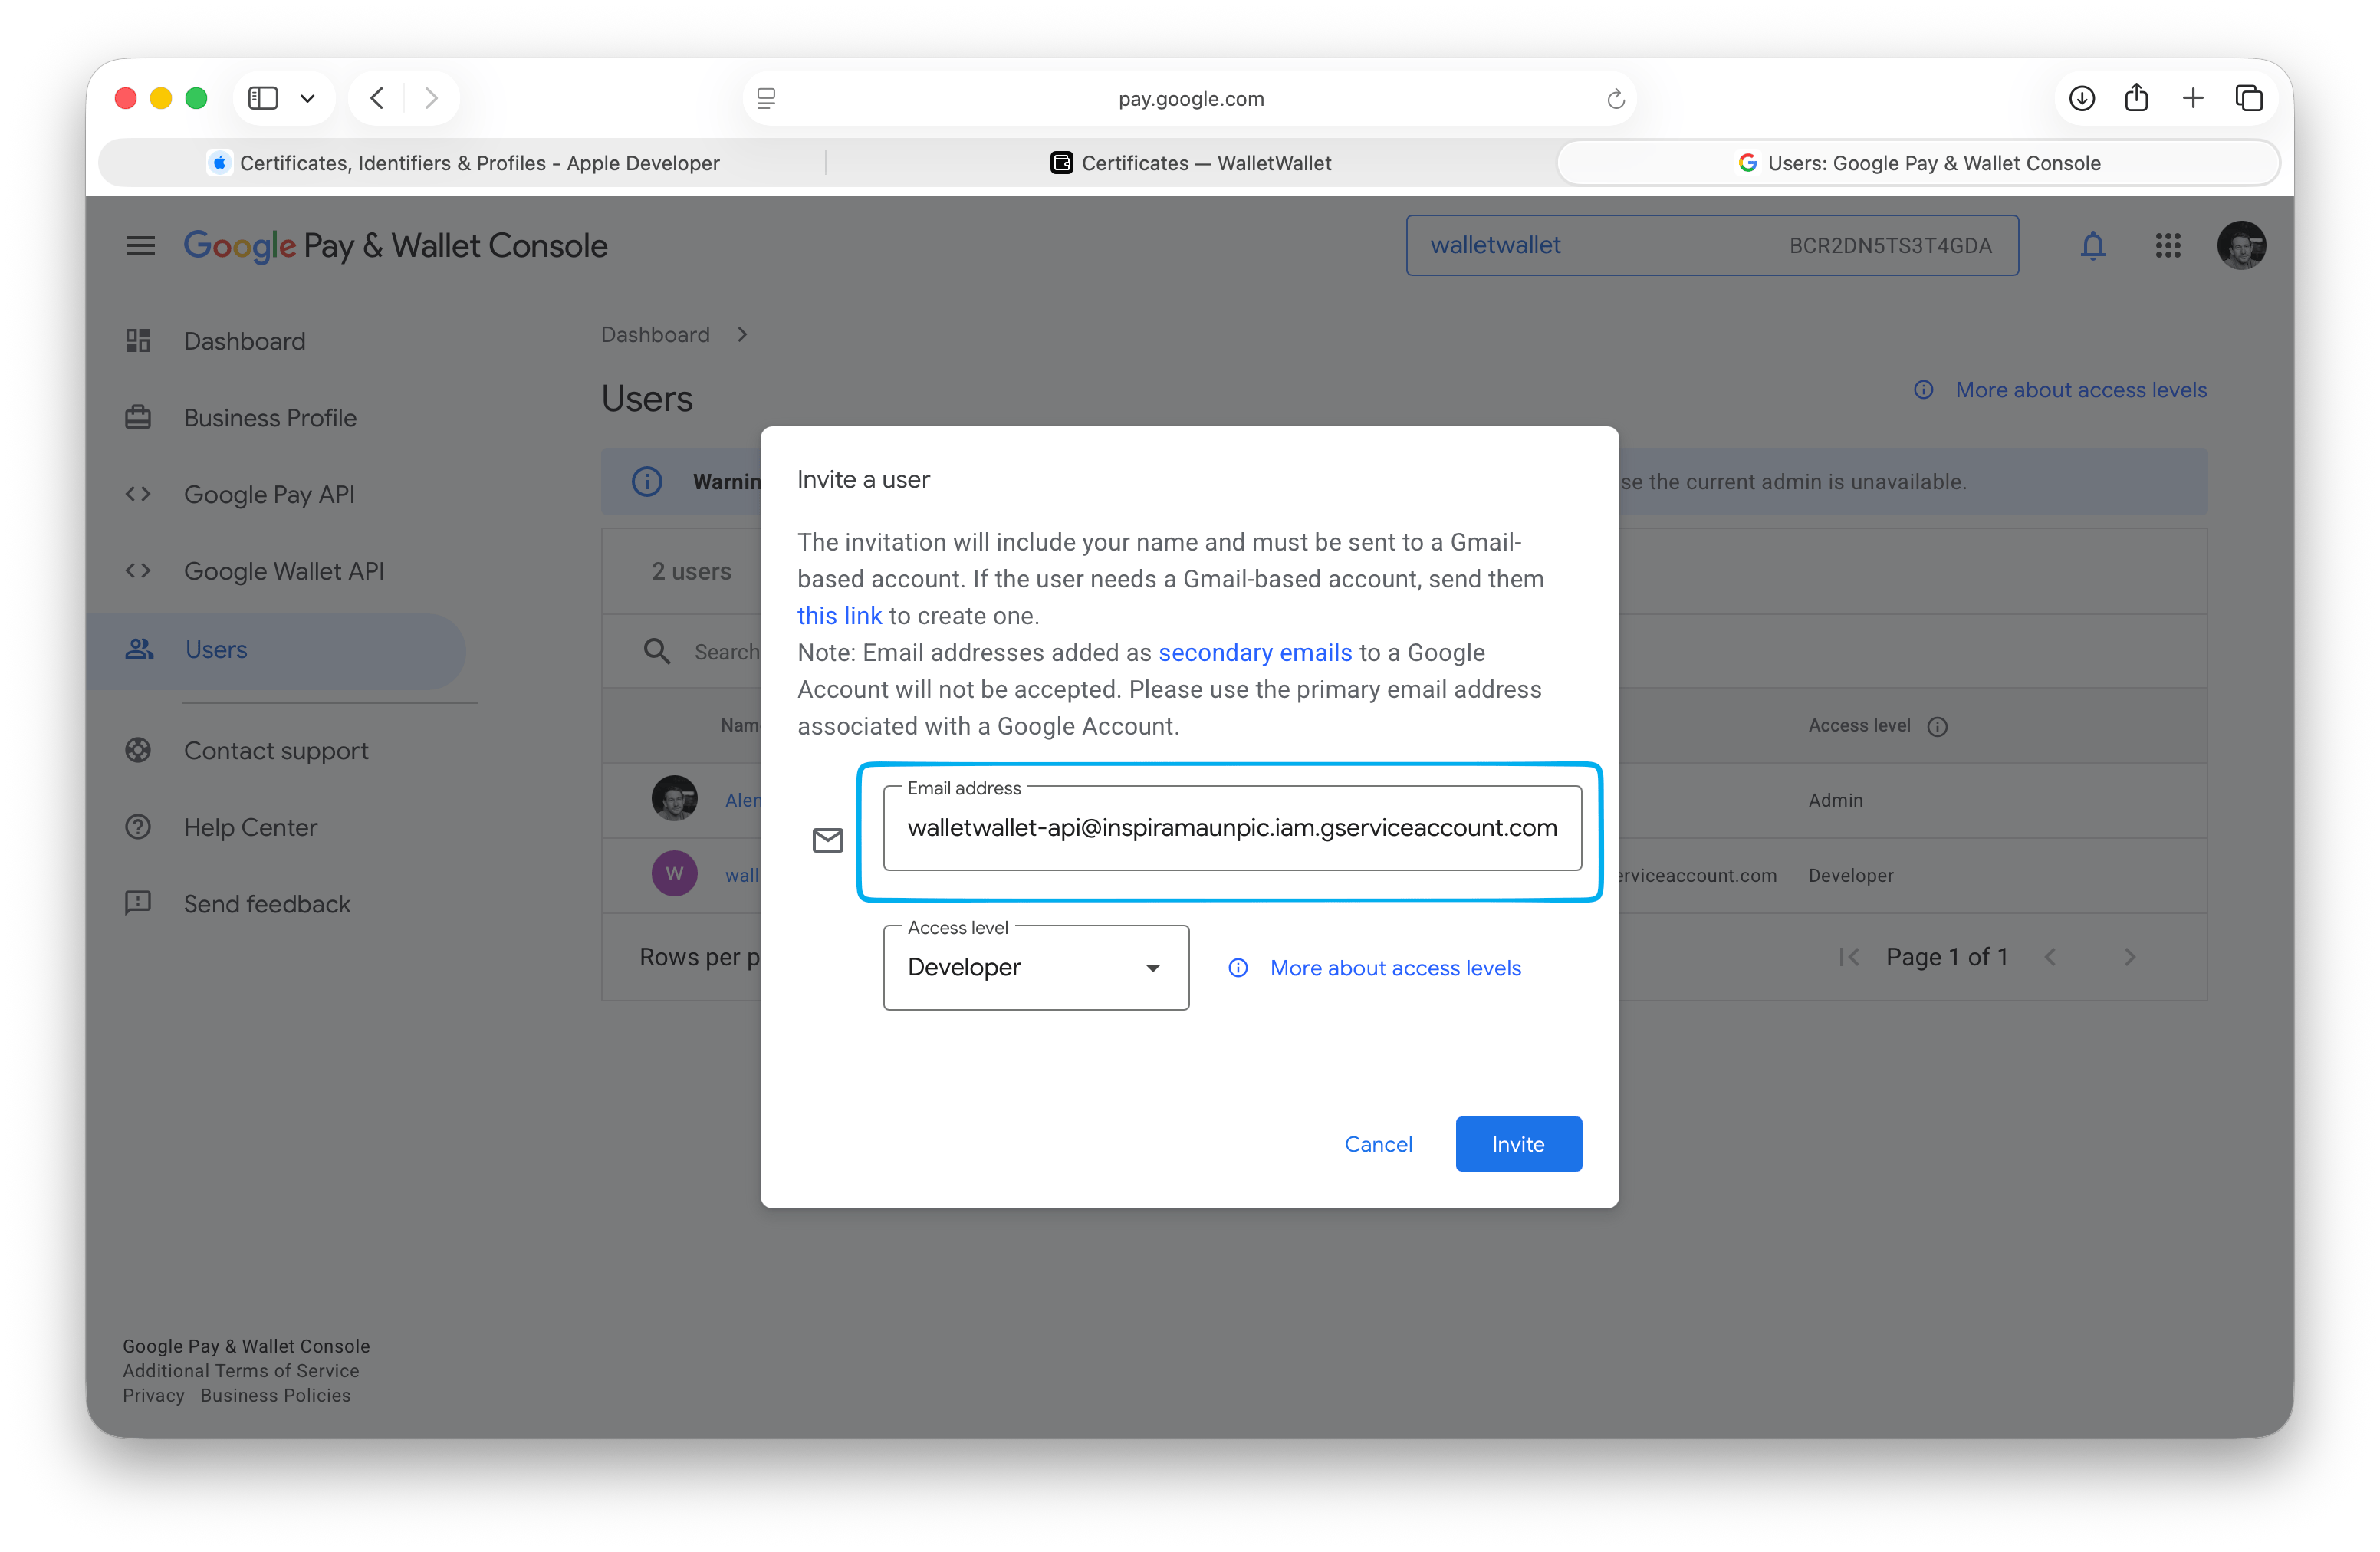
Without this step the key still authenticates, but Google refuses its requests to manage passes on the issuer, and nothing in Google Cloud points to the missing invite.
Step 7: Add the issuer to WalletWallet
In the WalletWallet dashboard, open Certificates and
open a credential set (or create one, for example loyalty). Credential sets
come with the trial and every paid plan. Under Google Wallet, paste the Issuer ID, choose the .json key, and click Save
Google credentials. Leave Class suffix empty.
Create one pass with that set, either in the Pass Editor or through the API:
curl -X POST https://api.walletwallet.dev/api/passes \
  -H "Authorization: Bearer ww_live_..." \
  -H "Content-Type: application/json" \
  -d '{
    "credentials": "loyalty",
    "title": "Bayroast Coffee",
    "barcodeFormat": "QR",
    "barcodeValue": "MEMBER-4821",
    "primaryFields": [{ "label": "Member", "value": "Ada L." }],
    "secondaryFields": [{ "label": "Stamps", "value": "3 / 10" }]
  }'
The response carries a googleSaveUrl. Open it on an Android phone signed in to
the Google Account that created the issuer, and save the pass. That first save
creates the pass class on your issuer, which Google requires before you can
request publishing access.
Step 8: Request publishing access
A new issuer starts in demo mode. Only users with the Admin or Developer role
on the issuer, and Google Accounts added as test accounts, can save its passes,
and every pass shows a [TEST ONLY] label. The Google Account that created the
issuer is an Admin, which is why the save in step 7 works during demo mode.
To go live, open Google Wallet API in the Pay & Wallet Console and find the Get publishing access box. Once the Business Profile from step 2 is complete and a class exists, click Request publishing access. Google reviews the request and emails you the result.
After approval Google removes the [TEST ONLY] label from your passes and any
Google Wallet user can save them.
Common setup errors
- Requests fail with a permission error. The service account was not invited as a Developer on the issuer (step 6), or it was invited on a different issuer.
- The API is not enabled. The Google Cloud project that owns the service account is not the one where the Google Wallet API was enabled (step 3).
- Only you can save the pass. The issuer is still in demo mode (step 8).
- The Request publishing access button is missing. The Business Profile is incomplete, or no class exists yet because no pass from the set has been saved to a phone (step 7).
Apple Wallet
Apple Wallet needs its own credentials: an Apple Developer Program membership, a Pass Type ID certificate, and a push key for updates. The Apple Developer account guide covers that side, and both end up in the same credential set.
Build your first wallet pass
Turn one JSON request into a pass that installs in Apple Wallet and Google Wallet, with live updates that reach both.